Service Parts Disassembly
8-29
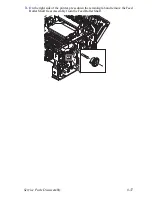
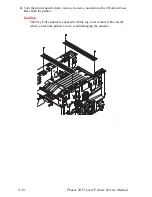
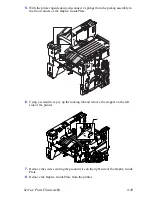
Print Cartridge Interconnect Assembly (PL 9.3.53)
1.
Remove the Laser Assembly (page 8-27).
2.
If the NIC Board is installed, remove it (page 8-17).
3.
Disconnect CN 4, CN 7, CN 8, and CN 9 from the Print Cartridge Interconnect
Assembly.
4.
Disconnect CN 6 from the Main Board.
5.
Remove the 3 screws securing the Print Cartridge Interconnect Assembly and
remove the Assembly.
-
-
Содержание Phaser 3425
Страница 1: ...Service Manual P h a s e r L a s e r P r i n t e r 3425 ...
Страница 2: ......
Страница 14: ...xii Phaser 3425 Laser Printer ...
Страница 20: ...xviii Phaser 3425 Laser Printer ...
Страница 29: ...General Information 1 9 Consumables 1 Print Cartridge 1 ...
Страница 48: ...2 14 Phaser 3425 Laser Printer Service Manual ...
Страница 93: ...6 Chapter Adjustments and Calibrations In this chapter Margin Calibration Resetting NVRAM ...
Страница 98: ...7 4 Phaser 3425 Laser Printer Service Manual ...
Страница 144: ...8 46 Phaser 3425 Laser Printer Service Manual ...
Страница 145: ...9 Chapter Parts Lists In this chapter Using the Parts List Print Engine Parts Xerox Supplies ...
Страница 175: ...10 6 Phaser 3425 Laser Printer Service Manual ...
Страница 179: ......
Страница 180: ......


