background image

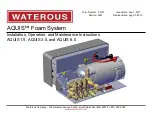
AQUIS™ Foam System

Installation, Operation, and Maintenance Instructions

AQUIS 1.5, AQUIS 3.0, and AQUIS 6.0

Waterous Company • 125 Hardman Avenue South • South Saint Paul, MN 55075 • (651) 450-5000

www.waterousco.com

Form Number: F-1031

Issue Date: Aug 1, 2017

Section: 2447

Revision Date: Aug 22, 2019

Содержание AQUIS Series

Страница 1: ...and Maintenance Instructions AQUIS 1 5 AQUIS 3 0 and AQUIS 6 0 Waterous Company 125 Hardman Avenue South South Saint Paul MN 55075 651 450 5000 www waterousco com Form Number F 1031 Issue Date Aug 1 2017 Section 2447 Revision Date Aug 22 2019 ...

Страница 2: ...31 Concentrate Injector 31 Drain Port 31 Pressure Regulator Valve 32 Operator Interface Terminal OIT 33 Digital OIT 33 Manual OIT 33 Accessory Terminal Strip 34 Installation 35 Installation Precautions 35 Disconnecting the Frame Ground 35 Modifying the Foam System 35 Dimensions AQUIS 1 5 36 Dimensions AQUIS 3 0 37 Dimensions AQUIS 6 0 38 Dimensions Digital OIT 39 Dimensions Digital OIT Instruction...

Страница 3: ...bling Manual Mode 69 Operating and Disabling Manual Mode 70 Auto Run Mode If Equipped 70 Changing the Display Mode 70 Displaying Default Mix Percent 70 Zeroing the Total Water Value 70 Zeroing the Total Foam Value 70 Displaying the Supply Tank 70 Operating the Inject Bypass Valve 71 Draining the Foam System 71 Flushing the Foam System 71 Flushing the AQUIS Foam System 71 Maintenance 72 Maintenance...

Страница 4: ...ed to safely perform required procedures proper installation is the responsibility of the purchaser Do not operate the equipment when safety guards are removed Do not modify the equipment Regularly check for leaks worn or deteriorated parts Waterous reserves the right to make modifications to the system without notice NOTICE Before operating the AQUIS Foam Proportioning System Check the foam pump ...

Страница 5: ...Using the wrong fuse may damage the equipment Equipment Damage Do not touch the surface during operation allow it to cool after operating Hot surface can burn you Hot Surface NOTICE Modifying the equipment can damage components and void your warranty Do not modify the foam system Modification Do not operate if the water temperature exceeds 160ºF 71ºC Hot liquid can scald you Hot Liquid ...

Страница 6: ...ons Continued Disconnect the power before servicing the pump Current can cause serious injury or death High Current Do not operate beyond recommended pressure Liquid ejected at high pressure can cause serious injury High Pressure Drain the lines before servicing Liquid ejected at high pressure can cause serious injury High Pressure ...

Страница 7: ...s that are in this document Introduction This section is an overview of the document Product Overview This section describes the parts and associated components that make up the system Installation This section describes the initial setup procedures Operation This section describes how to operate the equipment Maintenance This section describes typical maintenance procedures Troubleshooting This s...

Страница 8: ... Level Switch 2 wire 4 Meter 4 Meter 4 Meter 4 Meter 4 Meter 4 Meter X Foam Tee or Manifold Tee with Flowmeter Standard Standard Standard Not Available Not Available Not Available Master Waterway Check Valve Includes a concentrate injection port Upgrade Upgrade Upgrade Not Available Not Available Not Available Manifold Includes waterway check valve flowmeter and concentrate injection port Upgrade ...

Страница 9: ...te displays the foam system rating and performance Yes Yes System schematic panel plate This panel plate displays a schematic of the foam system components Yes No Foam concentrate fill Kit This kit includes a pump pick up hose panels and 2 supply level switches to fill an on board supply tank Note This kit does not include additional hoses or fittings Yes Yes Dual OIT kit This kit provides an addi...

Страница 10: ...10 90 Safety Introduction Product Overview Installation Operation Maintenance Troubleshooting Service Parts Warranty AQUIS 1 5 Components 1 6 5 3 2 4 7 8 10 9 Figure 1 ...

Страница 11: ...x and terminal strip 3 Pump This is the pump assembly 4 Vented oil cap This is cap replaces the shipping cap 5 Motor This operates the pump 6 Product sensor This senses the pump speed 7 Pump outlet This outputs the concentrate 8 Pump inlet This is the input for the concentrate supply 9 Inject Bypass valve This routes the concentrate to the injector or to an external container 10 Mounting bracket T...

Страница 12: ...12 90 Safety Introduction Product Overview Installation Operation Maintenance Troubleshooting Service Parts Warranty AQUIS 3 0 Components 1 5 6 3 2 4 7 8 10 9 Figure 2 ...

Страница 13: ...x and terminal strip 3 Vented oil cap This is cap replaces the shipping cap 4 Pump This is the pump assembly 5 Motor This operates the pump 6 Product sensor This senses the pump speed 7 Pump inlet This is the input for the concentrate supply 8 Pump outlet This outputs the concentrate 9 Inject Bypass valve This routes the concentrate to the injector or to an external container 10 Mounting bracket T...

Страница 14: ...14 90 Safety Introduction Product Overview Installation Operation Maintenance Troubleshooting Service Parts Warranty AQUIS 1 5 and 3 0 Under the Cover 1 3 6 4 2 7 5 Figure 3 ...

Страница 15: ...inal strip This connects accessories to the control box 2 Circuit breaker This prevents over current 3 Control box This houses the electric components 4 Flowmeter connection This connects control box to the flowmeter 5 HMI OIT connection This connects the controller to the HMI or OIT 6 USB connection This connects control box to upgrade equipment 7 Fuse housing This is the fuse location ...

Страница 16: ...16 90 Safety Introduction Product Overview Installation Operation Maintenance Troubleshooting Service Parts Warranty AQUIS 6 0 Components 1 5 6 3 2 4 7 8 10 9 Figure 4 ...

Страница 17: ...x and terminal strip 3 Pump This is the pump assembly 4 Vented oil cap This is cap replaces the shipping cap 5 Motor This operates the pump 6 Product sensor This senses the pump speed 7 Pump outlet This outputs the concentrate 8 Pump inlet This is the input for the concentrate supply 9 Inject Bypass valve This routes the concentrate to the injector or to an external container 10 Mounting bracket T...

Страница 18: ...18 90 Safety Introduction Product Overview Installation Operation Maintenance Troubleshooting Service Parts Warranty AQUIS 6 0 Under the Cover 5 6 7 4 3 1 2 Figure 5 ...

Страница 19: ... strip This connects accessories to the control box 2 Fuse housing This is the fuse location 3 Circuit breaker This prevents over current 4 HMI OIT connection This connects the controller to the HMI or OIT 5 Flowmeter connection This connects control box to the flowmeter 6 Control box This houses the electric components 7 USB connection This connects control box to upgrade equipment ...

Страница 20: ...eshooting Service Parts Warranty Overview Diagram Typical Note The graphics in this illustration are intended to help you understand concepts in next sections Do not use them to determine physical attributes placement or proportion 1 5 11 14 16 17 6 18 18 19 20 10 2 12 7 3 13 8 4 15 9 ...

Страница 21: ...ing with strainer The wye fitting with strainer traps debris that is in the concentrate 9 Foam pump The foam pump transfers pressurized concentrate from the supply tank into the waterway 10 Inject bypass valve The inject bypass valve directs the concentrate into the waterway or removes it from the foam system 11 Injector hose This hose transfers the concentrate from the pump to the injector 12 Inj...

Страница 22: ...g Service Parts Warranty Dual Tank System Overview Optional 6 5 3 1 7 8 9 10 11 12 4 14 13 16 15 21 20 19 18 17 22 2 23 Note The graphics in this illustration are intended to help you understand concepts in next sections Do not use them to determine physical attributes placement or proportion ...

Страница 23: ...ank B shutoff valve The tank B shutoff valve stops the concentrate from flowing into the supply hose 10 Tank B supply hose This hose supplies concentrate between tank B supply and the electric valve 11 Tank A shutoff valve The tank A shutoff valve stops the concentrate from flowing into the supply hose 12 Tank A supply hose This hose supplies concentrate between tank A supply and the electric valv...

Страница 24: ...24 90 Safety Introduction Product Overview Installation Operation Maintenance Troubleshooting Service Parts Warranty Flush System Overview Optional 4 1 3 2 5 6 ...

Страница 25: ...ntact Waterous for more information Component Accessory Description 1 Foam pump The foam pump transfers pressurized concentrate from the supply tank into the injector 2 Supply tank The supply tank contains the foam concentrate 3 Tank shutoff valve The shutoff valve stops the concentrate from transferring into the supply hose 4 3 Way tee valve The valve directs the flow of clear water or concentrat...

Страница 26: ...bypass hose routes the concentrate from the inject bypass valve to outside the apparatus Pump Mounting Hardware The mounting hardware is required to secure the pump assembly to the apparatus The hardware is not supplied with the kit Source the hardware locally For specifications refer to the installation section on Figure 25 Figure 26 and Figure 27 Power Cables Power cables bring power to the pump...

Страница 27: ...tact Waterous for information about obtaining a sensor Horizontal Sensor Vertical Sensor Figure 6 Figure 7 Supply Tank Level Sensor Cable This cable connects the level sensor to the control box It is 2 bare wires without connectors Supply Tank Shutoff Valve This valve stops the flow of concentrate into the supply hose lines Figure 8 The valve is an optional component available through Waterous A s...

Страница 28: ...is 3 8 inch NPT Figure 10 Flowmeter The flowmeter paddlewheels measure the amount of water flowing Figure 11 The flowmeter is installed in the flowmeter tee or foam manifold 2 1 3 1 Flowmeter 2 Cable 3 Paddlewheel Figure 11 Inject Bypass Valve Use the inject bypass valve Figure 12 to manually direct the concentrate as follows Rotate the handle to the inject position to create a foam solution Rotat...

Страница 29: ...t of water flowing from the waterway supply line Figure 13 2 1 1 Flowmeter 2 Tee body Figure 13 The flowmeter tee is available in the following configurations 2 inch tee Inlet Outlet Combination Victaulic 2 inches and FNPT 1 1 2 inches 2 1 2 inch tee Inlet Outlet Combination Victaulic 2 1 2 inches and FNPT 2 inches 3 inch tee Inlet Outlet Combination Victaulic 3 inches and FNPT 2 1 2 inches ...

Страница 30: ...c 2 inches and FNPT 1 1 2 inches 2 inch valve Inlet Victaulic 2 inches Victaulic 2 inches Outlet Victaulic 2 inches FNPT 2 inches 2 1 2 inch valve Inlet Victaulic 2 1 2 inches Victaulic 2 1 2 inches Outlet Victaulic 2 1 2 inches FNPT 2 1 2 inches 2 1 1 Check valve 2 Injector Figure 14 Concentrate Injector This fitting injects the concentrate into the waterway to create the solution in the apparatu...

Страница 31: ... Inlet Outlet 2 1 2 inches Waterous 4 bolt flange 4 3 8 B C Combination Victaulic 2 inches and FNPT 1 1 2 inches Combination Victaulic 2 1 2 inches and FNPT 2 inches Combination Victaulic 3 inches and FNPT 2 1 2 inches Concentrate Injector This fitting injects the concentrate in to the waterway to create the solution in the fire apparatus Figure 16 Drain Port The drain port on the foam manifold al...

Страница 32: ...m the output side of the pump to the input side of the pump Do not operate beyond recommended pressure Liquid ejected at high pressure can cause serious injury High Pressure Do not tamper with the pressure regulator valve or operate the pump with a damaged pressure regulator valve Use Figure 18 to locate the regulator valve on the AQUIS 1 5 Use Figure 19 to locate the regulator valve on the AQUIS ...

Страница 33: ...trate Calibration of water flow rate LED displayed warning of low concentrate supply Indicating light for A and B tank when dual supply tanks are installed Manual operating mode for backup Figure 21 Manual OIT The manual OIT Figure 22 communicates with the pump controller to perform the following functions Rotary dial control of foam proportioning rates from 0 1 to 1 0 in infinite increments Quick...

Страница 34: ...e other to terminal 5 or 8 This sensor alerts you when the concentrate reaches a predetermined level 3 Tank level sensor tank A Connect one wire from the level sensor that is in tank A to terminal 3 and the other to terminal 5 or 8 This sensor alerts you when the concentrate reaches a predetermined level 4 Tank B selected enable Connect orange wire from the dual tank selector controller This allow...

Страница 35: ...art can damage electronic components Disconnect all ground wire connections before jumping or welding High Current Avoid damaging the electronics in the control box Disconnect the frame ground before jump starting welding plasma cutting or conducting other high voltage or high current operations to the apparatus Modifying the Foam System The foam system components are designed to operate mounted t...

Страница 36: ... 06mm 15 589in 395 95mm 16 356in 415 45mm 1 2 FNPT BYPASS OUT 1 2 FNPT FOAM INJECTION OUT IL4538 2 070in 52 57mm 5 357in 136 07mm 1 373in 34 88mm 2 626in 66 71mm 12 MJIC FOAM SUPPLY IN INJECT BYPASS VALVE 12 MJIC FOAM SUPPLY IN 1 2 FNPT FOAM INJECTION OUT 1 2 FNPT BYPASS OUT SIGHT GLASS OIL FILL Figure 25 Oil Fill Sight Glass 1 2 FNPT Foam Injection Out 1 2 FNPT Foam Injection Out 12 MJIC Foam Sup...

Страница 37: ... 15mm 10 872in 276 15mm 18 062in 458 78mm 1 2 FNPT BYPASS OUT 1 2 FNPT FOAM INJECTION OUT IL4539 2 404in 61 07mm 4 885in 124 07mm 3 234in 82 13mm 5 155in 130 94mm 12 MJIC FOAM SUPPLY IN INJECT BYPASS VALVE 12 MJIC FOAM SUPPLY IN 1 2 FNPT FOAM INJECTION OUT 1 2 FNPT BYPASS OUT OIL FILL DIPSTICK SIGHT GLASS Figure 26 Oil Fill Dipstick Sight Glass 1 2 FNPT Foam Injection Out 1 2 FNPT Foam Injection O...

Страница 38: ... 724in 602 59mm 2X 21 000in 533 40mm 12 162in 308 90mm 3 147in 79 93mm 5 014in 127 36mm 13 927in 353 74mm 1 2 FNPT BYPASS OUT 1 2 FNPT FOAM INJECTION OUT IL4540 9 140in 232 15mm INJECT BYPASS VALVE 1 FNPT FOAM SUPPLY IN 1 2 FNPT FOAM INJECTION OUT 1 2 FNPT BYPASS OUT SIGHT GLASS OIL FILL DIPSTICK Figure 27 Oil Fill Dipstick Sight Glass 1 2 FNPT Foam Injection Out 1 2 FNPT Foam Injection Out 1 FNPT...

Страница 39: ...ntroduction Product Overview Installation Operation Maintenance Troubleshooting Service Parts Warranty Dimensions Digital OIT Figure 28 Panel Cutout Use the self tapping screws included to secure the OIT to the panel ...

Страница 40: ...40 90 Safety Introduction Product Overview Installation Operation Maintenance Troubleshooting Service Parts Warranty Dimensions Digital OIT Instruction Plate Figure 29 Panel Hole Cutout ...

Страница 41: ...41 90 Safety Introduction Product Overview Installation Operation Maintenance Troubleshooting Service Parts Warranty Dimensions Manual OIT Figure 30 Panel Hole Cutout ...

Страница 42: ...42 90 Safety Introduction Product Overview Installation Operation Maintenance Troubleshooting Service Parts Warranty Dimensions Foam Tee Figure 31 ...

Страница 43: ...29mm 5 000in 127mm 4X 469in 11 91mm 4 375in 111 13mm REF 1 750in 44 45mm 1 750in 44 45mm 15 500in 393 70mm 12 000in 304 80mm 7 244in 183 99mm Available Flange Adapters 1 1 2in FNPT x 2in VIC both ends 2in FNPT x 2 1 2in VIC both ends 2 1 2in FNPT x 3in VIC both ends Includes Flowmeter 5 000in 127mm 1 547in 39 29mm 3 094in 78 58mm 1 547in 39 29mm 3 094in 78 58mm 4X 7 16 14 UNC 1 000 4 250in 107 95m...

Страница 44: ...ion Maintenance Troubleshooting Service Parts Warranty Dimensions 2 1 2 Inch Check Valve Victaulic x FNPT 69 85mm 69 85mm 102 93mm 174 03mm 213 82mm 163 83mm 75 29mm 63 50mm 140 03mm 69 09mm 73 15mm 15 88mm 7 92mm 48 27mm 96 54mm 48 27mm 96 54mm 92 52mm Figure 33 ...

Страница 45: ...oubleshooting Service Parts Warranty Dimensions 2 1 2 Inch Check Valve Victaulic x Victaulic 69 85mm 69 85mm 102 93mm 174 03mm 158 75mm 208 74mm 15 88mm 7 92mm 15 88mm 7 92mm 73 15mm 69 09mm 73 15mm 69 09mm 75 29mm 63 50mm 140 03mm 48 27mm 96 54mm 48 27mm 96 54mm 92 52mm Figure 34 ...

Страница 46: ...ration Maintenance Troubleshooting Service Parts Warranty Dimensions 2 Inch Check Valve Victaulic x FNPT 60 33mm 57 15mm 63 50mm 63 50mm 96 58mm 15 88mm 7 95mm 161 33mm 61 11mm 51 82mm 113 64mm 147 62mm 197 62mm 40 41mm 80 82mm 40 41mm 80 82mm 86 17mm Figure 35 ...

Страница 47: ... Troubleshooting Service Parts Warranty Dimensions 2 Inch Check Valve Victaulic x Victaulic 63 50mm 63 50mm 96 58mm 161 33mm 60 33mm 57 15mm 15 88mm 7 95mm 60 33mm 57 15mm 7 95mm 15 88mm 197 62mm 54 17mm 61 11mm 117 12mm 147 62mm 40 41mm 40 41mm 80 82mm 80 82mm 86 17mm Figure 36 ...

Страница 48: ...48 90 Safety Introduction Product Overview Installation Operation Maintenance Troubleshooting Service Parts Warranty Dimensions 1 1 2 Inch Check Valve Victaulic FNPT x FNPT Figure 37 ...

Страница 49: ...49 90 Safety Introduction Product Overview Installation Operation Maintenance Troubleshooting Service Parts Warranty Dimensions 1 1 2 Inch Check Valve Victaulic FNPT x Victaulic Figure 38 ...

Страница 50: ...rporate a foam tank into the booster tank When specifying an integrated foam tank ensure that you include the installation of the optional low tank level sensor as well as the foam suction connections and tank drainage according to NFPA guidelines Determine a location for the OIT on the operator panel of the equipment Installing the Vented Oil Cap NOTICE Before operating the AQUIS Foam Proportioni...

Страница 51: ...for AQUIS 6 0 Locating the OIT Mounting Holes Locate and drill the mounting and opening holes for the OIT Use Figure 28 to determine the dimensions for the digital OIT opening Use Figure 30 to determine the dimensions for the manual OIT opening Installing the Pump Assembly The foam system components are designed to operate as installed on the mounting bracket Figure 1 Figure 2 and Figure 3 Do not ...

Страница 52: ...oom to bend Figure 39 Figure 39 5 Use the included hardware digital OIT or locally source the appropriate hardware manual OIT to secure the OIT to the panel 6 Route the cable to the control box 7 Connect the cable to the control box Refer to Connecting M12 Cables to the Control Box on page 52 Connecting M12 Cables to the Control Box 1 Remove the cover Refer to Removing the Cover on page 56 2 Align...

Страница 53: ...a cable extension 4 Install the cover Refer to Installing the Cover on page 59 Installing the Master Waterway Check Valve Note Refer to Overview Diagram Typical on page 20 for the instructions in this section 1 2 2 Outlet 3 Inlet Figure 42 1 Use the victaulic or FNPT connections to install the waterway check valve in line with the waterway 2 Install the inlet side of the waterway check valve towar...

Страница 54: ...r you will damage it 4 Route the cable to the control box 5 3 meter M12 4 pin extension cable Connect the cable to the control box Refer to Connecting M12 Cables to the Control Box on page 52 Installing the Flowmeter Tee 1 Orient the flowmeter with the connector at the top Figure 46 2 1 2 inch tee shown Figure 45 2 Install the flowmeter tee into the waterway Note The flowmeter tee can be installed...

Страница 55: ...tor hose routes the concentrate from the foam pump to the injector Refer to the Overview Diagram Typical on page 20 for the instructions in this section The hose is required to meet the following specifications Minimum 3 8 inch inside diameter AQUIS 1 5 and AQUIS 3 0 Minimum 1 2 inch inside diameter AQUIS 6 0 Minimum 450 psi 31 bar of pressure 1 Connect one end of the hose to the output on the foa...

Страница 56: ...can cause serious injury or death High Current Read and understand the following statements before continuing The pump motor uses 30 A to 100 A of current to operate Electrical current is dangerous and can cause serious injury or death Do not attempt to connect the pump motor to the power source if you have not been trained and understand the safety practices needed to install devices requiring 30...

Страница 57: ...0 A 12 AWG 10 AWG 8 AWG 8 AWG 6 AWG 50 A 8 AWG 8 AWG 6 AWG 4 AWG 4 AWG 80 A 6 AWG 6 AWG 4 AWG 2 AWG 2 AWG Important The foam pump requires a frame ground Important Make sure that you use the same gauge for the ground cable as you use for the power cable 1 Remove the cover Refer to Removing the Cover on page 56 2 Route the positive cable from the power source to the foam pump 3 Connect one end of t...

Страница 58: ...ble tie to secure the excess cable into a flat loop Figure 41 Note Use the previous instructions to install a second tank level sensor to the controller Connect the wires from the sensor to terminals 2 and 5 on the terminal strip Installing the Wye Fitting with Strainer The wye fitting with strainer is installed in line with the supply shutoff valve and the supply hose The wye fitting can be hard ...

Страница 59: ... check valve into the injector fitting in the proper orientation Installing the Cover 1 Locate the 3 screws and washers that you removed from the cover 2 Use the 3 screws and washers to secure the cover to the bracket Figure 52 1 3 2 1 Screw 2 Washer 3 Cover Figure 52 Installing the Drain Lines Install a dedicated line to the drain port on the check valve or manifold to remove the unused solution ...

Страница 60: ... 0 1 0 2 0 3 0 4 05 0 6 0 7 0 8 0 9 1 0 Flow rate US gallons 100 0 1 0 2 0 3 0 4 0 5 0 6 0 7 0 8 0 9 1 0 200 0 2 0 4 0 6 0 8 1 0 1 2 1 4 1 6 1 8 2 0 300 0 3 0 6 0 9 1 2 1 5 1 8 2 1 2 4 2 7 3 0 Note Refer to NFPA guidelines for flow testing Calibrating and Setup Digital OIT Entering the Calibration Setup Mode 1 Press and hold the SELECT button 2 After 5 seconds the 5 second value is displayed 3 Con...

Страница 61: ...0 percent 5 Press the SELECT button to select the displayed value 6 Press the FOAM button to save the value and exit the calibration and setup mode Editing the Units of Measure F2 1 Enter the calibration setup mode Refer to Entering the Calibration Setup Mode on page 60 2 Navigate to F2 parameter 3 Press the SELECT button to edit the parameter 4 Press the or up or down button to display the desire...

Страница 62: ...that you measured and the displayed value do not match press or up or down button to adjust the display value to match the value that you measured When the low flow value is displayed an insufficient amount of water is flowing though the flowmeter 6 Press the SELECT button to return to the F3 parameter 7 Press the FOAM button to save the value and exit the calibration and setup mode Enabling Syste...

Страница 63: ...urce from a 2 tanks that supply combination A B foam The proportioning value for this setting is between 0 1 to 1 0 3 0 or 6 0 for both tanks 5 Press the SELECT button to return to the F5 parameter 6 Press the FOAM button to save the value and exit the calibration and setup mode Simulating Water Flow F6 Use this mode to test and verify the foam system operation This function is available for the A...

Страница 64: ...isplay the zero flow 16 Press the SELECT button to save the value 17 Press the FOAM button to save the value and exit the calibration and setup mode Setting Default Mix Percent for B Foam F7 1 Enter the calibration setup mode Refer to Entering the Calibration Setup Mode on page 60 2 Navigate to F7 parameter 3 Press the SELECT button to edit the parameter 4 Use the or up or down button to display t...

Страница 65: ... system Hot Liquid Certain operating conditions cause the solution temperature to reach and exceed 160 F 71 C Do not operate if the water temperature exceeds 160ºF 71ºC Hot liquid can scald you Hot Liquid Avoid conditions the result it high temperature solution Do not operate when solution temperature exceeds 160 F 71 C Hot Surface Components in the foam system may become hot during operation Do n...

Страница 66: ...concentrate injected into the waterway 2 Blue LED The blue LED indicates the modes and status of the pump operation 3 Red LED The red LED indicates the modes and status of the pump operation 4 ON OFF button The ON OFF button enables and disables the foam operation Operating in Normal Mode In normal operating mode the OIT uses information from the flowmeter and the FOAM dial to produce the desired ...

Страница 67: ...at high pressure can cause serious injury High Pressure Do not operate while all discharges or drains are closed High pressure results and damages the foam system its components 1 Press and hold the ON OFF button for 2 seconds The blue indicator blinks at a faster 2 Hz rate 2 Turn the FOAM dial to increase or decrease the motor speed 3 Press the ON OFF button to exit manual mode Understanding the ...

Страница 68: ...represent the value for the current mode 4 Supply tank LED The supply tank LED shows the concentrate tank that is in operation 5 Increase button This button increases the value in the display 6 SELECT button This button selects the value in the display 7 Display mode LED The display mode LED indicates what information that is currently display 8 ON LED The ON LED indicates when the foam system is ...

Страница 69: ...ecting concentrate into the waterway Adjusting the Mix Percentage 3 Press the SELECT button until the PERCENT LED illuminates 4 Press the up button to increase the percent by 0 1 5 Press the down button to decrease the percent by 0 1 6 The display returns to FLOW RATE after 10 seconds without use Operating in Manual Mode The foam system can operate in manual mode as required by the NFPA regulation...

Страница 70: ... Display Mode 1 Press the SELECT button to scroll though the following modes WATER FLOW PERCENT TOTAL WATER TOTAL FOAM and then back to WATER FLOW 2 Press and hold the SELECT button for 3 seconds to lock the display to the current mode Displaying Default Mix Percent 1 Press the SELECT button until the PERCENT LED illuminates 2 Press the up and down buttons simultaneously The value displayed is the...

Страница 71: ... valve Contact Waterous for more information Flushing the Foam System NOTICE Not following maintenance procedures can damage your equipment Perform all maintenance procedures as required Maintenance Leaving corrosive solution in the foam system damages the equipment You must flush the system under certain conditions The environment the concentrate used and other factors determine if or when you ne...

Страница 72: ...indow to determine the oil level Figure 1 Figure 2 and Figure 4 2 Ensure that the oil level is centered in the window 3 Add oil if necessary Refer to Adding Oil on page 73 Changing the Oil Change the oil after the first 50 hours of operation and then every 500 hours thereafter Draining the Oil 1 Trip the circuit breaker Refer to Tripping and Resetting the Circuit Breaker on page 74 2 Remove the ha...

Страница 73: ...ergent oil 1 Remove the vented oil cap and set it aside Figure 1 Figure 2 and Figure 4 2 Use the chart below to determine the oil capacity of your model Model Oil Capacity AQUIS 1 5 6 1 oz 0 18 L AQUIS 3 0 10 8 oz 0 32 L AQUIS 6 0 18 9 oz 0 56 L 3 Add the specified amount of oil into the oil reserve 4 Use the sight window to determine the oil level in the reserve Note The oil cap on the AQUIS 3 0 ...

Страница 74: ... the specified fuse rating Using the wrong fuse may damage the equipment Equipment Damage Do not replace the fuse with a value different than specified Doing so causes poor performance or damages the foam system 6 Install the fuse holder cap into the control box 7 Install the cover Refer to Installing the Cover on page 59 Tripping and Resetting the Circuit Breaker 1 Remove the cover Refer to Remov...

Страница 75: ...tting Figure 61 1 2 3 1 Wye fitting 2 Strainer 3 Cap Figure 61 5 Remove the strainer from the wye fitting 6 Flush the debris from the stainer 7 Insert the strainer into the wye fitting 8 Secure the cap to the wye fitting Figure 61 9 Open the shutoff valve at the supply Inspecting the Hoses and Fittings Check the hoses and fittings every 50 hours of use Check the hoses for wear deterioration and le...

Страница 76: ...act Waterous The pump runs at full speed whether the foam pump is on or off The controller is faulty Contact Waterous to replace the controller The foam pump runs at full speed whenever the foam system is on There is a bad ground between the controller and chassis Repair or replace ground wire or ground connection The green light on the OIT does not illuminate when the foam system is enabled The L...

Страница 77: ...OIT cable Enable the master power Reset the circuit breaker The green LED on the OIT does not flash when you flow water though the flowmeter tee or manifold The flowmeter cable is malfunctioning The paddle wheel on the flowmeter is obstructed damaged or the flowmeter does not function Replace the flowmeter cable Clear or replace the flowmeter The OIT displays horizontal bars There is a communicati...

Страница 78: ...alve 3 way 217 Product sensor 220 Electric motor 221 Control box 223 Foam pump 224 Circuit beaker Horizontal Mounting Bracket Left or Right Pump Mounting AQUIS 3 0 Left Pump Mounting Shown AQUIS 1 5 and 3 0 Foam Pump Components No Description 225 Screw 1 4 20 x 3 4 inch 226 Screw 3 8 16 x 2 inches 227 Screw 5 16 18 x 1 1 4 inches 228 Washer 1 4 inch 229 Washer 5 16 inch 230 Lock washer 3 8 inch 23...

Страница 79: ...inches 213 Pump spacer 214 Sensor wheel 215 Ball valve 3 way 217 Product sensor 220 Electric motor 221 Control box 223 Foam Pump 224 Circuit beaker 225 Screw 1 4 20 x 5 8 inch 226 Screw 3 8 16 x 2 inches 227 Screw 5 16 18 x 1 1 4 inches 228 Washer 1 4 inch 229 Washer 5 16 inch 230 Lock washer 3 8 inch 232 Washer 10 233 Locknut 1 4 20 inch 234 Locknut 5 16 18 inch 235 Locknut 10 32 236 Oil fill cap...

Страница 80: ...6 x 2 inches 227 Screw 5 16 18 x 1 1 4 inches 228 Washer 1 4 inch 229 Washer 5 16 inch 230 Lock washer 3 8 inch 232 Washer 10 234 Locknut 5 16 18 inch 235 Locknut 10 32 No Description 236 Oil fill cap dip stick 237 Nut 5 16 18 inch 238 Valve inject bypass 239 Regulator valve 240 Support bracket 241 Tee fitting 1 NPT 242 Straight fitting 3 8 JIC x 1 2 MNPT 243 Bypass hose 244 Adapter 3 8 MNPT x 3 8...

Страница 81: ...6 0 Complete Unit No Description 100 Cover 101 Cover label 102 Screw 10 32 x 1 2 inch 103 Washer 10 104 Screw 1 4 20 x 3 4 inch 105 Washer 1 4 inch 200 Foam pump assembly AQUIS 1 5 3 0 and 6 0 Foam Manifold Complete Unit AQUIS 3 0 Left Pump Mounting Shown Horizontal Mounting Bracket Left or Right Pump Mounting Vertical Mounting Bracket ...

Страница 82: ... Shift spacer 307 Hinge pin 308 Valve seat 309 O ring 3 x 3 1 4 inches 310 Plug 1 4 NPT 312 Screw 3 8 x 1 inch 313 Flowmeter pipe 314 O ring 3 1 4 x 3 1 2 inches 315 Tapped flange 316 O ring 3 1 2 x 3 3 4 inches 317 Screw 7 16 14 x 1 inch 318 Screw 7 16 20 x 1 1 2 inches 321 Nut 7 16 inch 323 Elbow 3 8 NPT 327 Flowmeter 328 O ring 1 1 2 x 1 11 16 inches 329 Screw 10 32 x 3 4 inch 336 Dowel pin 0 1...

Страница 83: ...on Operation Maintenance Troubleshooting Service Parts Warranty AQUIS Flowmeter Tee No Description 327 Flowmeter 328 O ring 1 1 2 x 1 11 16 inches 329 Screw 10 32 x 3 4 inch 331 Flowmeter tee 350 Foam tee assembly Complete Foam Tee Assembly AQUIS Foam Tee ...

Страница 84: ...rranty AQUIS Foam Pump Components MISC Panel Plates OIT Instructions Rating Schematic No Description 101 Check valve 102 Wye strainer 103 Strainer screen 104 Strainer gasket 106 OIT cable 108 Flowmeter cable 109 Tank level wire 110 OIT 150 Tank level switch 156 Panel mounted foam strainer Misc AQUIS Components ...

Страница 85: ...85 90 Safety Introduction Product Overview Installation Operation Maintenance Troubleshooting Service Parts Warranty Optional Components Remote OIT No Description 1 Secondary OIT 2 OIT cable ...

Страница 86: ...g Service Parts Warranty Optional Components 3 8 Inch Inject Bypass Lines for AQUIS 1 5 and 3 0 No Description 425 Straight adapter 3 8 MJIC x 1 2 MNPT 426 Straight adapter 3 8 MJIC x 3 8 MNPT 427 Hose barb 3 8 inch barb x 6 FJIC 428 Push on hose 3 8 inch black 429 Push on hose 3 8 inch clear ...

Страница 87: ... Components 1 2 Inch Inject Bypass Lines for AQUIS 6 0 No Description 425 Straight adapter 3 8 MJIC x 1 2 MNPT 427 Hose barb 3 8 inch barb x 6 FJIC 429 Push on hose 3 8 inch clear 430 Straight adapter 8 MJIC x 3 8 MNPT 431 Hose barb 1 2 inch barb x 8 FJIC 432 Push on hose 1 2 inch black 433 Straight adapter 8 MJIC x 1 2 MNPT ...

Страница 88: ...y Lines for AQUIS 1 5 and 3 0 No Description 400 Ball valve 90 3 4 FNPT 401 Label foam tank shut off 402 Hex nipple 3 4 MNPT 403 Hose barb 3 4 inch barb x 3 4 MNPT 404 Hose clamp 11 16 x 1 1 4 inches 405 Spring hose 3 4 inch clear 406 Hose barb 3 4 inch barb x 12 FJIC 407 Adapter 1 2 MNPT x 12 MJIC 408 Bushing 1 MNPT x 3 4 FNPT 410 Bezel B size yellow ...

Страница 89: ...ch Supply Lines for AQUIS 6 0 No Description 400 Ball valve 90 1 FNPT 401 Label foam tank shut off 402 Hex nipple 1 MNPT 403 Hose barb 1 inch barb x 1 MNPT 404 Hose clamp 13 16 x 1 1 2 inches 405 Spring hose 1 inch clear 406 Hose barb 3 4 inch barb x 12 FJIC 407 Adapter 1 2 MNPT x 12 MJIC 408 Bushing 1 MNPT x 3 4 FNPT 410 Bezel B size yellow ...

Страница 90: ...parties that the only warranty provided for such products shall be the warranty provided by the manufacturer thereof which if assignable WATEROUS will assign to Buyer if requested by Buyer c any product or part altered modified serviced or repaired other than by WATEROUS without its prior written consent d the cost of dismantling removing transporting storing or insuring the defective product or p...

Отзывы: