48
49
STICK
SERIES
EQUIPMENT
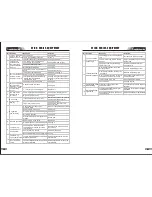
Nr.
1
2
3
4
5
Troubles
Solution
Fan is broken
The power board is broken
The power cable is broken
There is something in the fan
The start capacitor of fan damaged
Turn on the power
source, power
indicator is lit, fan
is not working.
Turn on the
power source,
fan is working,
power indicator
is not lit
Turn on the power
source, fan is not
working ,power
indicator is not lit
Turn on the power
source, power
indicator is lit, fan
is working, there
is no welding
output.
The number of
the display is
not intact
Reasons
Change fan
Clean it
Change capacitor
The power light damaged or
connection is not good
The power cable connected not
good
Display panel is broken
The light of the power indicator is
broken and the problems
mentioned in Nr. 2
Change the light of the power
indicator or refer to the solution
in Nr. 2
Change it
Change it
Change it
Change it
Replace it
Change it
Repair or change it
Change the power light
Connect correctly
Power on switch is damaged
The power board is broken
Control board is broken
st
1 inverter circuit damaged
The display panel is damaged
Change the display panel
6
7
No no-load
voltage output
(MMA)
No gas flow
(TIG for E221)
If the overheat indicator is on
The main circuit is broken
The machine is broken
Wait a few minutes, the machine
can be operated normal
Check and repair
Consult the dealer or the
manufacturer
Gas cylinder is close or gas
pressure is low
Something is in the valve
Open or change the gas cylinder
Remove it
Change it
Electromagnetic valve is damaged
8
Remove it
Change it
Gas always flows
Something is in the valve
Electromagnetic valve is damaged
9
10
Checking if the electorde stick to
the work piece that the anti-stick
function is on
Repair or change it
The min value displayed isn't accordant
with the actual value
Adjust potentiometer Imin on the
control board
Adjust potentiometer Imax on the
control board
The max value displayed isn't accordant
with the actual value
The welding
current cannot
be adjusted
The welding
current displayed
isn't accordant
with the actual
value
Control board is broken
Separate the electrode and
work piece
Nr.
11
Troubles
Solution
The welding current is adjusted too
low
Increase the welding current
Adjust the distance from torch to
work piece
Use the suitable length from
manufacturer
The arc is too long in the welding
process
The power cable or the welding
cable is too long
The penetration
of molten pool is
not enough
Reasons
STICK
SERIES
EQUIPMENT
12
13
14
Over-heat protection ,too much
welding current
Reduce the welding current
Reduce the welding time
Over-heat protection ,working too
much time
Over-current protection, current in
the main circuit is out of control
Tig torch is connected to the
positive terminal
Tungsten electrode is too big for
the welding current
Check the earth clamp position on
the work piece
Check and repair main circuit
and drive board
Connect the tig torch to negative
terminal
Adjust the position of earth clamp
Select the correct size of tungsten
electrode
Thermal overload
indicator light is on
Tig electrode melts
when welding
Arc flutters during
Tig welding
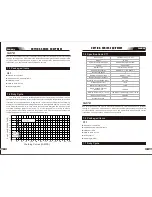
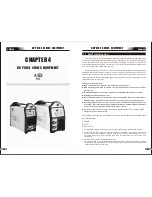
Troubleshooting
Troubleshooting
Digital tube is broken
Change it
Change it
Pressure too high or air regulator is
broken
Check gas
Air tube is brocken
Shut off the power when changing the torch
Check the power supply
Change the fan
Input voltage is too low
Fan is broken

