7 Start-up
22
Installation and maintenance instructions ecoTEC plus 0020261188_00
▶
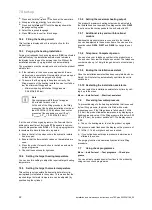
Press and hold the
and
buttons at the same time.
▶
Also press the reset button for a short time.
▶
Press and hold
and
until the display shows the
language setting option.
▶
Select the required language.
▶
Press
OK
twice to confirm this change.
7.5.2
Filling the heating circuit
This function is displayed but it is not yet active for this
product type.
7.5.3
Purging the heating installation
Purging (corresponds to check programme
P.00
) is activated
automatically by the installation assistant and remains in
the display for as long as the purging is active. Without the
installation assistant, purging also occurs automatically.
The programme must be carried out once or else the product
will not start.
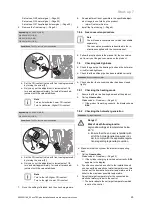
▶
If the radiators in the house are equipped with thermo-
static valves, ensure that all thermostatic valves are open
so that the circuit can be purged effectively.
▶
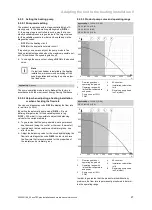
To ensure that the purging takes place correctly, the
filling pressure of the heating installation must not fall be-
low the minimum filling pressure.
–
Minimum heating installation filling pressure:
0.08 MPa (0.80 bar)
Note
Check programme
P.00
runs for approx.
6.5 minutes for each circuit.
At the end of the filling procedure, the filling
pressure of the heating installation must be at
least 0.02 MPa (0.2 bar) above the counter-
pressure of the expansion vessel ("Exp")
(P
Installation
≥
P
Exp
+ 0.02 MPa (0.2 bar)).
If, at the end of the purge programme, the flow rate that is
achieved is insufficient, fault code
F75
appears in conjunc-
tion with diagnostics code
D.149
= 8. The purge programme
is considered to have failed and is repeated.
▶
Ensure that all of the stopcocks in the hydraulic installa-
tion are open.
▶
Ensure that the thermostatic valves on the radiators are
open.
▶
Press the product's reset button to restart an automatic
purge programme.
▶
Check all connections for tightness.
7.5.4
Setting the target heating temperature
You can use this setting to adjust the required target heating
temperature.
7.5.5
Setting the target hot water temperature
This setting is only possible if a domestic hot water cylin-
der (optional) is installed in the system. This means that the
required target hot water temperature can be adjusted (by
post-heating the cylinder).
7.5.6
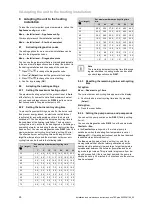
Setting the maximum heating output
The product's maximum heating output can be adjusted to
the installation's heat demand. Use diagnostics code
D.000
to set a value that corresponds to the unit output in kW.
7.5.7
Additional relay and multi-functional
module
Additional components that are connected to the installa-
tion can be adjusted in these menu items. You can use dia-
gnostics codes
D.026
,
D.027
and
D.028
to change the set-
ting.
7.5.8
Telephone: Competent person
You can store your telephone number in the product menu.
The end user can view the telephone number. The telephone
number can be up to 16 digits long and must not contain any
spaces.
7.5.9
Ending the installation assistant
Once the installation assistant has been completed and con-
firmed, it will not start up automatically next time the unit is
switched on.
7.5.10 Restarting the installation assistants
You can restart the installation assistant at any time by call-
ing it up in the menu.
Menu
→
Installer level
→
Start inst. assistant
7.6
Preventing low water pressure
To prevent damage to the heating installation that is caused
by low filling pressure, the product is fitted with a water
pressure sensor. If the filling pressure falls below 0.1 MPa
(1.0 bar), the product indicates low pressure by displaying a
flashing pressure value. If the filling pressure falls below 0.05
MPa (0.5 bar), the product switches off. The display shows
F.22
.
▶
Top up the heating water to start the product up again.
The pressure value flashes on the display until a pressure of
0.11 MPa (1.1 bar) or higher has been reached.
▶
If you notice frequent drops in pressure, determine and
eliminate the cause.
The purging function is automatically active after a filling
procedure.
7.7
Using check programmes
Menu
→
Installer level
→
Test programs
→
Check pro-
grams
You can activate various special functions in the product by
using various check programmes.

