Operation 6
0020261188_00 ecoTEC plus Installation and maintenance instructions
19
You can use the optional multi-functional module to actuate
two further additional components.
5.7.6.1 Using the additional relay
1.
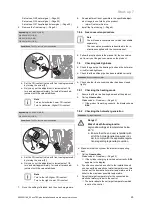
Connect an additional component directly to the integ-
rated additional relay using the grey plug on the PCB.
2.
Carry out the wiring. (
→
Page 18)
3.
Select
D.026
to actuate the connected component.
(
→
Page 26)
5.7.6.2 Using the VR 40 (2 in 7 multi-functional
module)
1.
Install the components in accordance with the respect-
ive instructions.
2.
Select
D.027
to actuate relay 1 on the multi-functional
module. (
→
Page 26)
3.
Select
D.028
to actuate relay 2 on the multi-functional
module. (
→
Page 26)
6
Operation
6.1
Operating concept
The operating concept and the display and setting options of
the end user level are described in the operating instructions.
6.2
Calling up the installer level
Caution.
Risk of material damage caused by incor-
rect handling.
Incorrect settings at installer level may cause
damage and operating faults to the heating
installation.
▶
You must only access the installer level if
you are an approved competent person.
Note
The installer level is protected against unauthor-
ised access using an access code.
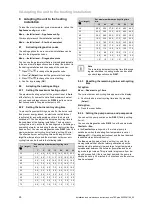
1.
Press the
and
("i") buttons at the same time.
◁
The following menu appears in the display.
2.
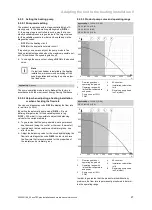
Use the
or
button to scroll until the
Installer
level
menu item appears.
3.
Confirm by pressing (
OK
).
◁
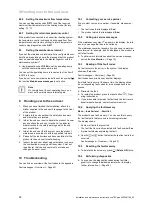
The text
Enter code
and the value 00 appear in the
display.
4.
Use
or
to set the value 17 (access code).
5.
Confirm by pressing (
OK
).
◁
The installer level appears with a selection of menu
items.
6.3
Live Monitor (status codes)
Menu
→
Live monitor
Status codes in the display provide information on the pro-
duct's current operating mode.
Status codes
–
Overview (
→
Page 42)
6.4
Calling up appliance config. and
diagnostics menu
To recheck and reset the most important system parameters,
call up the
Appliance config.
menu item.
Menu
→
Installer level
→
Appliance config.
The setting options for more complex installations can be
found in the
Diagnostics menu
.
Menu
→
Installer level
→
Diagnostics menu
Overview of diagnostics codes (
→
Page 39)
6.5
Using test programmes
As well as the installation assistants, you can also call up the
test programmes for start-up, service and troubleshooting.
Menu
→
Installer level
→
Test programs
In addition to the
Function menu
, the product comprises
an
Electronics self-test
but also
Check programs
(
→
Page 22).
7
Start-up
7.1
Checking and treating the heating
water/filling and supplementary water
Caution.
Risk of material damage due to poor-qual-
ity heating water
▶
Ensure that the heating water is of suffi-
cient quality.
▶
Before filling or topping up the installation, check the
quality of the heating water.
Checking the quality of the heating water
▶
Remove a little water from the heating circuit.
▶
Check the appearance of the heating water.
▶
If you ascertain that it contains sedimentary materials,
you must desludge the installation.
▶
Use a magnetic rod to check whether it contains mag-
netite (iron oxide).
▶
If you ascertain that it contains magnetite, clean the in-
stallation and apply suitable corrosion-protection meas-
ures, or fit a magnetic filter.
▶
Check the pH value of the removed water at 25 °C.
▶
If the value is below 8.2 or above 10.0, clean the installa-
tion and treat the heating water.
▶
Ensure that oxygen cannot get into the heating water.
Checking the filling and supplementary water
▶
Before filling the installation, measure the hardness of the
filling and supplementary water.

