


65
3.
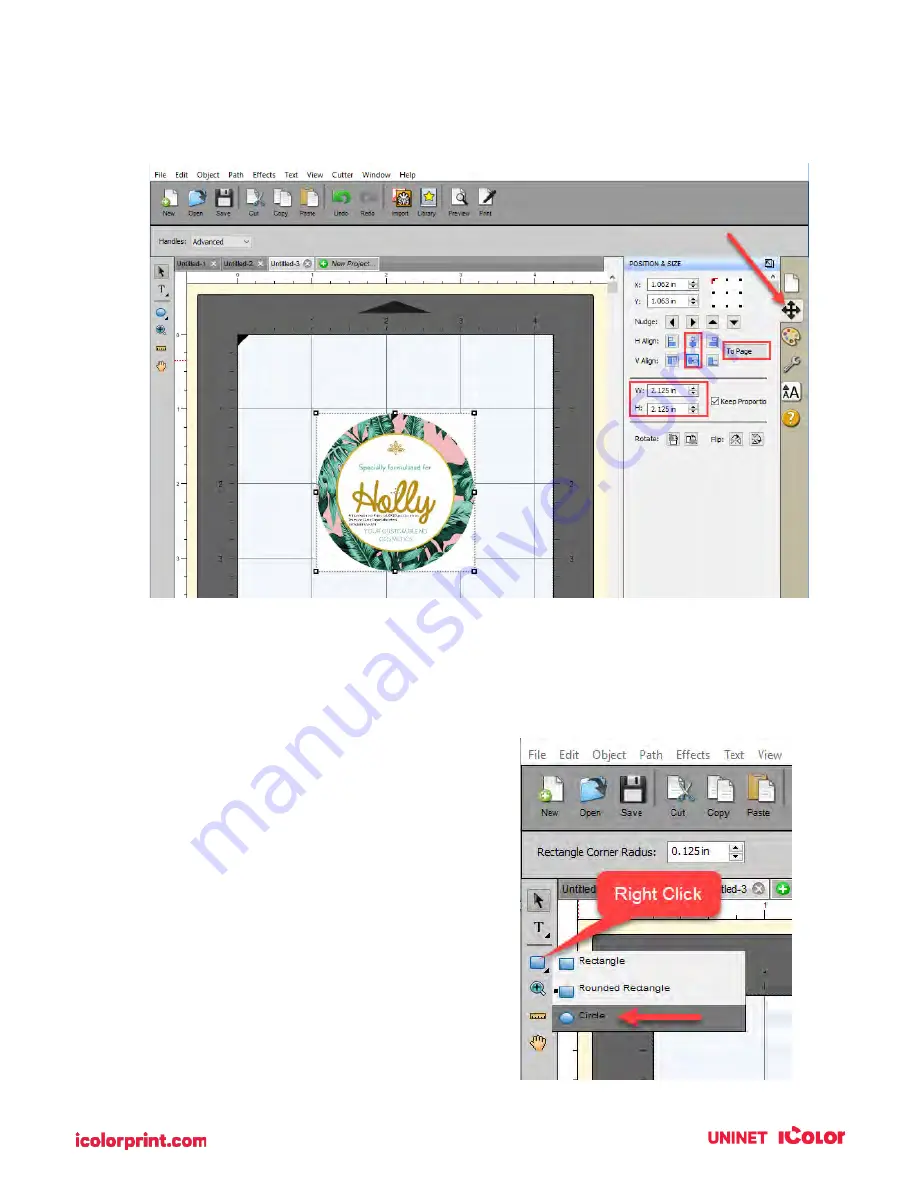
Set the Size & Position. In this example, we are setting the size to 2.125” x 2.125”. Center the
image horizontally and vertically.
4.
Create your cut line using the shape tool on the left side toolbar. Right-click on the rectangle
icon and choose the circle tool.
5.
Draw the circle close to the size of the images.
You don’t have to be accurate on this step since
we will be changing the size and position in the
next step.
6.
Set the size to correspond to the actual cut label
size you would like. In this case, we set the size to
2” x 2” so that we have a standard 1/16” bleed
around the label. Uncheck the Keep Proportions
box. This will make sure that no labels have any
white unprinted areas around the edges.
Содержание IColor 250
Страница 1: ......
Страница 52: ...51 2 Browse to the file you would like to use and choose Open ...
Страница 59: ...58 8 Center the image horizontally and vertically to the page ...
Страница 73: ...72 2 Select Blank Template Click Next 3 Select IColor 250 Label Click Next ...
Страница 104: ...103 Printing from Preview Click on the Preview dropdown menu and choose Printer Features ...
Страница 114: ...113 4 Prepare items needed for the procedure 5 Soak the paper towels in water for 5 seconds ...


