


100
2.
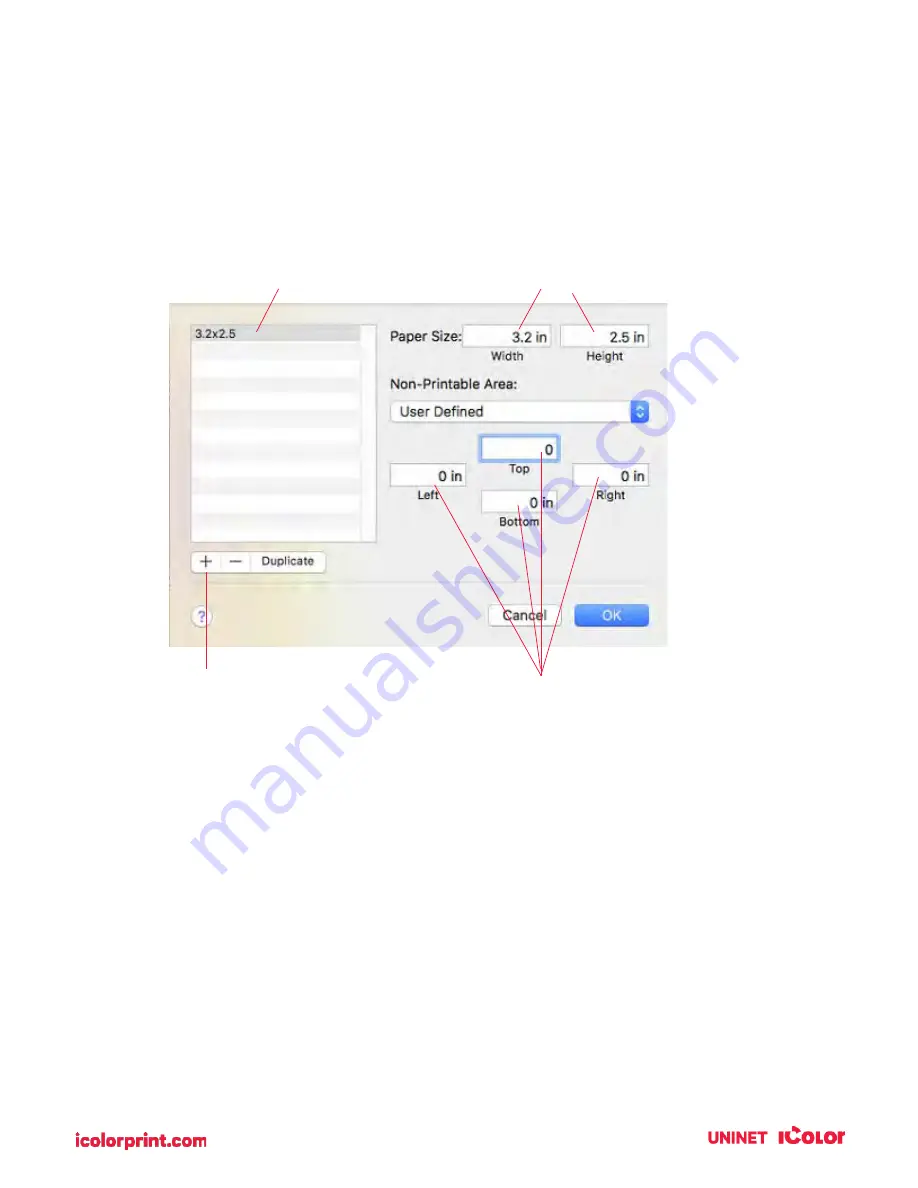
Click the + sign to create a new size.
3.
Enter the actual width and height of your label stock.
4.
Set all margins to zero.
5.
Rename the size the same as the width and height.
6.
Your custom size will now appear at the bottom of the preset size list in this application and any
other application on this Mac.
NOTE: If you need to over bleed your image to achieve complete coverage of your label, you
would use this process to create a custom size that is .03 inches (or less) larger than your actual
label stock. For Example, 4.03 inches x 3.03 inches for a 4 inches x 3 inches label.
Set Width and Height
Rename
Click plus sign to create a new
size
Set all margins to Zero
Содержание IColor 250
Страница 1: ......
Страница 52: ...51 2 Browse to the file you would like to use and choose Open ...
Страница 59: ...58 8 Center the image horizontally and vertically to the page ...
Страница 73: ...72 2 Select Blank Template Click Next 3 Select IColor 250 Label Click Next ...
Страница 104: ...103 Printing from Preview Click on the Preview dropdown menu and choose Printer Features ...
Страница 114: ...113 4 Prepare items needed for the procedure 5 Soak the paper towels in water for 5 seconds ...


