32
1.2.2.3.
Robotic Arm is Connected to the Control Box
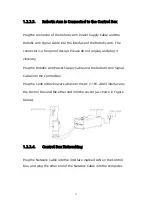
Plug the connector of the Robotic Arm Power Supply Cable and the
Robotic Arm Signal Cable into the interface of the Robotic Arm. The
connector is a foolproof design. Please do not unplug and plug it
violently;
Plug the Robotic Arm Power Supply Cable and the Robotic Arm Signal
Cable into the Control Box;
Plug the Control Box Power Cable into the AC (110V-240V) interface on
the Control Box and the other end into the socket (as shown in Figure
below).
1.2.2.4.
Control Box Networking
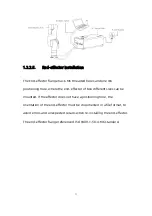
Plug the Network Cable into the interface marked LAN on the Control
Box, and plug the other end of the Network Cable into the computer.
Содержание xArm
Страница 1: ...1...
Страница 29: ...29 Working space of xArm7 unit mm Note The following working range diagrams are only for safety assessment...
Страница 78: ...78 Step3 Open the Properties Step4 Open the IPV4...
Страница 81: ...81 1 2 4 Return to the Search Interface PC Click Tool Search to return to the search interface...
Страница 116: ...116 1 4 9 3 Advanced Tools...
Страница 119: ...119 Friction Identification...
Страница 136: ...136 7 Restart the control box enter your modified IP in the xArm Studio search box and connect the robotic arm...


