TAC-7X
MANUAL
Step 9.
Continue inserting the conductor; as the conductor strands
bottom out in the contact, the contact will be depressed
and,in turn, activate the trigger.
Step 10. When the trigger is fully activated, the crimp cycle is initiated.
When the crimp cycle is complete, the funnel will open.
Smoothly pull the conductor out immediately after the funnel
opens.
NOTE
Do not attempt to remove the conductor until the funnel
opens. A built in safety feature precludes the transfer
mechanism from returning to the vertical position until the
crimped contact is removed from the transfer tip.
Step 11. Visually inspect the crimp, as required. (See Figure 3-3).
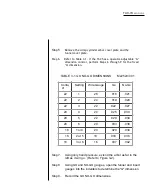
Step 12. Repeat Steps 7 through 12 until all crimps are made. (Select the
proper "G" dimension setting if wire gauges change).
Step 13. Open the sleeve valve.
Step 14. Set the feeder-bowl power on-off switch to off.
Содержание TAC-7AE
Страница 6: ...Figure 1 1 TAC 7X Front View ...
Страница 8: ... Figure 1 2 Wire Insertion Through Funnel ...
Страница 12: ...Figure2 1 Pneumatic Hook Up ...
Страница 14: ... Fiqure 2 4 Track Drop Tube Escapement ESCAPEMENT SYSTEM _ _ _ BR ASSEMBL I TRA ...
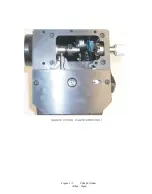
Страница 18: ... ARBOR COVER PLA TE REMOVED Figure 3 1 Crimp Cylinder Arbor Open ...
Страница 20: ... ARBOR COVER PLAT E REMOVED Figure 3 2 Crimp Cylinder Arbor Closed ...
Страница 23: ... Crimp Inspection Points Improper Crimps ...
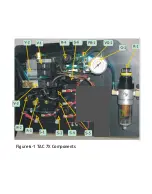
Страница 33: ...Figure 6 1 TAC 7X Components ...
Страница 34: ...Figure 6 2 Control Box Components Figure 6 2 TAC 7X Components Right View ...
Страница 35: ...PLC Controller Switching Power Supply Vibratory Feed Controller Figure 6 3 TAC 7X Components Left View ...
Страница 37: ...Figure 6 3 Contact Track Feed Air Adjustments ...
Страница 42: ... Figure 6 4 Indenter Plate Removal ...
Страница 43: ...HOSE CLAMP CAREFULL Y REMOVE Figure 6 5 Indenter Replacement ...
Страница 47: ...Figure 6 6 Indenter Adjustment ...
Страница 52: ...TAC 7X Pneumatic Diagram ...


