73
Viewing
・
Listening
and Operation
Others
Set up
Introduction
Recording
72
Viewing
・
Listening
and Operation
Others
Set up
Introduction
Recording
● Alarm In/Ext. Control In
1) Set an "alarm" to be detected.
Alarm In:
Detects an external alarm.
Ext. Control In: Performs external control.
OFF:
Does not perform "Alarm In" or "Ext. Control In."
2) Set "Input type" for alarms if "Function" is set to other than "OFF."
Normally Opened (NO): A no-voltage contact system. Set in case of
normally open, closed in case of an alarm.
Normally Closed (NC): A no-voltage contact system. Set in case of
normally closed, open in case of an alarm.
NOTE
●
Camera starts alarm recording when the camera detects alarm signal. (Signal
lenghth requires more than 100ms).
●
Camera starts "Ext. Control In Recording" when control signal comes in.
(Control signal should be more than 1 second).
● Motion Detection
1) Function
ON: Camera detects motion. (A change in the image is detected and an
alarm is sent)
OFF: Camera does not detect motion.
2) Sensitivity
Set "Sensitivity."
HIGH:
Motion is detected with even a small change in brightness or
motion is detected.
MIDDLE: Intermediate between HIGH and LOW.
LOW:
Motion is detected only when a large change in brightness or
motion is detected.
NOTE
●
Detection sometimes fails if the object is dark.
●
Incorrect detection is sometimes made due to noise if the object is dark and
AGC gain is high. Set the sensitivity to low.
● Output Hold Time
Set a time to hold alarm output.
Choose from 1, 5, 10, 15, 30 and 60 seconds
This function is used when connecting to alarm output terminals and
activating a siren, buzzer or emergency light.
Camera/Alarm Settings (Cont.)
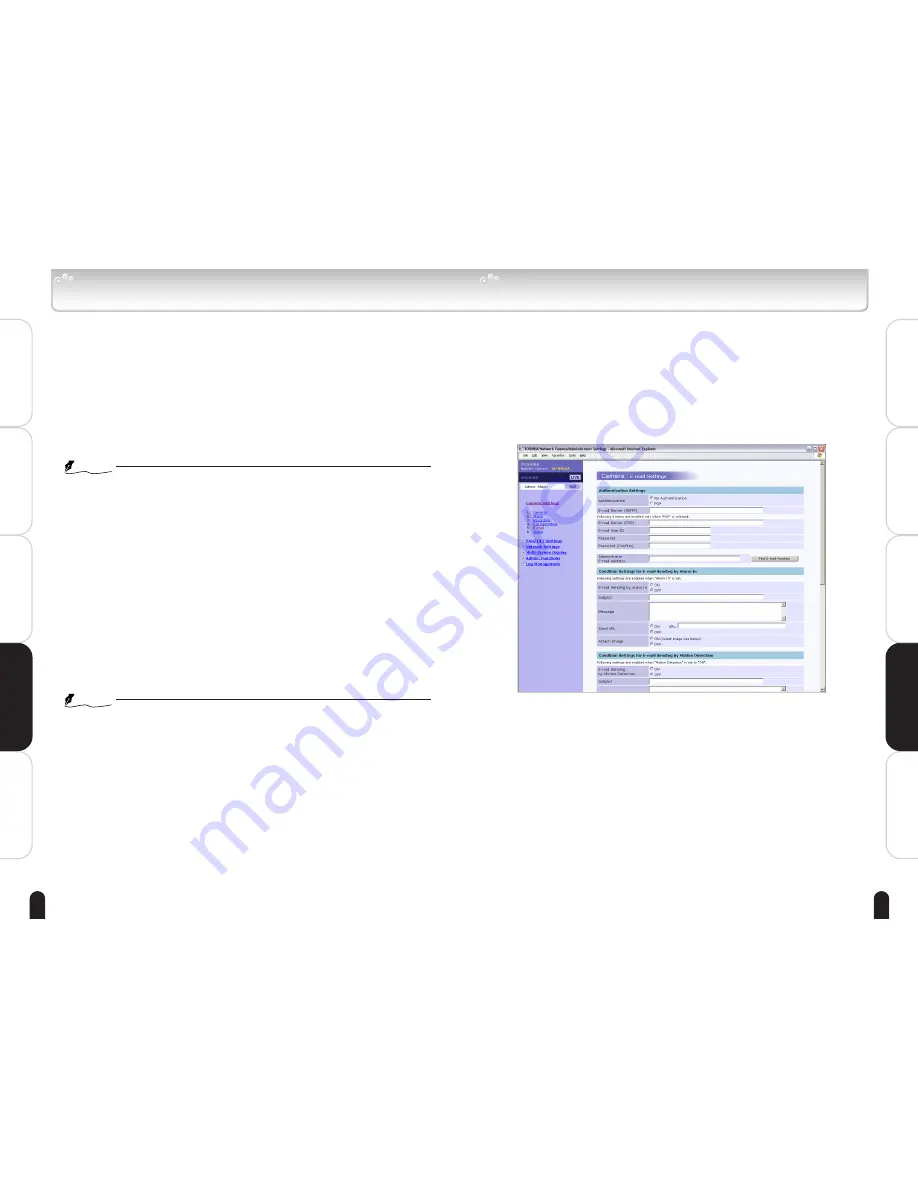
Camera/E-mail Settings
E-mail can be sent to a maximum of 11 destinations including the administrator
e-mail address in case of Alarm In or Motion Detection.
1
Click "Camera Settings" on the Admin. Menu.
・ A sub menu for Camera Settings will appear.
2
Click "5. E-mail" in the sub menu.
・ The "Camera - E-mail Settings" screen will appear.
3
Configure each setting items.
・ Click the Save button to save settings.
・ The settings will not be reflected unless the Save button is clicked.


