


g003838
Figure 6
1.
Bolt
2.
Rear hitch shield
7.
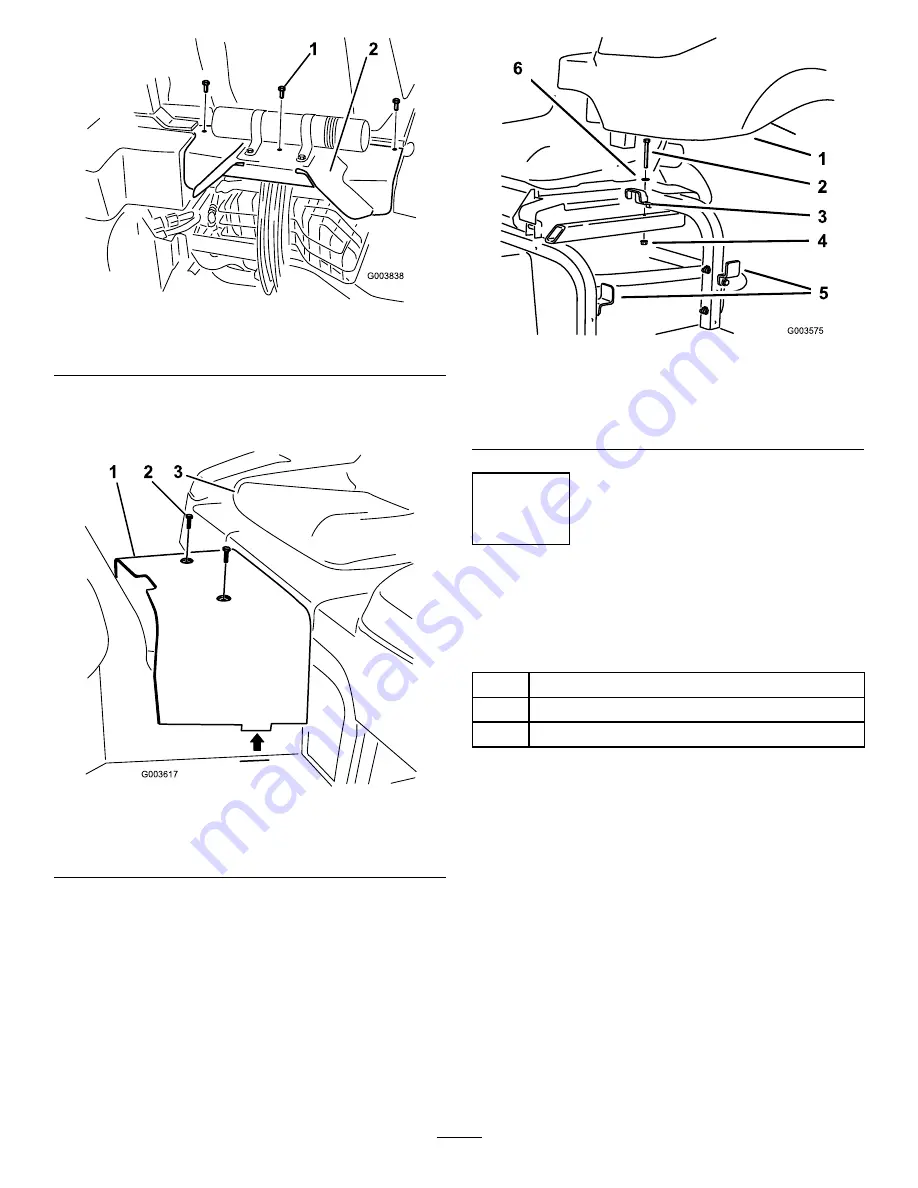
Remove the 2 screws securing the center
shroud to the frame (
). Remove and
retain the shroud.
g003617
Figure 7
1.
Center shroud
3.
Seat
2.
Screws
8.
Disconnect the hydraulic lines going to the tank.
9.
Remove the top hydraulic tank bracket from the
machine frame and loosen the 2 brackets on the
side of the frame (
). Remove the tank
and retain the hardware.
g003575
Figure 8
1.
Hydraulic tank
4.
Nut
2.
Bolt
5.
Side bracket
3.
Top bracket
6.
Washer
4
Installing Fittings to the
Hydraulic Tank
Parts needed for this procedure:
1
Small 90-degree tee with barb
1
Large 90-degree elbow (threaded both ends)
1
Strainer
Procedure
Note:
Make sure that all O-rings are lubricated and
properly positioned on all fittings before installation.
Note:
Install all fittings and hydraulic lines loosely first
and then tighten them when everything is installed.
Install the fittings at the angles shown in the figures.
1.
Remove the 2 hydraulic tank plugs from the side
of the tank.
2.
Install the strainer into the hydraulic tank where
the large plug was removed.
3.
Install the large 90-degree elbow into the
strainer.
4.
Install the small 90-degree tee with barb where
the small plug was removed (
6