background image

14

3.   AUDIO SETUP

3.1 VOLUME SETUP

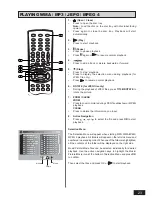
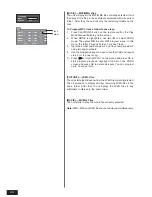
Once you select the Volume Setup and press OK, you will
hear the calibrating sound from the front left speaker for a
few seconds. Then this sound will move from speaker to
speaker as follows: Front Left -> Centre -> Front Right ->
Subwoofer -> Rear Right -> Rear Left. If the calibrating
sound is either too small or too loud, exit the Volume Setup
and then adjust the volume control until the calibrating sound
is clearer. Let the calibrating sound cycle through all the
speakers at least once.

If the calibrating sound level from all speakers is
approximately the same, no further adjustment is necessary.

If any speaker sound level appears unbalanced to the rest,
you can increase or decrease the level of the speaker by
pressing 

 or 

 to increase or decrease the speaker level

when that speaker is highlighted.

When you have completed the level adjustments, press 

OK

to exit the Volume Setup and return to the previous menu.

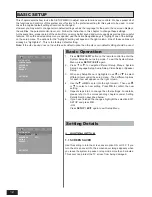
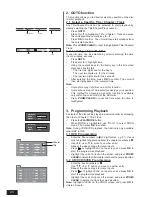
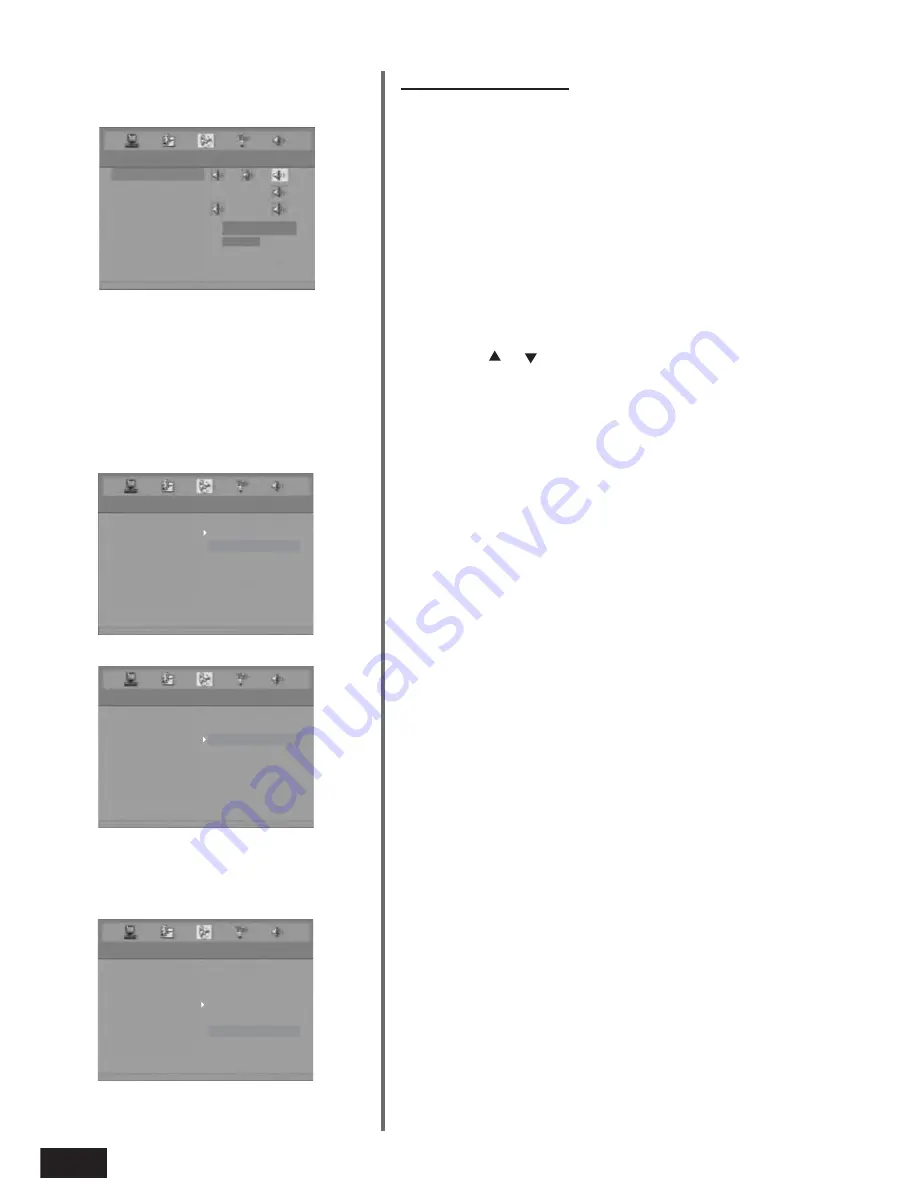
3.2  DYNAMIC RANGE

Dynamic Range Control enables you to control the dynamic range
so as to achieve a suitable sound for your equipment.

ON: 

Loud sound such as explosion is toned down slightly when

playback.

OFF:

 The unit plays back at the recording level on the disc.

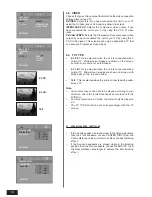
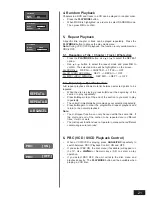
3.3  DIGITAL  OUTPUT

For an A/V receiver or amplifier connected to the DVD Home
theatre’s 

“COAXIAL”

 socket, you can select from the following

settings:

SPDIF/RAW:

 Dolby Digital signals are fed unaltered to the digital

output. Generally, this setting is used with receivers capable of
Dolby Digital 5.1 channel decoding.

SPDIF/PCM: 

 Dolby Digital and MPEG 2 multi-channel signals are

converted to PCM (Pulse Code Modulation). This setting is suitable
for amplifiers or receivers without digital multi-channel sound
decoders.

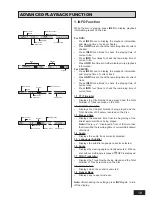
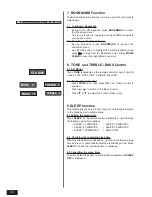
3.4  PROLOGIC II

The Dolby Pro Logic II Surround System is a specially encoded 2
channel analog format that will reproduce 5 channel output when a
Dolby Pro Logic II Decoder is used.

MOVIE MODE: 

The Movie mode is for use with stereo television

shows and all programs encoded in Dolby Surround.  The result is
enhanced soundfield directionality.

MUSIC MODE: 

The Music mode is for use with any stereo music

recordings, and provides a wide and deep sound space.  The Music
mode includes different controls that allow the sound to be tailored
to individual listening preference.

AUDIO SETUP

VOLUME SETUP

ON

DIGITAL OUTPUT
PROLOGIC II

EXIT SETUP

DYNAMIC RANGE

OFF

AUDIO SETUP

VOLUME SETUP
DYNAMIC RANGE

PROLOGIC II

SPDIF/PCM

EXIT SETUP

DIGITAL OUTPUT

SPDIF/RAW

AUDIO SETUP

VOLUME SETUP
DYNAMIC RANGE
DIGITAL OUTPUT

MOVIE MODE

MUSIC MODE

EXIT SETUP

PORLOGIC II

OFF

AUDIO SETUP

DYNAMIC RANGE
DIGITAL OUTPUT
PROLOGIC II

FRONT RIGHT

5 dB

EXIT SETUP

VOLUME SETUP

Содержание DR2502

Страница 1: ...INSTRUCTION MANUAL DVD Home Theatre System DR2502...

Страница 2: ...1 To ensure proper use of this product please read this owner manual carefully and retain for future reference Should the unit require maintenance contact an authorized service location SAFETY...

Страница 3: ...p out of reach of young children This apparatus is not suitable for use by young children or infirm persons without supervision Young children must be supervised to ensure that they do not play with t...

Страница 4: ...her limited viewing uses only unless otherwise authorized by Macrovision Corporation Reverse engineering or disassembly is prohibited Manufactured under license from Dolby Laboratories Dolby Pro Logic...

Страница 5: ...d studio logos The next Title will be the film Other Titles contain trailers for other films production notes or alternative endings for the film There are many possibilities with Digital Versatile Di...

Страница 6: ...EO PROLOGIC II MOVIE PROLOGIC II MUSIC CONCERT CHURCH PASSIVE WIDE and LIVE Note Surround Sound Effect DSP is available only for STEREO contents 2 channels DSP cannot be selected while playing back a...

Страница 7: ...previous FM preset channel number in tuner mode 7 1 press to skip to the next chapter track in DVD mode 2 Skips to the next FM preset channel number in tuner mode 8 PLAY 1 Starts playing in DVD CD mod...

Страница 8: ...s REC Connect to the Audio Input of a television or you can also connect audio Left and Right cables to external recording devices such as a VCR or cassette recorder 6 Component video and progressive...

Страница 9: ...ed colour terminal clip To prevent damage to circuits never short circuit the positive and negative speaker output terminals Press the speaker terminal clip down and insert the wire then release the c...

Страница 10: ...s component video in jacks you can optionally connect your DVD receiver to the TV using the component video in jacks The advantage here is an optimal picture quality Use the component video cables not...

Страница 11: ...udio Left Right output jacks to the audio Left Right input jacks on the VCR or Tape Recorder To record the video of your DVD connect this units video output jack to the video input jack on the VCR or...

Страница 12: ...rn on the TV and set to the correct video in channel Insert the batteries in the remote control Start Playback Press the key either on the unit front panel or the remote control The unit VFD display s...

Страница 13: ...s saver can protect the TV screen from being damaged BASIC SETUP This chapter explains how to use the SETUP MENU to adjust various functions and controls We have preset all of the functions and contro...

Страница 14: ...e The Parental lock is active Note The rating levels are only functional when the parental lock is active The rating levels can only be changed when the parental lock is not active 1 3 SOURCE Select t...

Страница 15: ...V receiver or amplifier connected to the DVD Home theatre s COAXIAL socket you can select from the following settings SPDIF RAW Dolby Digital signals are fed unaltered to the digital output Generally...

Страница 16: ...too spacious or strong from the surrounds it can be adjusted forward to get a better balance Likewise if a stereo recording is somewhat too mono or narrow sounding it can be adjusted toward the rear...

Страница 17: ...TYPE 4 3 PS This is selected when the unit is connected with a normal TV Wide screen images are shown on the screen but with some parts cut automatically 4 3 LB This is selected when the unit is conne...

Страница 18: ...ssed the speed of slow motion playback changes accordingly Note Slow motion step by step is not applicable to CD Playback Backward slow motion is not applicable to VCD playback 5 Skip to the Beginning...

Страница 19: ...nly available when the scenes shot from multiple angles have been recorded on the DVD disc If multi angle viewing is not available OFF is displayed 11 AUDIO FM ST To Change the Audio Language Availabl...

Страница 20: ...corded on the disc 1 2 CH Chapter Info Displays the Chapter Number being played and the Total Number of Chapters recorded on the disc 1 3 Elapsed time Displays the elapsed time from the beginning of t...

Страница 21: ...M CLEAR to reset the time when the time is highlighted 3 Programming Playback Contents of the disc can be played in a selected order by arranging the order of Chapter Title Track Press the PLAYMODE bu...

Страница 22: ...back allows material between selected points to be repeated While the disc is playing press A B to set the beginning of the section to play repeatedly Press A B again to set the end of the section to...

Страница 23: ...ess TONE once then press OK The Treble Control is enabled Press or to switch to the Bass Control Press or to adjust the Treble Bass Level 9 SLEEP function This feature lets you select a time for your...

Страница 24: ...n you input 8 Active Navigation Press or to select the file and press OK to start playback Selection Menu The Selection Menu will appear when starting MP3 WMA JPEG MPEG 4 playback All folders will app...

Страница 25: ...t numbers 4 Use the Navigation keys to move to another field and repeat step 3 for the next song 5 Press or highlight PLAY on the screen and press OK to start program playback Highlight CLEAR on the P...

Страница 26: ...To save a radio station 1 When the desired radio station is tuned Press and hold OK until the frequency flashes on the VFD display 2 Press or use the remote control numeric keys 0 9 to select the chan...

Страница 27: ...ws and with Apple s Mac These two formats are the most widely used When naming your MP3 files do not exceed 8 characters and place mp3 as the file extension General name format of Title mp3 When compo...

Страница 28: ...essed image file format Your player can play JPEG files with a resolution of up to five million 5 mega pixels However there is no perceptible improvement in the quality of pictures displayed on your T...

Страница 29: ...nit Avoid any obstacle that may block the remote control signal path Inspect or replace the batteries If it appears that the DVD Home Theatre System is faulty please first consult this checklist It ma...

Страница 30: ...Video Y 1 Vp p C 0 3 Vp p 75 ohms YPbPr Y 1 Vp p Pb 0 6 Vp p Pc 0 6 Vp p 75 ohms Audio Line Outputs Audio L R 2 Vrms 1 kilohms 0dB signal discs Audio Power Outputs Stereo Mode 30W 6 ohms at 1 kHz THD...

Отзывы: