background image

 SEECTOR User Manual


seector00.doc 27.04.00

26

The two buttons overrides the level control.

DIM lowers the level by a selectable level. This level is set in the user
menu.

MUTE completely cuts any audio on the output.

MUTE has priority over DIM.

6.3 Monitor selection panels

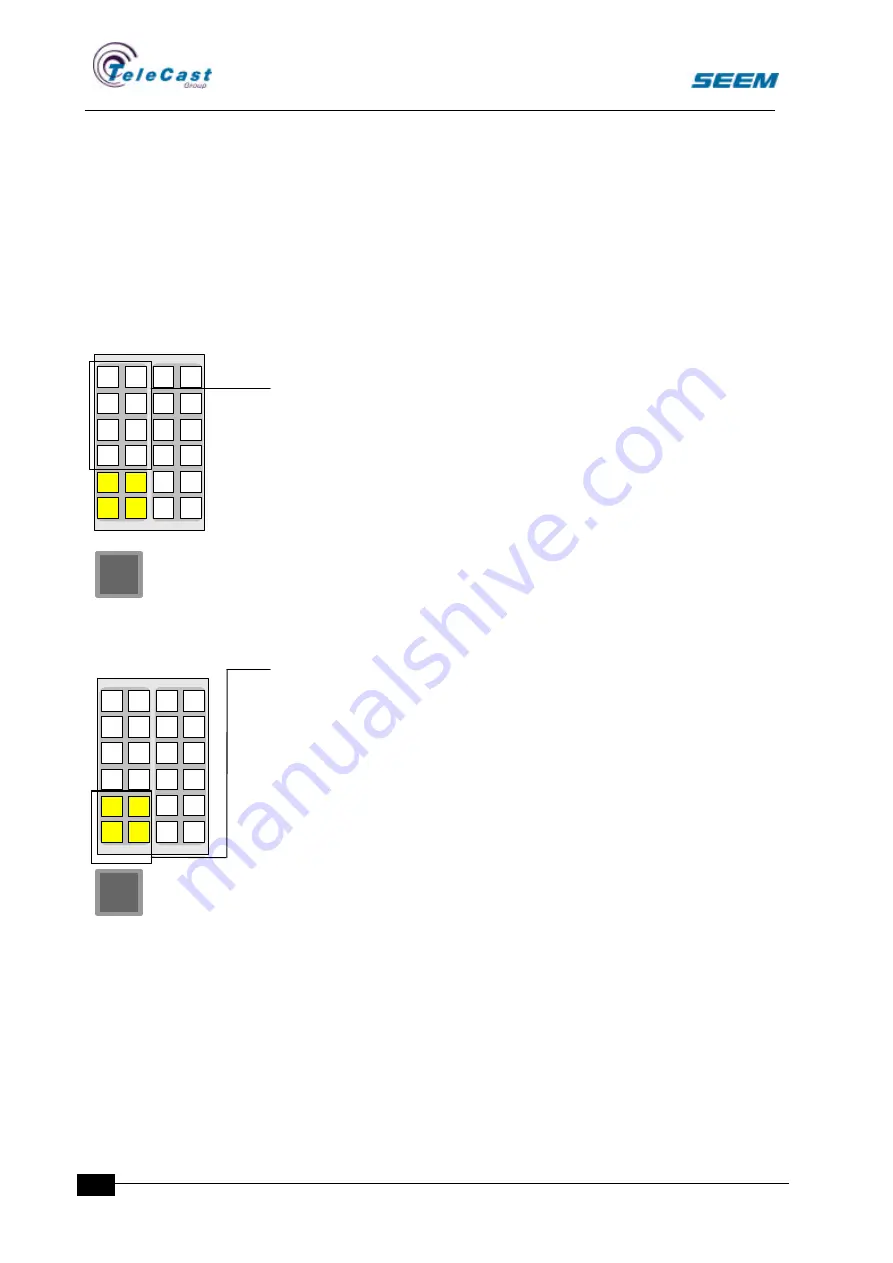
A number of separate switches give a possibility for fixed source
selections for the monitor for easier access to commonly used
sources. Each switch is labelled with a source name that is selected
when the switch is pressed. Only one source is available
simultaneously. A second push on the selected switch releases the
selection.

When no dedicated selection is made, the source in the monitor
source display is selected.

These switches are freely programmable, and can be assigned to any
monitor output as well as any valid monitoring source during
configuration.

6.4 Monitor function selectors

Separate switches gives extended monitoring facilities.

 Mono sum

 Mono sum to left speaker only

 Side changes

 Phase reverse

 Selection follows another monitor

 Speaker swap

These switches are freely programmable, and can be assigned to any
monitor during configuration.

6.5 Monitor options menu

The user menu has a monitor options section.

Several useful options are available for each monitor output
individually.

 Mute while OnAir

 Dim while OnAir

 Source Change while OnAir

 Dim while talkback

C

C

S4400

PHASE

SIDE

MONO

LEFT

MONO

7

8

5

6

3

4

1

2

11

12

9

10

7

8

5

6

3

4

1

2

S4400

PHASE

SIDE

MONO

LEFT

MONO

7

8

5

6

3

4

1

2

11

12

9

10

7

8

5

6

3

4

1

2

Содержание Seector

Страница 1: ...Digital Mixer User Surface USER MANUAL interstage Phistersvej 31 2900 Hellerup Danmark Telefon 3946 0000 fax 3946 0040 www interstage dk pro audio with a smile...

Страница 2: ...ued as a commitment of TeleCast Norge AS TeleCast Norge AS assumes no responsibility for any errors that may appear in this document No part of this document may be photocopied reproduced or transmitt...

Страница 3: ...GN PANEL 15 4 2 AUXILIARY PANEL 18 4 3 FILTER PANEL 19 4 4 EQUALISER PANEL 20 4 5 INSERT PANELS AND PROCESSES 21 4 6 DYNAMICS PANEL 22 5 STOPWATCH PANEL 24 6 MONITORING 25 6 1 GENERAL 25 6 2 MONITOR P...

Страница 4: ...This section explains some basic guidelines for understanding the Seector consoles 1 1 1 Block diagram The basic console functions are decided and customised during the configuration process All para...

Страница 5: ...e system concept Directly Primary Assigned Secondary Menu selection Tertiary Primary functions have a direct control through one finger operation Secondary functions are accessed on a central assign p...

Страница 6: ...ction that is indicated by the button illumination A long push is detected when the button is pressed down continuously for a longer period Programmable Approx 0 6s The long push activates a momentary...

Страница 7: ...guration is stored in the configuration files In this manual a C marks any section explaining configuration options 1 3 2 User set ups The user can alter the behaviour of the system by selecting diffe...

Страница 8: ...ns are built into the system All screen menus are placed in predefined positions to avoid any vital information to be obstructed Menus are never more than two levels deep Only one menu can be open at...

Страница 9: ...bar and overload Every meter has a title bar where the source name is written When the level exceeds a predefined level the meter presents an overload warning 2 1 2 Display window configuration The n...

Страница 10: ...s are indicated as icons reflecting the process status 2 2 2 Routing section The routing section displays the selected routing status for a source All available destinations are shown The routing syst...

Страница 11: ...user set up menu The date is also displayed The real time clock can run locally as a master or be synchronised from the audio rack 2 3 2 Status section The status section displays status for the contr...

Страница 12: ...ction User window configuration The available options for the user window are set at configuration stage 2 5 Pointing Device A pointing device is included to give easy access to the menus The pointing...

Страница 13: ...t double tap rapidly on the pad holding your finger down on the second tap To drag further than the surface simply lift your finger and reposition after reaching the edge of the pad 2 5 2 Other pointi...

Страница 14: ...controls The fader strips serve as control panels for both sources and destinations The distinction between input source and output destination panels is indicated by the character display 3 1 2 Contr...

Страница 15: ...stem or a preset changes the fader value to another position than the fader knob value Channel PPM All fader strips may have a separate PPM meter This is a lower quality meter with a range from 36dB t...

Страница 16: ...r Short push toggles PFL mode on and off When short pushes toggles PFL the indicator shows PFL status In the user set up menu several options can be selected for the cue switch PFL cut on open fader T...

Страница 17: ...displays If a source is occupied by another strip the colour is changed to passive in the screen list and the source is skipped on the panel when turning the rotary control If the channel is on air so...

Страница 18: ...minated Left switch Illuminated Right switch Illuminated 48V switch Microphone source only Illuminated coarse gain switch Microphone source only Illuminated Phase shift switch The gain rotary control...

Страница 19: ...uit If a dynamics section is not available or defined for the source the switch has no effect and the dynamics section is dark The block diagram gives the availability Pan Bal control Pan bal rotary c...

Страница 20: ...lled for an increased number of auxiliary send controls 4 2 2 Auxiliary send controls Level control rotary control Pan Bal control Pan Bal light bar Illuminated pre switch Illuminated on switch The au...

Страница 21: ...dow one of the auxiliary panels are selected For this panel any auxiliary can be connected to the panel rows Every panel row has its own selection window When an auxiliary is selected for a panel row...

Страница 22: ...ary control Frequency light bar Illuminated Q value switch The equaliser panel contains 4 similar sections If the main assign panel equaliser switch is inactive the complete equaliser panel is inactiv...

Страница 23: ...option opens the equaliser menu whenever an equaliser control is operated 4 5 Insert panels and processes 4 5 1 General To enhance the functionality of the channel extra processing can be inserted in...

Страница 24: ...nu A menu is available to make selection without dedicated panels 4 6 Dynamics panel 4 6 1 General All channels can have a compressor expander switched into the circuit Various algorithms with differe...

Страница 25: ...indicated on the hardware panel A field for each control shows the exact value A square area shows the input output relationship The axis are marked from 40dB to 0dB A dotted line marks the 1 1 functi...

Страница 26: ...ch timer Whenever the fader is on air the watch is running The start point is either 0 when counting upwards or the preset value when counting down When the timer reaches 0 it switches to upward count...

Страница 27: ...s Illuminated assign switch By using a short push on the assign switch the assign function becomes available Only source and destination selections are available and the rest of the assign panel is di...

Страница 28: ...he monitor source display is selected These switches are freely programmable and can be assigned to any monitor output as well as any valid monitoring source during configuration 6 4 Monitor function...

Страница 29: ...d source whenever the monitor is on air This is useful when a mix minus studio is created for the studio speakers This selection can also be used in conjunction with dim while OnAir Dim while talkback...

Страница 30: ...mes that talkback to this destination is allowed in the configuration 7 1 2 Talkback on source CUE switches When the CUE switch is pressed the console checks the source properties to find a link to an...

Страница 31: ...witch enables or disables the complete autoassign function When the function is enabled the following switches can be set to perform autoassign ON switch is activated CUE switch is activated SOLO swit...

Страница 32: ...t 12 or 24 hour display mode for real time clock 8 1 7 User area options This menu is not yet available 8 1 8 Other options Auto menu opening Enables opening of assign window menus when related contro...

Страница 33: ...l All parameters defined in the user set up as well as actual settings of switches and encoders can be stored in snapshot set ups on a diskette The preset memory panel is used for storing and loading...

Страница 34: ...not be changed until they are closed 8 2 3 More fixed presets More presets can be available with an additional switch panel These switches are freely programmable and can be set to wrk as preset swit...

Страница 35: ...so external talkback signals are available All signal inputs and outputs are part of the configuration The audio rack manual gives details about different remote control formats available 9 2 Studio m...

Страница 36: ...tion menu are not part of the user setups These settings are of a more fixed nature 10 1 1 Password The configuration menu is password protected For password please contact system administrator inters...

Отзывы: