background image

15

OPTIONAL ANTI-ROTATION FEATURE

Deck-Mount Models: EC-3100 & EC-3102 

(Figure 2G)

Note: The anti-rotation feature uses a pin to anchor the faucet in position and is intended for use ONLY 
on stainless steel sinks.

Use the mounting hole diagram or the faucet base gasket as a template by placing it in position 
over the faucet mounting hole. Mark the stainless steel mounting surface at the center of the 
small hole at the bottom of the base gasket. Drill a 5/32” (4 mm) diameter hole through the 
stainless steel mounting surface. Install the faucet aligning the pin with the small hole.  Assemble 
the washer and nut to secure the faucet in place.

Note: The pin can be removed with pliers if not needed.

CARACTERÍSTICA OPCIONAL PARA EVITAR LA ROTACIÓN

Modelos de montaje sobre cubierta: EC-3100 y EC-3102 

(Figura 2G)

Nota: La característica para evitar la rotación cuenta con un tornillo de ajuste para fi jar el grifo en posición y 
está diseñado para usarse ÚNICAMENTE en lavabos de acero inoxidable.

ES

EN

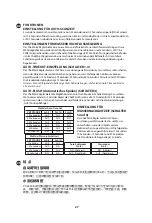
OPTIONALER VERDREHSCHUTZ

Modell Wandbefestigung: EC-3101 

(Abbildung 2F)

Hinweis: Der Verdrehschutz erfolgt über eine Stellschraube, um die Armatur in vertikaler Position zu verankern 
und ist AUSSCHLIESSLICH für die Verwendung mit Edelstahlspülen vorgesehen.

Nutzen Sie das Montagelochbild oder die Fußdichtung der Armatur als Vorlage, durch dessen 
Platzierung auf dem Armaturen-Montageloch. Markieren Sie die Edelstahlbefestigungsfl äche in der 
Mitte der kleinen Kerbe an der Unterseite der Fußdichtung. Bohren Sie ein Loch mit 7,14 mm (9/32”) 
Durchmesser in die Edelstahlbefestigungsfl äche. Verlängern Sie die 1/4-20 Stellschraube an der 
Rückseite des Armaturenkörpers durch Lösen der Schraube (gegen den Uhrzeigersinn) mit einem 1/8” 
Innensechskantschlüssel. Lösen Sie die Schraube weit genug, sodass sie über die Fußdichtung hinaus 
und in die 7,14 mm Bohrung hineinragt. Die Unterlegscheibe und Mutter anbringen, um die Armatur 
sicher zu befestigen.

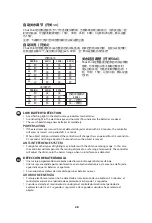
可选配的防转特点

墙式型号:EC-3101 

(图2F)

注意:带防转特点的龙头用一个螺钉将龙头固定在垂直位置,只适用于不锈钢水槽。
使用安装孔图或者龙头底座衬垫作为模板,将其放在水龙头安装孔上方的位置。在不锈

钢安装面的底座衬垫上的小凹槽中央坐上标记。穿过不锈钢安装面,钻一个直径为9/32”

(7.14mm)的孔。用1/8”的六角套筒扳手(逆时针方向)拧开在龙头本体后方的1/4-20的

固定螺钉,将其拧松足够长,使其伸长穿过底座衬垫,进入钻好的9/32”的孔内。装好垫圈

和螺母,确保龙头固定在适当的位置。

DE

CN

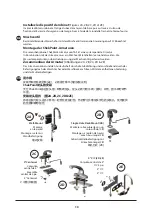
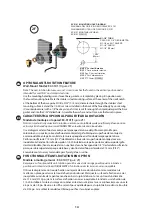
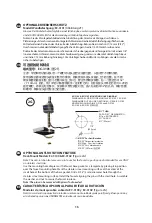
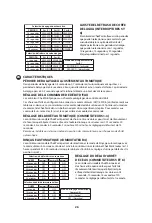
EC-3100 & EC-3102 MOUNTING HOLE DIAGRAM

DIAGRAMA DEL ORIFICIO DE MONTAJE EC-3100 Y EC-3102
DIAGRAMME DU TROU DE FIXATION EC-3100 & EC-3102
MONTAGELOCHBILD für EC-3100 und EC-3102
EC-3100 & EC-3102 

安装孔径

Ø1” THRU

Ø5/32” For Anti-Rotation

Ø5/32” Para evitar la rotación
Ø5/32 po. Pour l’anti-rotation
Ø5/32” Für Verdrehschutz
Ø5/32” (3.97mm) 

定位销

2G

Ø1” THRU

PASO DE 1” DE DIÁMETRO
Ø1 po. EN TRAVERS
Ø1” DURCH
Ø1” 

(25mm)

7/8”

(22.2mm)

Содержание ChekPoint EC-3102-HG

Страница 1: ...ach of Contract which might arise is hereby excluded and disclaimed Any implied warranties of merchantability or fitness for a particular purpose are limited to three years in duration Under no circum...

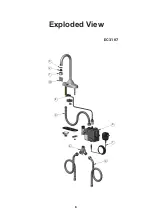
Страница 2: ...2 Exploded View EC 3100 4 8 6 7 9 5 3 2 1 10...

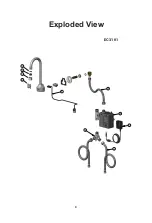
Страница 3: ...3 Exploded View EC 3101 4 8 6 7 9 5 3 2 1 10...

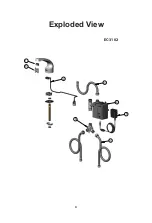
Страница 4: ...4 2 6 5 7 3 4 1 8 Exploded View EC 3102...

Страница 5: ...5 Exploded View EC 3103 2 6 5 7 3 4 1 8...

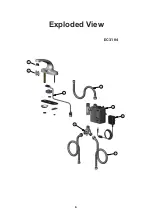
Страница 6: ...6 Exploded View EC 3104 2 6 5 7 3 4 1 8...

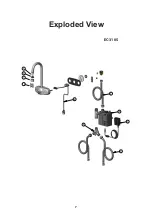
Страница 7: ...7 Exploded View EC 3105 4 8 6 7 9 5 3 2 1 10...

Страница 8: ...8 Exploded View EC 3107...

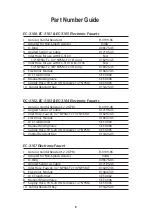
Страница 9: ...C 3102 EC 3103 EC 3104 Electronic Faucets 1 Aerator Vandal Resistant 2 2 GPM B 0199 08 2 Angled Sensor w Cable 017195 45 3 Inlet Hose Faucet 1 2 NPSM F x 1 4 NPSM F 016297 45 4 Electronic Module 01664...

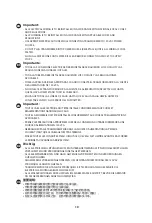
Страница 10: ...EL GRIFO A LOS PAROS DEL SUMINISTRO Important TOUT LE C BLAGE LECTRIQUE DOIT TRE INSTALL CONFORM MENT AUX CODES ET R GLEMENTATIONS NATIONAUX LOCAUX TOUTE LA PLOMBERIE DOIT TRE INSTALL E CONFORM MENT A...

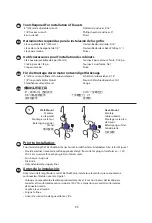
Страница 11: ...or Installation of Faucets 8 200mm adjustable wrench Slotted screwdriver 3 16 1 8 hex key wrench Phillips head screwdriver 1 Basin wrench Pliers Herramientas requeridas para la instalaci n de los grif...

Страница 12: ...se y despu s a trav s del orificio d Mitigeur Lors de l installation du robinet avec la vanne m langeuse les instructions de la page 15 doivent tre respect es Installation des robinets de la s rie Che...

Страница 13: ...Die Wassertemperatur kann ber die Anpassung des Mischventils gesteuert werden Zusammenbau der Armatur Abbildungen 2A 2B 2C 2D 2E Das Armaturenkabel und den Auslaufschaft durch die Fu dichtung und ans...

Страница 14: ...inoxidable Extienda el tornillo de sujeci n 1 4 20 instalado en la parte posterior del cuerpo del grifo desatornill ndolo hacia la izquierda con una llave de cu a hexagonal de 1 8 Destornille lo sufic...

Страница 15: ...rfolgt bereineStellschraube umdieArmaturinvertikalerPositionzuverankern undistAUSSCHLIESSLICHf rdieVerwendungmitEdelstahlsp lenvorgesehen Nutzen Sie das Montagelochbild oder die Fu dichtung der Armatu...

Страница 16: ...und EC 3102 Abbildung 2G Hinweis DerVerdrehschutzerfolgt bereinenBolzen umdieArmaturinPositionzuverankernundistAUS SCHLIESSLICHf rdieVerwendungmitEdelstahlsp lenvorgesehen Nutzen Sie das Montagelochb...

Страница 17: ...or debe suministrar las llaves de paso o comprarlas conT S Purgue cualquier residuo de las l neas de suministro Ajuste las juntas de compresi n de forma segura en las l neas de suministro Fixez le mod...

Страница 18: ...te la junta de compresi n en las l neas de suministro pero sin apretar en exceso Branchements du c ble du capteur et de la conduite d arriv e d eau Figures 4 et 4A Acheminez le c ble du capteur depuis...

Страница 19: ...le until all wiring has been completed This type of Transformer is designed to be plugged into a 120 VAC wall receptacle The Transformer is supplied with a 6 foot Cable Remove the rubber plug from the...

Страница 20: ...capteur est sauvegard e et revient au dernier r glage lorsque l alimentation lectrique est r tablie Remarque Pour l option d alimentation du l Hydro Generator EC HYDROGEN consultez le manuel d utilisa...

Страница 21: ...sed in conjunction with the optional AC adapter the faucet will automatically switch to AC power and conserve its battery power Fresh alkaline batteries should last 450 000 on off cycles CONFIGURACI N...

Страница 22: ...nc le bouton marche arr t l eau s coule Apr s avoir maintenu le bouton pendant 5 7 secondes l eau cesse de couler et la DEL rouge de la lentille du capteur devient fixe 4 Rel chez le bouton marche arr...

Страница 23: ...schlie end ausgehen um anzuzeigen dass der Erfassungsabstand NICHT ge ndert wurde BETRIEB 1 Halten Sie Ihre H nde unter den Auslauf Das Wasser wird so lange flie en wie sich die H nde des Benutzers in...

Страница 24: ...be proteger el grifo para evitar que le salpique limpiador Los cidos y los l quidos de limpieza decolorar n o remover n la cubierta de cromo No use produc tos qu micos limpiadores o abrasivos en el le...

Страница 25: ...ente al sensor AJUSTES DEL CONTROL DEL FLUJO DE AGUA Los controladores ChekPoint ofrecen opciones de ajustes preestablecidos para el control del flujo Estas opciones se obtienen mediante la configurac...

Страница 26: ...nt rieur du module de commande ChekPoint dans un bo tier noir pr s du compartiment de piles Pour acc der aux commutateurs retirez les 4 vis et le capot arri re du module de commande R GLAGE DE L ARR T...

Страница 27: ...n Die Standardeinstellung betr gt 15 Sekunden Hinweis Die nachfolgende Tabelle zeigt die Schalterstellungen die f r jeden Auto Timeout Modus erforderlich sind AUTO FLUSH Automatisches Sp len SCHALTER...

Страница 28: ...RENCE SYSTEM Sunlight or other types of lighting may interfere with the distance sensing range In this case the controller will compensate the sensing distance to a safe range temporarily The controll...

Страница 29: ...ge peuvent interf rer avec la plage de d tec tion distance Dans ce cas le contr leur compense la distance de d tection en la ramenant une plage de s curit temporaire Le contr leur ajuste la distance c...

Страница 30: ...impie con un pa o suave P Por qu no se corta el suministro de agua despu s de retirar las manos y colocarlas lejos del ojo electr nico R El rango del sensor podr a ser muy largo El usuario tendr que a...

Страница 31: ...n electronic eye POSSIBLE CAUSE SOLUTION If red LED stays on or is flashing 1 Replace batteries and or make sure trans former is plugged in 2 If appropriate action from no 1 does not correct problem S...

Страница 32: ...cies muy reflejantes luz solar etc 1 Residuos en la v lvula de solenoide no cierra apropiadamente 2 El m dulo de control est averiado cam bie el m dulo de control Flujo escaso o lento Activaci n en fa...

Страница 33: ...her dass derTransformator eingesteckt ist 2 Falls die erforderliche Ma nahme Nr 1 das Problem nicht behebt Sensorbereich zu lang Waschbecken wird wahrgenommen Bereich reduzieren Sensor ist fehlerhaft...

Страница 34: ...34 LED LED 1 2 1 1 2 3 1 1 2 CN...

Страница 35: ...Travelers Rest SC 29690 De Veenhoeve Phone 864 834 4102 Oude Nieuwveenseweg 84 Fax 864 834 3518 2441 CW Nieuwveen E mail tsbrass tsbrass com The Netherlands EC 3130 ChekPoint Above Deck Electronic Fau...

Отзывы: