background image

TABLE OF CONTENTS 

Brief description......................................................................................... 6


TeleAlarm

®

 S12.......................................................................................6


Methods of transmitting your call for help ..................................................7


Automatic monitoring...............................................................................8


Overview .................................................................................................. 9


TeleAlarm

®

 S12.......................................................................................9


Wrist transmitter S37..............................................................................10


Further available accessories ..................................................................10


Installation .............................................................................................. 11


Positioning the TeleAlarm

®

 S12...............................................................11


Installation on a piece of furniture........................................................11


Wall mounting ...................................................................................11


Connecting the TeleAlarm

®

 S12..............................................................11


AC adaptor .......................................................................................11


Telephone network cord .....................................................................12


Telephone connection cord.................................................................12


Getting started ........................................................................................ 12


Initial use ..............................................................................................12


Operation............................................................................................... 16


Triggering a call for help ........................................................................16


The pre-alarm .......................................................................................16


Contacting a private individual ...............................................................16


Cancelling the call for help.....................................................................16


Receiving alarms via telephone ...............................................................17


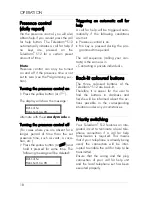
Presence control (daily report).................................................................18


Turning the presence control on ..........................................................18


Turning the presence control off ..........................................................18


Triggering an automatic call for help ...................................................18


Back-lit coloured buttons........................................................................18


Priority switching ....................................................................................18


Taking phone calls through the transmitter...............................................19


Locking the keyboard .............................................................................19


Automatic monitoring............................................................................... 20


Ready mode..........................................................................................20


Signals of the LCD display ......................................................................20


Signals of the LED indicator ....................................................................21


Loudspeaker signals...............................................................................21


Содержание TeleAlarm S12

Страница 1: ...TeleAlarm S12 User Guide ...

Страница 2: ......

Страница 3: ...wisscom reserves the right to make changes in the information contained in this document at any time without prior notice Great care has been given to the contents of this document however Swisscom cannot be held liable for the con sequences of any errors or omissions contained herein or for consequential or incidental damages incurred as a result of acting on information contained in the document...

Страница 4: ...nnection cord 12 Getting started 12 Initial use 12 Operation 16 Triggering a call for help 16 The pre alarm 16 Contacting a private individual 16 Cancelling the call for help 16 Receiving alarms via telephone 17 Presence control daily report 18 Turning the presence control on 18 Turning the presence control off 18 Triggering an automatic call for help 18 Back lit coloured buttons 18 Priority switc...

Страница 5: ...nation 30 Programming the Prealarm period and Prealarm sound signal 31 Programming the prealarm stop 32 Checking the system and troubleshooting 34 Checking the radio range 34 Periodical alarm transmission test 35 After programming alarm transmission test 35 Warnings and conditions 36 Important safety instructions 36 Battery maintenance instructions 36 Disposal of the batteries 37 Environmental imp...

Страница 6: ...hands free com munication Your contact can assess your situation precisely and provide you with the specific help you need The display gives current informa tion about the actions carried out by the TeleAlarm S12 The TeleAlarm S12 also offers addi tional features to make your tele phone easier to use You can receive incoming telephone calls via the radio transmitter with out having to go to the te...

Страница 7: ...ers answers the call for help is lost The user should then press his wrist transmitter S37 again to trigger a new call for help Methods of transmitting your call for help The TeleAlarm S12 can contact Private individuals neighbours relatives nurses etc Monitoring centres You can choose people you know neighbours relatives friends etc or medical services which are active in the area to receive your...

Страница 8: ... for about 120 hours The radio transmitter uses a lithium battery that can handle more than 3 000 transmissions The power supply and telephone line the TeleAlarm S12 backup battery and the wrist transmitter battery are monitored If there is a loss of power or if one of the batteries runs low the failure mes sage will be shown on the TeleAlarm S12 display This informa tion can be relayed to a monit...

Страница 9: ...button for help call Loudspeaker Green reset button Microphone Programming keyboard LED indicator LCD display Yellow button 10V AC plug AC adaptor input jack T T Telephone cord socket LINE ON OFF switch Series No ID label Wall mountings Telephone connector socket ...

Страница 10: ...ist transmitter S37 AC adaptor Telephone network cord Telephone connection cord Instruction manual this manual Further available accesso ries For your TeleAlarm S12 other acces sories can be supplied Please contact your Swisscom dealer for further de tails For example Additional wrist transmitters S37 Clip for wrist transmitter S37 LED indicator Call for help button ...

Страница 11: ...placed inside the chan nels on the bottom of the TeleAlarm S12 Connecting the TeleAlarm S12 AC adaptor Connect the TeleAlarm S12 to the 230V household current Insert the AC adaptor into the AC adaptor input jack 10V AC of the TeleAlarm S12 and plug the AC adaptor into a 230V outlet For safety reasons we recommend that you use an outlet in close proximity to the TeleAlarm S12 unit The AC adaptor sh...

Страница 12: ... the initial programming of the unit with default factory settings without centre pro gramming For future or additional programming operations please refer to PROGRAMMATION section Turn the ON OFF switch on the bottom side of TeleAlarm S12 to the ON position After the unit has been turned on the TeleAlarm S12 will prompt you to se lect a language to program an alarm recipient a radio transmitter a...

Страница 13: ...arm S12 the telephone numbers of hospitals doctors etc may not be programmed without get ting permission to do so first Note At least one telephone number must be registered If several telephone numbers are entered please proceed afterwards to the section Program ming an alarm recipient Phone Nr 0123456789 Use to delete an entry if you have made a mistake or confirm your selection by pressing The ...

Страница 14: ...e 39 Generic silent Alm Confirm by pressing the key The following display will temporarily ap pear Transmitter Stored then OK Program Confirm your selection by pressing The display will show the message Talk after BEEP Wait until the countdown has reached 0 and then start to speak after the beep tone to record the desired message Sample of a recorded voice message This is a TeleAlarm call for help...

Страница 15: ... battery is dead loss of power telephone line is unplugged etc The TeleAlarm S12 can be pro grammed for silent dialling so that an alarm can be transmitted without any sound from the unit This includes si lent dialling and silent communication voice channel from the TeleAlarm S12 to the receiver Note When the silent alarm mode is active you can switch to the normal alarm mode by pressing twice key...

Страница 16: ...arm S12 press the green button If the TeleAlarm S12 has been programmed correspondingly see page 28 you can also cancel the call for help by pressing again the red button of your radio transmitter after the red LED has turned off Contacting a private indi vidual If the pre alarm period has expired the LED indicator will change to a con tinuous red signal and the call for help unit will call the al...

Страница 17: ...own He she ends the call and acknowl edges the call for help by pressing the key zero 0 Then he she will hang up again He she will do whatever is possible to help as quickly as possible Telephone key Action on the TeleAlarm S12 0 Interrupts the connec tion 1 Turns the volume down 3 Turns the volume up 4 For Assistance Alarms Answers the call Extends the conversa tion time by 3 minutes Returns to h...

Страница 18: ...vity Monitoring ON ª Triggering an automatic call for help A call for help will be triggered auto matically if the following conditions are met Presence control is on No key is pressed during the pro grammed time period The call sequence calling your con tacts is the same as in Contacting a private individual Back lit coloured buttons The three coloured buttons of the TeleAlarm S12 are back lit Th...

Страница 19: ...y Incoming Call X Press the call for help button on the assigned radio transmitter The TeleAlarm S12 now enables you to speak to the calling person in a hands free communication Locking the keyboard The programming keyboard can be locked to prevent that a key is pressed by mistake Briefly press the key and then the key to lock or unlock the keyboard The symbol for the locked keyboard will appear o...

Страница 20: ...s in the event of failures t and or special modes and uses the integrated LCD display the LED indicator and the loudspeaker to this end Signals of the LCD display Examples of a failure Main power Error The following table shows the com plete list of the symbols on the LCD display Symbols of the operating mode ª Presence control activated Programming keyboard locked Status of the backup battery Sym...

Страница 21: ...llowing table via a sequence of sound signals Event Tone At the start up i X f i h v At a hardware failure or in the programming mode as warn ing beep tone V ÕU U Immediately prior to the pre alarm sound signal T V Y Pre alarm sound signal ring ing x Pre alarm sound signal two tone siren f i f i f i TeleAlarm S12 identification f i h At the end of the alarm Y V T r At a telephone line fault con ti...

Страница 22: ...d the TeleAlarm S12 will leave the pro gramming mode and return to the ready mode To leave the programming mode at once press the key delete key several times until the display shows S12 is ready you are now in the ready mode The above message will be shown on the display screen either on a con tinuous basis or alternating with warn ing messages if technical problems are detected backup battery is...

Страница 23: ...confirm that you wish to save the new radio transmitter in position 2 The display will show the message Press Radio Button Press the alarm key on your radio transmitter key on your wrist trans mitter S37 Programming a silent alarm When the transmitter code is ac cepted the following display will tem porarily appear Transmitter code accepted The TeleAlarm S12 will invite you to assign an alarm type...

Страница 24: ...ient To receive a call for help from the TeleAlarm S12 the alarm recipient s telephone number must be pro grammed in the unit Up to 8 recipients can be pro grammed in the TeleAlarm S12 Each recipient is identified via his tele phone number which is programmed in a storage position In the event of an alarm the telephone numbers are called one after the other until one of the recipients acknowledges...

Страница 25: ...ill show the message Phone Nr 0691234566 Use to delete an entry if you have made a mistake or confirm your selection by pressing The display will show the message Destination stored and then OK Program 0 Erase Info Your TeleAlarm S12 is now ready to program another alarm recipient Use to proceed without chang ing the preset values Press delete key to end the programming and to return to the ready ...

Страница 26: ...son called to know who you are and how you can be reached Sample of a recorded voice message This is a TeleAlarm call for help from Mr Walter press key four 4 on your telephone or call me back on 012 345 67 89 This section describes how to program voice messages for this call for help system Press programming key for voice messages on the program ming keyboard The display will show the message OK ...

Страница 27: ...delete key to end the programming and to return to the ready mode The display will show the message S12 is ready Programming general pa rameters The operation of the TeleAlarm S12 depends on the values of general pa rameters These are set to standard values dur ing the production they can however be changed to adapt the TeleA larm S12 to the users specific needs The following table contains the pa...

Страница 28: ...The display will show one of those messages Language 0 Deutsch or Language 1 Francais or Language 2 Italiano or Language 3 English Select the language using the keys and Up and down Press to confirm the respective language The display will show the message Parameter Stored and then Parameter Nr 00 Language Your TeleAlarm S12 is now ready to program further parameters Press the key delete key twice...

Страница 29: ...nguage Enter 02 via the programming key board to edit the daily report Note You can also move the list up and down using and up and down The display will show the message Parameter Nr 02 Passive Alarm Press to confirm this selection The display will show the message Passive Alarm Value 00 hr Note The time period can be set from 0 to 99 hours Enter for example 24 via the pro gramming keyboard and p...

Страница 30: ... selection The display will show the message Button Lights 1 ON Enter 0 via the programming key board The display will show the message Button Lights OFF Press to confirm this The display will show the message Parameter Stored and then Parameter Nr 23 Button Lights Your TeleAlarm S12 is now ready to program further parameters Press the key delete key twice to end the programming and to re turn to ...

Страница 31: ...lso move the list up and down using and up and down The display will show the message Parameter Nr 24 Prealarm Time Press to edit this parameter The display will show the message Prealarm Time Value 010 s Enter the new duration 6 or 006 example for 6 seconds via the programming keyboard and press to confirm this The display will show the message Parameter Stored and then Parameter Nr 24 Prealarm T...

Страница 32: ...dy mode The display will show the message S12 is ready Programming the prealarm stop Stopping a call for help via the trans mitter during the prealarm period Press programming key for pa rameters on the programming key board The display will show the message OK Program Info Press to edit the parameter val ues The display will show the message Parameter Nr 00 Language Enter 29 via the programming k...

Страница 33: ...rm this The display will show the message Parameter Stored and then Parameter Nr 29 Prealarm Stop Your TeleAlarm S12 is now ready to program further parameters Press delete key twice to end the programming and to return to the ready mode The display will show the message S12 is ready ...

Страница 34: ...TeleAlarm S12 Press quickly three times on the programming keyboard to enter the secure mode The TeleAlarm S12 will prompt you to enter a 6 digit code which corre sponds to the secured function you wish to use Enter code Enter the following code 194159 The LCD display will confirm that you have started a radio range check Radio Range Check The TeleAlarm S12 will generate a loud beep whenever a reg...

Страница 35: ...r after any change of programmed parameters it is specially recommended to perform a transmission test to each alarm recipi ent in order to ensure that it is re ceived correctly To check the programming each contact can be called individually The TeleAlarm S12 will then carry out this call only Press the call for help button of the wrist transmitter S37 or the red key of the TeleAlarm S12 Select o...

Страница 36: ...sources or di rect sun light Avoid excess dust and mechanical shock Occasionally wipe off your TeleA larm S12 with a dry cloth Avoid cleaning agents Battery maintenance in structions Charge your battery completely over 24 hours before using your TeleAlarm S12 for the first time after having replaced the battery or after a longer power interruption The battery will charge correctly in a temperature...

Страница 37: ...ed personnel only Dispose of used batteries according to Instructions and regulations Environmental impact At the end of its working life this device must not under any circumstances be disposed of as normal waste It must be taken to a reseller or central collec tion point for electronic and electrical devices in accordance with the Swiss Ordinance on the Return Taking Back and Disposal of Electri...

Страница 38: ...t deployment are free of charge Purchased units The repair services are carried out free of charge within the warranty period pursuant to the provisions of the war ranty certificate 1 If a repair must be carried out the unit must be returned to the point of purchase If the fault clearing service is required even dur ing the warranty period the fault de ployment will be charged distance lump sum as...

Страница 39: ......

Страница 40: ...en 10 2010 ...

Отзывы: