Vista 9 Digital Mixing System
5-8 Au
Date printed: 28.0.0
SW V4.5
5.8.4
Auto Punch-in/out
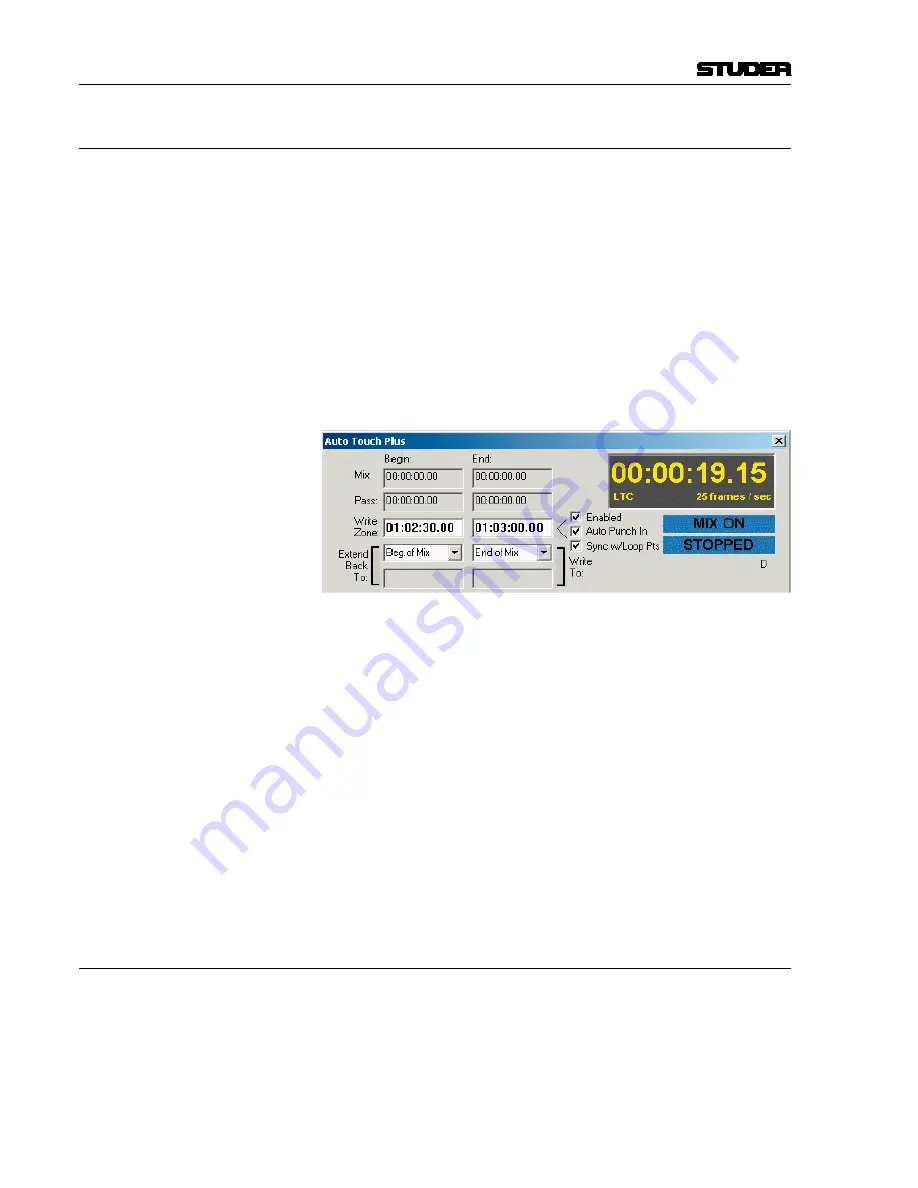
Automatic punch-in/punch-out is controlled via the Au window of
the GC.
Write Zone
To set up an Auto Punch-in/Out, a ‘Write Zone’ with a ‘Begin’ and ‘End’
time must first be established. These will be the In and Out point for the
Auto Punch-in. The times displayed were the last In and Out times used by
the system. Direct entry of Begin and End times is possible once the Write
Zone is enabled. Refer to
chapter 5.8.3
for details.
Auto Punch-in
To activate the Auto Punch-in feature, the Write Zone must first be enabled,
which is done by checking the ‘Enable’ box next to the End time field. Once
the Write Zone is enabled, it is then possible to enable the Auto Punch-in
facility. This is accomplished by checking the ‘Auto PUNCH-IN’ box located
below the Write Zone Enable box.
Performing the Punch
Once Auto Punch-In is enabled and the desired controls are enabled, play back
timecode (media). During the pre-roll before the Begin Time, the affected
controls will act as if in RECORD ENABLE, but will not punch-in until the
Write Zone Begin time.
At the Begin time, the system will automatically punch-in and the any enabled
controls will change to RECORD. Recording will continue until the End time
is reached, where the controls are automatically punched out.
Notes
It is possible to punch-out any individual control at any time within the Write
Zone using the
AUTO MODE
key. Global punch-outs may also take place be-
fore the end of the Write zone. It is not possible to punch-in before the Begin
time or after the End time when the Write Zone is enabled.
Glide functions may be used with Auto Punch-In/Out. Since changes to the
Read Mix are prohibited after the Write Zone End time, the Backtime Glide
function must be used if Auto Punch-out is used.
5.8.5
Auto GPi in/out
Global Punch-Ins and Punch-Outs can also be done via the GPI input. This
will basically make the Punch-In and Punch-Out key available to external
systems or external keys.
If such functionality is required, the
Signaling.ini
file needs to be adapted
accordingly. Please contact Studer Service & Support to do the necessary
changes in that file.
Содержание Vista 9
Страница 18: ...Vista 9 Digital Mixing System 1 Introduction Date printed 26 10 10 SW V4 5...
Страница 42: ...2 Desk Operation Vista 9 Digital Mixing System Date printed 27 10 10 SW V4 5...
Страница 90: ...Vista 9 Digital Mixing System 3 Parameters Date printed 27 10 10 SW V4 5...
Страница 140: ...Vista 9 Digital Mixing System 3 52 Parameters Date printed 27 10 10 SW V4 5...
Страница 298: ...Vista 9 Digital Mixing System 5 AutoTouch Date printed 28 10 10 SW V4 5...
Страница 460: ...Vista 9 Digital Mixing System 6 Session Configuration Date printed 28 10 10 SW V4 5...
Страница 506: ...Vista 9 Digital Mixing System 7 DAW Control Date printed 29 10 10 SW V4 5...
Страница 513: ...Vista 9 Digital Mixing System DAW Control 7 Date printed 29 10 10 SW V4 5...
Страница 517: ...Vista 9 Digital Mixing System DAW Control 7 13 Date printed 29 10 10 SW V4 5...
Страница 524: ...Vista 9 Digital Mixing System 8 RELINK Date printed 29 10 10 SW V4 5...
Страница 542: ...Vista 9 Digital Mixing System 8 20 RELINK Date printed 29 10 10 SW V4 5...
Страница 543: ...Studer SCore Live For Vista and OnAir 3000 Systems Operating Instructions October 2010 6th Edition...
Страница 546: ...SCore Live SCore Live Date printed 28 10 10...
Страница 568: ...SCore Live 24 SCore Live Date printed 28 10 10...
Страница 570: ...Vista Digital Mixing System 10 Application Notes Update Date printed 28 10 10 SW V4 5...


