CP190i and CPF190i
Page 95
NOTE(*)
When an empty level is entered, the message “No cartographic coverage” is shown on a window
in a corner of the chart display. The warning message is always displayed as long as the current
zoom has no data coverage.
12.0.11
Underwater Objects Settings
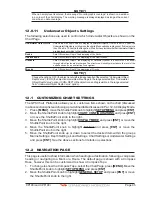
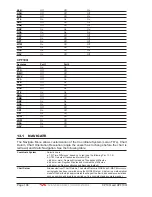
The following selections are used to control which Underwater Objects are shown on the
Chart Page.
Underwater Object Limit
: Selects the max depth value to display Underwater Objects. If value is set to 0 Feet, the
Underwater Objects are not shown on the charts. Menu options are grayed out. If value is more
than 0 Feet (i.e. 10 Feet), in the Range from 0 Feet to the selected value the Underwater Objects
are displayed according to their setting below.
Rocks
:
Sets Off/Icon/Icon+Depth* the displaying of the Rocks.
Obstructions
:
Sets Off/Icon/Icon+Depth* the displaying of the Obstructions.
Diffusers
:
Sets Off/Icon/Icon+Depth* the displaying of Diffusers (Diffuser is a structure on an outfall
through which liquids are discharged. The structure will usually project above the level of the
outfall and can be an obstruction to navigation).
Wrecks
:
Sets Off/Icon/Icon+Depth* the displaying of Wrecks.
NOTE(*)
Choose the options: OFF (the object is not visible independently of the selected “Underwater Object
Depth Value”); ICON (the object icon is visible without tags, in the range selected from “Underwater
Object Depth Value” option); ICON+DEPTH (the object icon and tag is visible, in the range selected
from “Underwater Object Depth Value” option).
12.1 CUSTOMIZING CHART SETTINGS
The GPS Chart Plotter also allows you to customize items shown on the chart (discussed
in above sections) instead of using a pre-defined table discussed in Par. 12.0.4 Display Mode.
1. Press
[MENU]
, move the ShuttlePoint knob to highlight
SETUP MENU
and press
[ENT]
.
2. Move the ShuttlePoint knob to highlight
CHART CONFIGURATIONS
and press
[ENT]
or move the ShuttlePoint knob to the right.
3. Move the ShuttlePoint knob to highlight
DISPLAY MODE
and press
[ENT]
or move the
ShuttlePoint knob to the right.
4. Move the ShuttlePoint knob to highlight
Custom
and press
[ENT]
or move the
ShuttlePoint knob to the right.
5. Move the ShuttlePoint knob up or down to select the desired item within the groups
Marine Settings, Depth Settings, Land Settings, Chart Settings or Underwater Settings
and press
[ENT]
. See the above sections for details on selections.
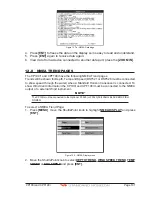
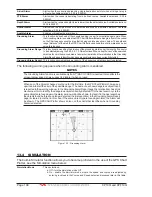
12.2 NAVIGATION PAGE
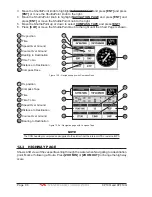
This page is useful to show information when heading to a destination, following a compassa
heading or navigating to a Mark or a Route. The default page is shown with a Compass
Rose, however this can be customized to show a Compass Tape.
1. To change to show the Compass Tape, select the Chart Page, press
[MENU]
. Move the
ShuttlePoint knob to highlight
SETUP MENU
and press
[ENT]
.
2. Move the ShuttlePoint knob to highlight
GENERAL SETUP
and press
[ENT]
or move
the ShuttlePoint knob to the right.
Содержание CP190i
Страница 1: ......
Страница 2: ...Owner s Manual CP190i GPS Chart Plotters CPF190i GPS Chart Plotters Fish Finder CPF190i CP190i ...
Страница 5: ...Page 6 CP190i and CPF190i ...
Страница 11: ...Page 12 CP190i and CPF190i 21 APPENDIX TERMS 147 ANALYTICALINDEX 151 ...
Страница 15: ...Page 16 CP190i and CPF190i ...
Страница 49: ...Page 50 CP190i and CPF190i ...
Страница 63: ...Page 64 CP190i and CPF190i ...
Страница 71: ...Page 72 CP190i and CPF190i ...
Страница 83: ...Page 84 CP190i and CPF190i ...
Страница 103: ...Page 104 CP190i and CPF190i ...
Страница 109: ...Page 110 CP190i and CPF190i ...
Страница 137: ...Page 138 CP190i and CPF190i ...
Страница 139: ...Page 140 CP190i and CPF190i ...
Страница 145: ...Page 146 CP190i and CPF190i ...
Страница 149: ...Page 150 CP190i and CPF190i ...
Страница 160: ......

