26
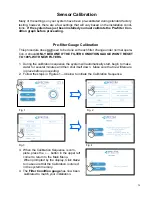
3. When the Calibration Sequence is com-
plete, press the
button in the upper left
corner to return to the Main Menu.
When prompted by the display, Click Save
to make sure that the Calibration is stored
in the system memory.
4. The
Filter Condition gauge
has now been
calibrated to match your installation.
1. During the calibration sequence the system will automatically start, begin to make
water for several minutes and then shut itself down.
Make sure that new filters are
in place before proceeding.
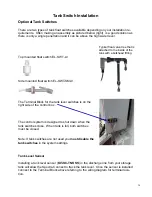
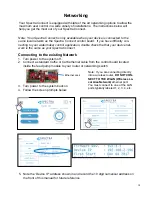
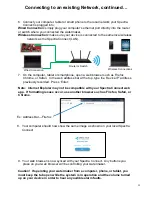
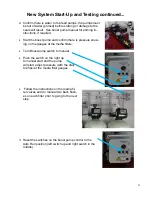
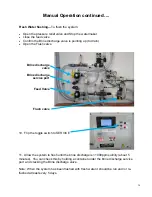
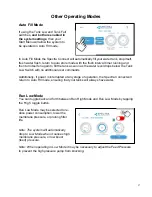
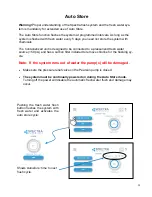
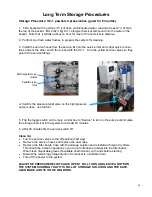
2. Follow the steps in Figures 1—4 below to initiate the Calibration Sequence.
Sensor Calibration
Many of the settings on your system have been pre-calibrated during standard factory
testing, however, there are a few settings that will vary based on the installation condi-
tions.
If the system has just been installed you must calibrate the Pre-filter Con-
dition graph before proceeding.
This procedure does
not
need to be done with each filter change under normal opera-
tion, it should
ONLY BE DONE IF THE FILTER CONDITION GAUGE WON’T RESET
TO 100% WITH NEW FILTERS.
Pre-filter Gauge Calibration
Fig. 1
Fig. 2
Fig. 3
Fig. 4
Содержание LB-20000
Страница 2: ...2 Page Intentionally blank...
Страница 4: ...4 Page Intentionally blank...
Страница 48: ...48 Black Parker tube fittings...
Страница 49: ...49 John Guest Super Speedfit Fittings...
Страница 64: ...64...
Страница 65: ...65...

