Chapter 2 – Installing the nTier300 VTL
32
5.
When the drive sled is in position, push the handle inward and to the right until it
locks in place. An audible click indicates that the drive sled is locked into position.
Note:
The latch occasionally sticks in the open position. If this happens,
simply push it to the left and press the handle inward to lock the
drive into place.
6.
Repeat Steps 2–5 to install all of the remaining drives.
Connecting Cables and Powering On
After installing the drives, you are ready to connect the cables to the system and
perform the initial power-up.
1.
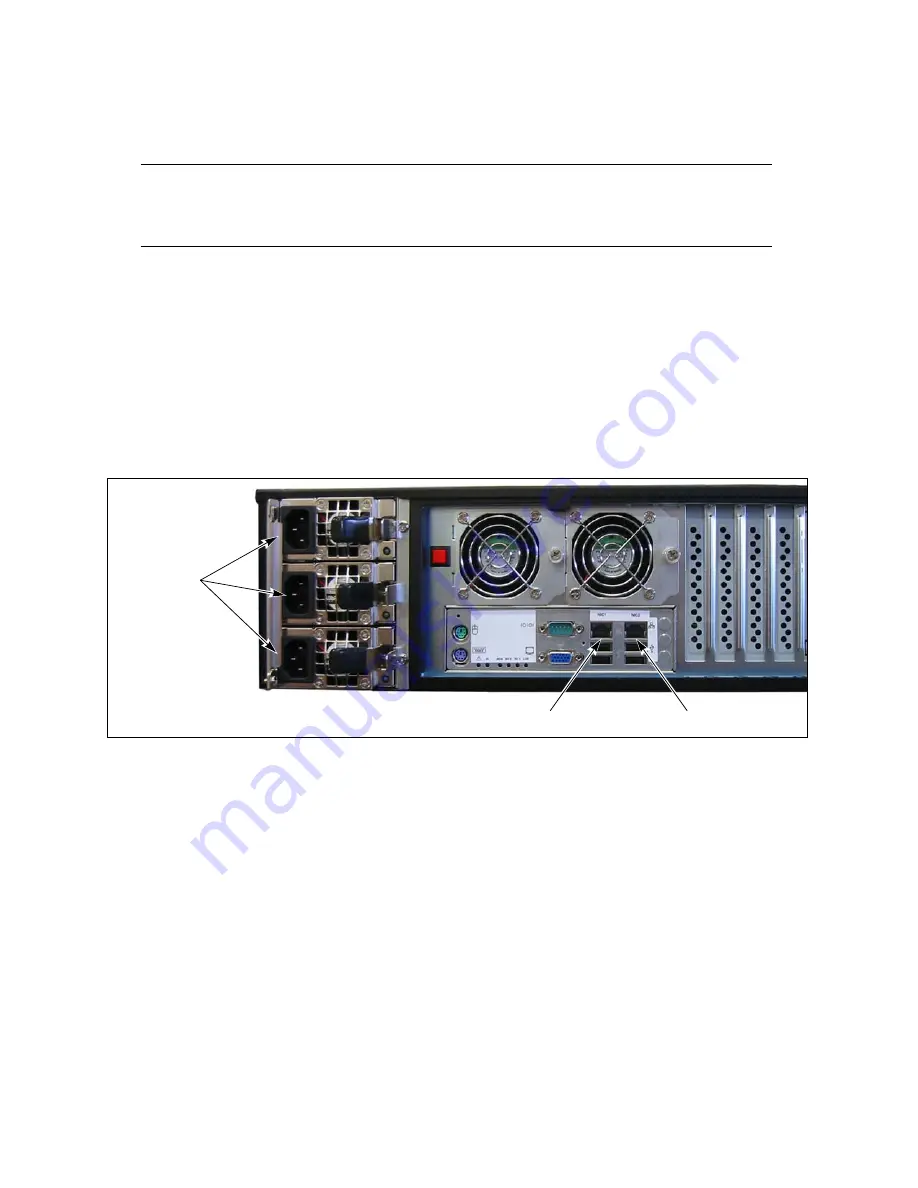
Connect an Ethernet cable to either Ethernet port 1 or 2 on the rear panel. Connect
the other end of the cable to an active network over which a computer running the
FalconStor VTL Console can access the nTier300 VTL. This connection also provides
access to the BlueScale web interface using a web browser.
Ethernet port 1 is preconfigured to use DHCP addressing. Use the VTL Console
to view the IP address assigned by the DHCP server.
Ethernet port 2 is preconfigured with an IP address of 192.168.1.2. Use this port
if your network does not have a DHCP server.
Figure 2-19
Connect the cables to the back panel.
Power
connectors
Ethernet port 1
Ethernet port 2
Содержание Spectra nTier300
Страница 1: ...Spectra nTier300 Virtual Tape Library Appliance Installation Guide PN 90990034 Revision B...
Страница 8: ...Contents 8 Notes...
Страница 36: ...Chapter 2 Installing the nTier300 VTL 36 Notes...
Страница 52: ...Chapter 3 Using the nTier300 VTL BlueScale Web Interface 52 Notes...
Страница 66: ...Appendix A Technical Support 66 Notes...


