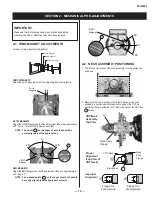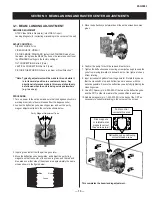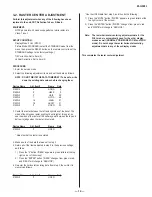
— 10 —
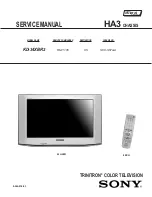
KD-34XBR2
1
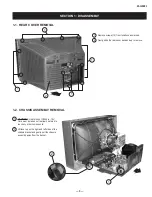
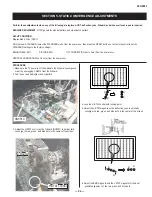
Discharge the anode of the CRT and remove the anode cap.
2
Unplug all interconnecting leads from the defl ection yoke, neck
assembly, degaussing coils and CRT grounding strap.
3
Remove the C Board from the CRT.
4
Remove the chassis assembly.
5
Loosen the neck assembly fi xing screw and remove.
6
Loosen the defl ection yoke fi xing screw and remove.
7
Remove (2) screws from the degaussing coil holder assemblies to
release the CRT grounding strap.
8
Place the set with the CRT face down on a cushion and remove
the degaussing coil holders.
9
Remove the CRT supports (on both left and right sides) by lifting
up on the clip and gently sliding it up and out.
10
Remove (4) screws holding in the Spacer -36 at the top of the
cabinet and remove, making sure to remove the degaussing coil
holders with it.
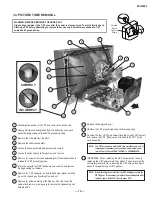
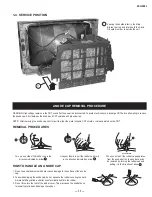
1-3. PICTURE TUBE REMOVAL
WARNING: BEFORE REMOVING THE ANODE CAP
High voltage remains in the CRT even after the power is disconnected. To avoid electric shock,
discharge CRT before attempting to remove the anode cap. Short between anode and CRT
coated earth ground strap.
Coated
Earth
Ground
Strap
1
2
3
4
5
6
7
8
9
10
11
12
13
14
INCORRECT
CORRECT
11
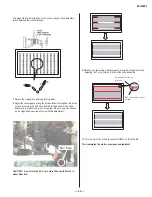
Remove the degaussing coil.
12
Remove the CRT grounding strap and tension springs.
13
Unscrew the four CRT fi xing screws [located on each CRT corner]
and remove the CRT [Take care not to handle the CRT by the
neck assembly.]
NOTE: The CRT screws used with the HA3 are specifi c to this unit. If
replacement is necessary, these exact screws must be used.
(p/n: 4-080-811-01; Desc: SCREW, TAPPING (7) + CROWN WASHER)
14
IMPORTANT: When replacing the CRT, care must be taken in
replacing the CRT spacers into the cabinet. The spacer must be
completely reset prior to re-inserting the CRT screws (see fi gure
above for proper setting of CRT spacer).
NOTE:
When removing the screws from the CRT, damage occurs to the
CRT Spacer. It is necessary to replace these components after
removal.
(p/n: 4-080-267-01; Desc: Spacer, CRT)
Содержание KD-34XBR2 - 34" Hdtv Fd Trinitron Wega
Страница 187: ...L504 FB502 LB2016 OUH 1608 MAIN_COMB_C MAIN_COMB_Y TO P2 TO P2 3D COMB AV SW 9 965 916 02 HA3 B P3 C ...
Страница 207: ...9 965 916 02 HA3 QI P1 ...
Страница 223: ...7016 0UH 4A 9 965 916 02 HA3 QM P1 ...
Страница 264: ......
Страница 296: ......


