25
Configuring Recording Settings (User Settings)
Cha
p
te
r 2
P
repa
rat
ion
The [Quality] screen closes, and the [Quality] tab
appears again.
The setting configured here will be used as the initial
value for the [Video Quality] setting in the [Recording
Preparation] screen.
3
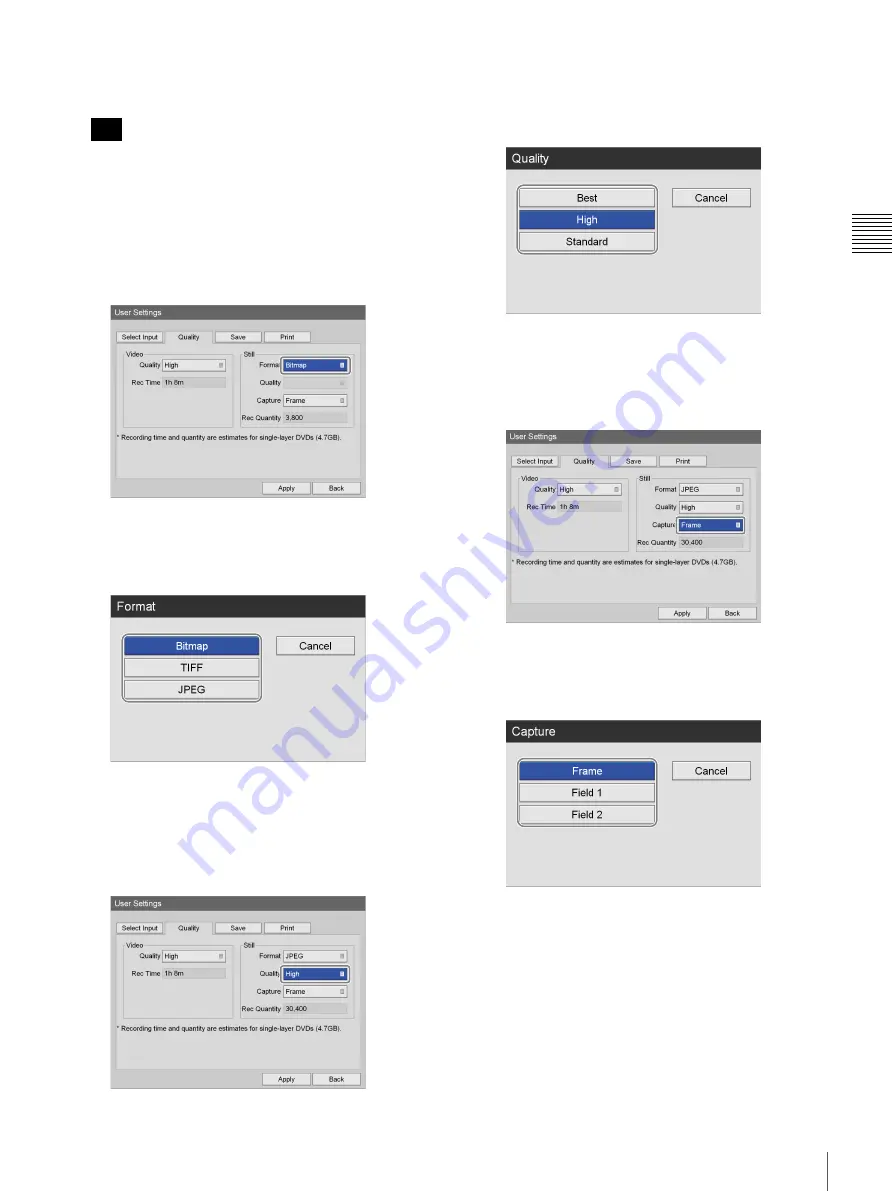
Configure the still image settings.
1
Use the
b
button to select the [Format] box, and
press the ENTER button.
The [Format] screen appears.
2
Use the
V
and
v
buttons to select a format for the
still image files, and press the ENTER button.
The [Format] screen closes, and the [Quality] tab
appears again.
3
If you selected [JPEG] in step
B
, use the
v
button
to select the [Quality] box, and press the ENTER
button.
The [Quality] screen appears.
4
Use the
V
and
v
buttons to select the image quality,
and press the ENTER button.
The [Quality] screen closes, and the [Quality] tab
appears again.
5
Use the
v
button to select the [Capture] box, and
press the ENTER button.
The [Capture] screen appears.
6
Use the
V
and
v
buttons to select the frame or field
capture mode, and press the ENTER button.
The [Capture] screen closes, and the [Quality] tab
appears again.
4
To configure save settings, proceed to
If you are finished configuring, use the
V
,
v
,
B
, and
b
buttons to select [Apply], and press the ENTER
button.
Tip


