17
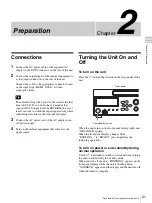
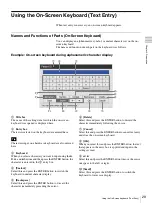
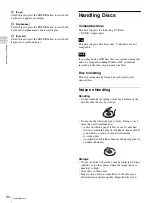
Names and Functions of Parts
Chapt
er 1 Ov
erv
ie
w
(HVO-550MD only)
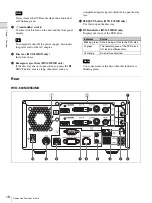
Do not touch the laser pickup inside the DVD
drive
The discharge of static electricity that may result from
touching the pickup may cause the drive to hang up,
preventing the ability to write data. If a hang up occurs, try
turning the recorder off and turning it on again.
a
Front panel display
Displays the current status and messages.
b
CUSTOM button
Execute the function assigned to this button.
For details on assigning functions, see “[CUSTOM
Button Control]” under “[General 2] Tab” (page 69).
c
X
PAUSE button
Use this while recording is in progress to pause
recording. Press this button again to resume recording.
A chapter separator is also created at the position in
which recording was paused.
You can also use this button to pause playback.
To resume playback, press this button again or press
the
B
PLAY button.
“PAUSE” appears on the front panel display during
pause.
d
x
STOP button
Use this to stop playback or recording.
A recorded data separator is also created at the position
in which recording was stopped.
e
z
REC button
Use this to start video/audio recording.
“REC” appears on the front panel display during
recording, in addition to the recording time.
For details on use, see “Manual Recording”
(page 38).
f
B
PLAY button
• Use this to play back the most recent recorded data
stored on the internal hard disk.
• Press this button while playback is paused to resume
playback.
g
Menu navigation buttons
Use these to navigate menus.
MENU button
Display or hide the menu.
V
button
Use this to move the cursor up or select an item that is
above the current item.
B
/
m
button
Use this to move the cursor left or select an item that is
to the left of the current item.
You can also use this button to rewind during playback
of recorded data.
v
button
Use this to move the cursor down or select an item that
is below the current item.
b
/
M
button
Use this to move the cursor right or select an item that
is to the right of the current item.
You can also use this button to fast forward during
playback of recorded data.
ENTER button
Use this to confirm a currently selected menu or item,
and execute operations. When recording or playback is
not in progress, holding this button for 5 seconds
switches the input signal as follows with each long
press: DVI-D
t
HDMI
t
VIDEO
t
S VIDEO
BACK button
Use this to return to a previous screen during menu or
operation screen displays.
h
HDD indicator
Displays the status of the internal hard disk.
i
SERVER indicator
Displays the server access status.
j
USB 1 port/indicator
Connect USB memory devices, external hard disks,
and other USB media here.
The indicators display the status of USB media access.
Note
Indicator
Status
Blinking green The internal hard disk is being
accessed.
Lit green
The recording area of the internal hard
disk is full. Delete any unnecessary
recorded data.
Lit orange
An error has occurred.
Indicator
Status
Blinking green The server is being accessed.
Lit green
The recording area of the server is full.
Lit orange
An error has occurred.
Indicator
Status
Blinking green Data is being written to the USB media.
Lit green
The recording area of the USB media
is full. Delete any unnecessary
recorded data, or insert different
media.
Lit orange
An error has occurred.


