background image

C

L

IE

 O

p

e

ra

ti

n

g

 In

s

tru

c

tio

n

s

Using the Memory Stick™

91

n

N

Why Memory Stick™?

Sony's vision is to expand the world of communication, promoting the portability of digital data. The 
Memory Stick™ is the resulting medium, through which digital devices can be instantly connected. With it, 
you can download data from any compatible device, and then transfer it to another in a single and instant 
transfer.

The main advantages of the Memory Stick™ are its:

Compactness

: with dimensions of just 21.5 mm (W) x 2.8 mm (H) x 50 mm (D), compatible products can 

also be small, lightweight and attractive in their design.

Capacity

: Its data capacity far exceeds that of a floppy disk.

Security: its lock option means you can protect your data from accidental erasure.

Versatility

: memory capacity ranges from 4MB up to 128MB (the equivalent capacity of 88 floppy disks).

Reliability

: by way of protecting the hardware and its contents, the number of terminals is reduced to 

only 10 pins. This, and the overall robust structure of the stick, gives it a longer lifespan than other 
storage devices.

Durability

: the same Memory Stick™ can be used tens of thousands of times.

Forward compatibility

: the Memory Stick's™ current format is designed to be compatible with future 

products and higher capacity Memory Sticks™.

The future of Memory Stick™

Memory Stick's™ potential is virtually unlimited, with the number of compatible products increasing rapidly 
in both personal and professional spheres.

The introduction of the 256 MB and 512 MB Memory Stick™ is anticipated in 2002, and a 1 gigabyte capacity 
Memory Stick™ is expected in 2003. Additionally, the native 

transfer speed

 of the Memory Stick™ will be 

increased to accommodate the increasing 

capacity

. By the end of 2002, Memory Stick's™ transfer speed will 

be increased by eight times to a maximum of 20 MB/sec.

Содержание Clie PEG-N770C

Страница 1: ...N CLIÉ Operating Instructions P E G N 7 7 0 C E ...

Страница 2: ...t of defective manufacturing SONY will replace it at SONY s option or issue a refund However SONY bears no other responsibility The software provided with this player cannot be used with equipment other than that which it is designated for use with Please note that due to continued efforts to improve quality the software specifications may be changed without notice Program 2001 Sony Corporation 20...

Страница 3: ... whatever reason could lead to damages that are not covered by the guarantee To avoid electrical shock do not open the cabinet Refer servicing to qualified personnel only Picture distortion may occur if this equipment is positioned in close proximity to any equipment emitting electromagnetic radiation To prevent fire or shock hazard do not expose your CLIÉ handheld to rain or moisture Use your CLI...

Страница 4: ...o not use headphones while driving cycling or operating any motorized vehicle It may create a traffic hazard and is illegal in some areas It can also be potentially dangerous to play loud music while walking especially at pedestrian crossings Be extra vigilant while using the headphones or even discontinue use whenever there might be a risk Preventing hearing damage Avoid using headphones at high ...

Страница 5: ...roduct contains a rechargeable lithium ion polymer battery that should not have to be replaced during the lifetime of the product For changing or removing this battery please contact CLIÉ Technical Support Do not handle damaged or leaking lithium ion polymer batteries Dispose of promptly and properly The battery pack used in this device may present a fire or chemical burn hazard if mistreated Do n...

Страница 6: ...ulator Data exchange capabilities or data synchronization with your computer HotSync Playback or still or motion pictures working with PictureGear Lite software on your computer Data exchange with a computer or other CLIÉ handhelds using the Memory Stick and Jog Dial Extended features with the installation of add on applications for the Palm Operating System see the Software Guide for more Online ...

Страница 7: ...d is turned on If this is the first time you are using your handheld you will see the Setup screen If this is not the first time you see the last screen you viewed 3 If the power does not come on make sure that the hold switch 2 is not in the lock position To turn off your CLIÉ handheld proceed as follows Press the power button The power is turned off You do not have to save data quit an applicati...

Страница 8: ...tion you want to run The stylus is stored in the holder at the back of your CLIÉ handheld As shown below simply pull it out when needed To avoid losing the stylus always put it back in its holder after use Tapping To open an application or select an item take the stylus and press the tip lightly on the icon or item on the screen as shown This action is called tapping ...

Страница 9: ...an use the dragging action in the following scenarios To display data above or below the current viewing area on the screen use the stylus to drag the slider of any scroll bar To select multiple characters or items together drag the stylus along all the required characters or items To display the onscreen Graffiti Help drag the stylus from the bottom of the writing area to the top of the screen Yo...

Страница 10: ...tate the Jog Dial to select various items in succession or to select an application to start The operations you can perform by rotating the Jog Dial differ depending on the application you are using For details refer to the instructions for each application Pressing the Jog Dial Press the Jog Dial to highlight the item or to run the application you selected by rotating the Jog Dial The operations ...

Страница 11: ...ld down the power button for more than two seconds Even with the frontlight on you may need to further adjust the brightness on the screen To adjust the brightness of the frontlight level proceed as follows 1 Tap the icon The adjustment control screen is displayed 2 To change the brightness level slightly tap to the left or right 3 To change the level considerably drag the slider to the left or ri...

Страница 12: ...a soft reset A soft reset tells your CLIÉ handheld to stop what it is doing and start over again All records and entries stored on your CLIÉ handheld are retained with a soft reset To perform a soft reset proceed as follows 1 Take out the reset tip by unscrewing the metal barrel from the stylus quill as shown below 2 Use the reset tip to gently press the reset button inside the hole on the back pa...

Страница 13: ...ou save a backup of your CLIÉ handheld data on your computer you can restore any data previously synchronized with your computer during the next HotSync operation To perform a hard reset proceed as follows 1 Take the reset tip from the stylus see Performing a soft reset page 11 2 While holding down the power button use the reset tip to gently press and release the reset button The Palm Powered win...

Страница 14: ...ffiti strokes closely resemble the upper case letters of the regular alphabet which makes Graffiti writing easy to learn This section explains the procedures for creating letters numbers punctuation and symbols as well as teaching you some Graffiti tips and tricks Writing Graffiti letters The Graffiti writing area is divided into two parts one for writing the letters of the alphabet and one for wr...

Страница 15: ...screen keyboard any time you need to enter text or numbers into your CLIÉ handheld Note that you cannot enter Graffiti characters while using the onscreen keyboard To use the onscreen keyboard proceed as follows 1 Open any application in which you want to enter text such as Memo Pad 2 Tap any record or tap New 3 Tap a to open the alphabetic keyboard or tap 1 to open the numeric keyboard The select...

Страница 16: ...g Instructions Entering data 15 n N Alphabetic keyboard On any keyboard screen tap abc to go to the alphabetic keyboard 1 The main buttons are as follows Backspace 2 Carriage return 3 Caps shift 4 Caps lock 5 Tab 6 ...

Страница 17: ...ructions Entering data 16 n N International keyboard On any keyboard screen tap Int l 1 to go to the international keyboard Numeric keyboard From any keyboard screen tap 123 1 to go to the numeric keyboard as shown below ...

Страница 18: ... available in the Palm Desktop for CLIÉ software and in most PIMs so you do not need to learn different applications Refer to the Palm Desktop for CLIÉ software online Help for more information on entering data on your computer If you have data stored in computer applications such as spreadsheets and databases or if you want to import data from another handheld you can transfer the data to your CL...

Страница 19: ...cations into related groups The Application Launcher The Application Launcher displays all the default applications available on the CLIÉ handheld You can also display selected applications by arranging them into categories To start the Application Launcher tap the Home icon As well as being your gateway to all the applications the Application Launcher screen displays the current time battery leve...

Страница 20: ...e many applications installed on the CLIÉ handheld tap the scrollbar to see all the available applications Or 1 Tap the Home icon 2 Rotate the Jog Dial to select the application 3 Push the Jog Dial to launch the selected application Or Press an application button on the front panel to display the selected application immediately 1 Date Book 3 To Do list 2 Address Book 4 Memo Pad ...

Страница 21: ...ed into the CLIÉ handheld There are some restrictions when opening an application copied not installed using MS Gate onto the CLIÉ handheld from the Memory Stick See the Software Guide for more details Changing the display of the Application Launcher By default the Application Launcher displays applications as icons You can also display applications in a list format To display applications in a li...

Страница 22: ...s 1 Tap the Home icon 2 Tap the Menu icon 3 From the App menu select Category The Category screen appears 4 Tap the down arrow next to the application you want to categorize 5 Select the category you want 6 Tap Done To create a new category for an application proceed as follows 1 Tap the Home icon 2 Tap the Menu icon 3 From the App menu select Category The Category screen appears 4 Tap next to app...

Страница 23: ... handheld lets you find information in several ways In all applications starting with the current application you can find search for selected text In the Date Book the To Do List and the Memo Pad you can find a telephone number from the Phone Lookup to display the Address List screen and let you add the information that appears in this list to a record In the Address Book you can use the Find opt...

Страница 24: ... data you want from the find result list The application including found data automatically starts up to display data Tap Stop to stop the search at any time Tap Find More to restart Find The Find option is not case sensitive searching for sony also finds Sony Select text in an application before tapping the Find icon to automatically place the text in the Find dialog box Using the Phone Lookup op...

Страница 25: ...n with Graffiti to enter the name and phone number of John Smith The name and phone number of John Smith are added if John Smith is the only one in records The records include many Johns the Phone Number Lookup screen appears Phone Lookup by text You drag and highlight text before you write with Graffiti The Phone Lookup starts up to exchange the selected text for the found name and phone number I...

Страница 26: ...saves your work in the current application and displays it when you return to that application Using the Edit screen The Edit menu is available with any screen where you enter or edit text In general commands available in the Edit menu apply to text that you select in an application To use the Edit menu proceed as follows 1 Tap the drop down icon The menu appears 2 Select Edit The Edit menu appear...

Страница 27: ...n a record The text you paste replaces any selected text If you did not previously cut or copy text Paste does nothing Select all Selects all of the text in the current record or screen This enables you to cut or copy all of the text and paste it elsewhere Keyboard Opens the onscreen keyboard When you have finished with the onscreen keyboard tap Done Graffiti Help Opens screens that show all the G...

Страница 28: ... applications 27 n N See the Software Guide to find out what you can do with these applications The Software Guide will also provide explanations on the following pre installed Sony applications MS Gate MS Backup MS Autorun MS AudioPlayer ...

Страница 29: ...y associated with a date or a date and time A record in Date Book is called an event To open Date Book proceed as follows 1 Press the Date Book button on the front panel Date Book starts up Today s schedule is displayed with a list of times for a standard business day 2 Press the Date Book button repeatedly to cycle through the Day Week Month and Agenda views The Date Book views are displayed in t...

Страница 30: ... writing a number in the Graffiti writing area and making sure no event is selected To schedule an untimed event proceed as follows In step 3 above tap No Time A new untimed event is displayed in the first line in Date Book Scheduling an event for another date To schedule a timed event for another date proceed as follows 1 Press the Date Book button on the front panel Date Book starts up 2 Do one ...

Страница 31: ...f consecutive days Examples of repeated or continuous events A birthday an annual event A weekly guitar lesson an event that falls on the same day of the week and at the same time of day Business trip or vacation a continuous event To schedule a repeated event proceed as follows 1 Tap the description of the event 2 Tap Details The Event Details dialog box appears 3 Tap Repeat The Change Repeat dia...

Страница 32: ...lly changes the end date so that the duration remains the same If you change the repeat interval for example daily to weekly of a repeated event past occurrences prior to the day on which you change the setting are not changed and your CLIÉ handheld creates a new repeated event If you change the date of a repeated event for example from January 14 to January 15 and apply the change to all occurren...

Страница 33: ...rough the different views daily calendar weekly calendar monthly calendar and schedules for the day 3 You can also select a Date Book view by tapping an icon in the Date Book screen Tap one of the following icons to see the corresponding calendar view Day view You can display and check the events for a specific day 1 Press the Date Book button on the front panel Date Book starts Today s schedule i...

Страница 34: ...view 4 Press the Jog Dial The content of the selected event appears 5 An event conflict this means that two or more events overlap each other appears in the Week view as overlapping time bars To reschedule an event while you are in Week view tap and drag the event to a different time or day Tap a blank time on any day to move to that day and have the time selected for a new event Tap any day or da...

Страница 35: ...ars 3 Rotate the Jog Dial to select the day you want to review 4 Press the Jog Dial The content of the selected event appears Tap a day in the Month view to display that day in the Day view Tap the scroll arrows in the top right hand corner to move forward or backward a month Tap Go To to open the Go To Date dialog box to select a different month Use the scroll buttons on the front panel of your C...

Страница 36: ...genda view appears Today s schedule and To Do List are displayed Tap any appointment while in the Agenda view to display the Day view of the appointment Check off completed To Do List items in the Agenda view or tap a description of an item to go directly to the To Do List application Changing between date and time views To change between the date and time views proceed as follows 1 Tap and hold t...

Страница 37: ... dialog box appears Enter the set time and the end time To change the date tap the Date box and select a new date The Set Date dialog box appears Specify the year month and day in the calendar 4 Tap OK Changing a timed event to untimed To change a timed event to an untimed event proceed as follows 1 In the Date Book screen tap the event you want to edit 2 Tap Details 3 Tap the Time box The Set Tim...

Страница 38: ...ap OK The event is deleted Alternatively 1 Press the Date Book button on the front panel The Date Book starts up 2 Tap the event you want to delete 3 Tap Details The Event Details dialog box appears 4 Tap Delete The Delete Event dialog box appears 5 Tap OK If you select Save Archive Copy On PC the deleted data from your CLIÉ handheld is saved to the Palm Desktop for CLIÉ software during the next H...

Страница 39: ...e down arrow to choose from minutes hours or days 5 Tap the 5 next to the Alarm check box and enter any number from 0 to 99 as the number of time units 6 Tap OK The alarm icon appears next the event You can set a silent alarm for an untimed event In this case the alarm is set for the specified period of minutes hours or days before midnight beginning of the day of the untimed event No audible alar...

Страница 40: ...unications port A repeated event will not be deleted By default the events that you purge are restored and saved in the Palm Desktop for CLIÉ software on your computer at the next HotSync operation To delete the events completely deselect the check box for Save archive copy on PC in the Purge dialog box Option menus Font You can select the fonts of the Date Book Under Preferences you have the foll...

Страница 41: ...of these settings to show that you have Timed Untimed or Daily Repeated events in the Month View only About the Date Book Shows the version information for Date Book Address Book The Address Book lets you keep names addresses telephone numbers and other information about your personal or business contacts With the Address Book you can Quickly enter look up or duplicate names addresses phone number...

Страница 42: ... numeric and e mail fields is automatically capitalized 3 Tap First name The cursor shifts to the first name field 4 You can also use the Graffiti software to move the cursor to the next field by using a full stroke 5 Fill in the First name field 6 Repeat the last steps to enter the other items of information that you want to include 7 You can tap the scroll down arrow next to each item to display...

Страница 43: ...to scroll to the entry To view an image pasted to an address record tap an image in the Address View screen The image is displayed across the whole screen To return to the Address View screen tap the image again To view the next page of the Address View screen rotate the Jog Dial in the Address View screen The next or previous page of data is displayed Displaying entries by company You can set up ...

Страница 44: ...gins with that letter If you write another letter the list scrolls to the first entry that starts with those two letters For example writing an s scrolls to Sands and writing sm scrolls further to Smith If you have sorted the list by company name the Look Up feature scrolls to the first letter of the company name 2 Tap the record you want to view The record you selected is shown Editing entries To...

Страница 45: ... selected address record appears 2 Tap Edit The Address Edit screen appears 3 Tap No Image in the upper right of the screen The PG Pocket screen appears 4 Tap No Image 5 Select the image you want to paste The image you selected is pasted to the address information 6 Tap Done The Address screen is displayed again A camera icon is attached to the record that has the pasted image 7 To change the imag...

Страница 46: ...ss Book menu is displayed 3 Tap Duplicate Address from the Record menu The entry you selected in Step 1 is copied The word Copy is added to the end of the name field of the copied information 4 Tap Done The Address screen is displayed again Images are not duplicated Deleting entries You can delete records you entered To delete address records proceed as follows 1 Tap the record you want to delete ...

Страница 47: ...s 2 Tap Edit The Address Edit screen appears 3 Tap Unfiled in the top right hand corner of the screen A list of categories appears 4 Tap the required category The category is assigned to the records you selected Address Book menus This section explains the menu commands specific to Address Book The Record and Options menus differ depending on the screen displayed Record menus Duplicate Address Mak...

Страница 48: ...ent address record Delete Note Deletes comments from the current address record Select Business Card Defines the current address record on a business card Option menus Font You can select the fonts of the Address Book Preferences Remembers the last category Display Determines how Address Book appears when you return to it from another application If you select this check box Address Book shows the...

Страница 49: ... Sort your To Do List items either by due date priority level or category Attach notes to individual To Do List items for a description or clarification of the task To open the To Do List proceed as follows 1 Press the To Do List button on the front panel To Do List opens and displays the category of items you last viewed 2 Press the To Do List application button repeatedly to cycle through the ca...

Страница 50: ... Do List items by category press the Jog Dial when To Do List is displayed but no To Do item is selected To select a category from the categories list tap the down arrow in the top right hand corner of the screen You can select the category you want from the list Viewing due and completed items To view completed and due items in the To Do List proceed as follows 1 Tap Show in the To Do List screen...

Страница 51: ...ry for each item 3 Tap OK Editing items and lists Setting the priority of an item The priority setting for items lets you arrange the tasks in your To Do List according to their importance or urgency The default setting for To Do List is to arrange items by priority and due date with priority 1 items at the top If you have a number of items in your list changing an item s priority setting may move...

Страница 52: ... hide completed items To Do List menus This section explains the menu commands specific to To Do List The Record and Options menus differ depending on the screen displayed Record menus Delete Item Deletes the current To Do item Attach Note Adds comments to the current To Do item Delete Note Deletes comments from the current To Do item Purge Allows you to delete any completed items from To Do List ...

Страница 53: ...computer The Memo Pad allows you to Make memos and jot down various types of information Copy memos you wrote with other applications Read TXT or CSV document files from a computer through HotSync for display on your CLIÉ handheld Categorize the memos into business private and other categories To open the Memo Pad proceed as follows 1 Press the Memo Pad button on the front panel The Memo Pad opens...

Страница 54: ...ized While entering text the text may overlap the Done or Details buttons When you finish entering the text the overlap disappears Displaying memos To review a memo proceed as follows 1 Rotate the Jog Dial to select the memo you want to display If the required memo is not displayed rotate the Jog Dial further to scroll up or down the memo list 2 Press the Jog Dial The content of the selected memo ...

Страница 55: ...ategory to display the list of available categories 4 Select the category you want to assign to the memo Defining a memo as private You can hide a memo that you label as private If you define a password for your CLIÉ handheld you must enter it to display private records To define a memo as private proceed as follows 1 Tap the memo you want to define as private The content of the memo you tapped ap...

Страница 56: ...he memos in Memo Pad does not affect their order in the Palm Desktop for CLIÉ software Consequently the memo order in Memo Pad may differ from that in the Palm Desktop for CLIÉ software Deleting memos To delete a redundant memo from Memo Pad proceed as follows 1 In the Memo Pad screen tap the memo you want to delete The content of the memo you tapped appears 2 Tap Details The Memo Details dialog b...

Страница 57: ... communications port New Memo Creates a new memo Delete Memo Deletes the current memo Beam Memo Sends the current memo to another CLIÉ handheld via the infrared communications port Option menus Font You can select the fonts of the Memo Pad Phone Lookup If there is an Address Book entry you can look up the phone number of the selected memo Preferences Used to specify the way in which memos are disp...

Страница 58: ... that you spend Assign expense items to categories so that you can organize and view them in logical groups Keep track of vendors companies and people involved with each particular expense Log miles travelled for a particular date or expense category Sort your expenses by date or expense type To open Expense proceed as follows 1 Tap the Home icon The Application Launcher screen appears 2 Rotate th...

Страница 59: ...ng any of the following options Category Specify the category of the Expense item Expense contains two sample categories named New York and Paris which may be used to sort Expense items by the destination of the business trip To rename an existing category or add a new category tap the down arrow and choose a category from the Edit Categories drop down list Type Tap the down arrow and select an Ex...

Страница 60: ... the Expense item whose date you want to change The date is highlighted 2 Tap the date area of the selected Expense item The Date screen appears 3 Tap the correct date The date is now changed Changing the display To change display options of Expense items proceed as follows 1 In the Expense screen tap Show The Show Options dialog box appears 2 Select your preferred display mode options Sort by Tap...

Страница 61: ...cy and then select Edit currencies from the drop down list The Select Currencies dialog box appears 4 Tap the down arrow for each currency and then tap the country with the currency you want to display in the Currency list 5 Tap OK to close the Select Currencies dialog box 6 Tap OK again To change your default currency proceed as follows 1 In the Expense screen tap the Menu icon The menu is displa...

Страница 62: ...se data to your computer the Palm Desktop for CLIÉ software makes it easy to view your Expense data in a Microsoft Excel spreadsheet You can also print the Expense report from a printer connected to your computer 1 Perform a HotSync operation to transfer the Expense data from your CLIÉ handheld to your computer 2 Click Expense in the Palm Desktop for CLIÉ software Microsoft Excel opens and the Exp...

Страница 63: ...lains the menu commands specific to Expense The Record and Options menus differ depending on the screen displayed Record menus Delete Item Deletes the current Expense item Purge Allows you to delete any category that is no longer used from the Expense category set Run this command to save memory on your CLIÉ handheld Option menus Preferences Use automatic fill Lets you select an Expense type by wr...

Страница 64: ...n This button enables you to re enter the number without starting the calculation over C Clears the entire calculation and enables you to start a new calculation Toggles the current number between a negative and positive value If you want to enter a negative number enter the number first and then press the button M Places the current number in the Calculator memory Each new number you enter with t...

Страница 65: ...handheld includes a Security application that allows you to protect your data from unauthorized users Security allows you to do the following Lock and turn off your CLIÉ handheld so that it does not operate until you enter the correct password Mask all records that you mark as private so the information appears greyed out Hide all records that you mark as private so they do not appear on any scree...

Страница 66: ...ears 4 Enter the same password again to verify it and then tap OK Your password is now assigned Changing or deleting a password You can change or delete the password you assigned You have to enter the current password before you can change or delete it To change or delete your password proceed as follows 1 Rotate the Jog Dial to select Security and press the Jog Dial Alternatively tap the Security...

Страница 67: ...ivate records In all basic applications except Expense you can make individual records private Private records remain visible and accessible until you select the Security setting to hide all private records You can mask or hide your private records To view the masked or hidden records again you need to enter the password To mask or hide private records proceed as follows 1 Rotate the Jog Dial to s...

Страница 68: ...É handheld proceed as follows 1 Back up the data on your CLIÉ handheld using a HotSync transfer see Using HotSync operations page 74 2 Assign a password see the previous section Assigning a password page 65 3 Tap the Home icon 4 Select System from the drop down list in the top right hand corner The System screen appears 5 Tap the Security icon The Security dialog box appears 6 Tap Lock Turn Off Th...

Страница 69: ... password and then tap OK The Lock Handheld screen appears 4 Tap your choice from the list as follows Never Your CLIÉ handheld will not lock automatically To lock it manually you must tap Lock Turn Off in the Security screen On power off Your CLIÉ handheld will lock when it is turned off At a preset time The Set Time dialog box appears Set a time so your CLIÉ handheld will lock at that preset time...

Страница 70: ...stem screen appears 3 Tap the Prefs icon The Preferences screen appears 4 From the drop down list in the top right hand corner select Owner 5 Enter the owner information If you enter more text than can fit on one screen a scroll bar appears at the right side of the screen If you use the security application to assign a password to enter edit the owner information you have to unlock the Owner Prefe...

Страница 71: ...CLIE Operating Instructions Using your CLIÉ handheld 70 n N 5 Tap Unlock The Unlock Message dialog box appears 6 Enter your current password the one you entered in the Security application 7 Tap OK ...

Страница 72: ...tions on your CLIÉ handheld so you can view enter and modify data stored on your CLIÉ handheld You can also import data from Windows applications onto your CLIÉ handheld and transfer the add on applications as described in the Software Guide To start the Palm Desktop for CLIÉ software double click the Palm Desktop for CLIÉ software icon on the Windows desktop or click Start select Programs Sony Ha...

Страница 73: ...e of the corresponding CLIÉ application For details see the Palm Desktop online help click Help and then Palm Desktop Help Here is an overview of the Palm Desktop for CLIÉ features 1 List pane Displays the records in the current Desktop application 2 Application Launch bar Provides one click access to each Desktop application Click an icon to open its associated application ...

Страница 74: ...o install on your CLIÉ handheld the next time you perform a HotSync operation 4 User name display Displays the user name of the owner of the information being displayed 5 Record pane Displays full details of the record that is selected in the List pane The information displayed here is the same as the one displayed on your CLIÉ handheld s Details screen ...

Страница 75: ...g a local HotSync This section describes how to perform a HotSync operation using the cradle local HotSync assuming that you have done all the necessary preparations and installations for your CLIÉ handheld and your computer For the required preparations and software installation and for information on performing a HotSync for the first HotSync operation please see the Read This First manual To pe...

Страница 76: ...then re install it Proceed as follows 1 Click the HotSync icon in the Windows task tray bottom right corner of the taskbar A shortcut menu is displayed 2 Make sure that Local is not selected If it is selected click Local to clear it Do not remove your CLIÉ handheld from the cradle during a HotSync operation Do not push the HotSync button during a HotSync operation It might cause errors and force t...

Страница 77: ...owing options If you are not sure which option to use keep the default setting Always available Always available Adds the HotSync Manager to the Startup folder and tells the HotSync Manager to monitor the USB port as soon as Windows is started This allows you to perform a HotSync operation even when the Palm Desktop for CLIÉ software is not running Available only when the Palm Desktop is running S...

Страница 78: ...he system information stored on your CLIÉ handheld The Install conduit installs add on applications on your CLIÉ handheld To customize HotSync application settings proceed as follows 1 Click the HotSync icon in the Windows task tray bottom right of the taskbar and then select Custom from the HotSync Manager menu Alternatively select Custom from the HotSync menu of the Palm Desktop for CLIÉ softwar...

Страница 79: ... For the procedure used to send a profile after setting user names see Synchronizing with external data File Link page 86 Creating a profile To create a profile proceed as follows 1 Start the Palm Desktop for CLIÉ software 2 Select Users from the Tools menu The Users dialog box appears If no user profile is created the New Profile dialog box is displayed skip to step 4 3 Click Profiles The Profile...

Страница 80: ...er name for your CLIÉ handheld Conducting an infrared HotSync operation You can use the IR infrared port of your CLIÉ handheld to perform an IR HotSync operation with a computer equipped with an IrDA Infrared Data Association IR port An IR HotSync operation allows you to perform a HotSync operation without using the cradle Before you start performing an IR HotSync operation Check the following You...

Страница 81: ...t menu The Setup dialog box is displayed 3 Click the Local tab to change the setting for an IR HotSync operation as needed Serial Port specifies a virtual port for an infrared port If you are not sure of the connection port see the Infrared Monitor in the Windows Control Panel Speed determines the speed at which data is transferred Try the As Fast As Possible rate first and then adjust downward if...

Страница 82: ...y 10 to 20 centimeters apart and the path between your CLIÉ handheld and the computer must be clear of obstacles 5 Tap the icon The HotSync operation starts Wait for the message showing that the HotSync operation is complete Restoring the local HotSync settings To restore the local HotSync settings proceed as follows 1 Connect the cradle to your computer 2 Click the HotSync icon in the Windows sys...

Страница 83: ...ter has TCP IP support installed Both your company s network system and its remote access server support TCP IP You have a remote access account Everything you need to connect to your company s dial in server network modem is included in the Palm Desktop for CLIÉ software and your CLIÉ handheld You need to activate certain features however on both the Palm Desktop for CLIÉ software and your CLIÉ h...

Страница 84: ...Setup from the Options menu The Primary PC Setup screen is displayed 4 On your computer click the HotSync icon in the Windows task tray and then select Setup from the shortcut menu 5 Click the Network tab then click TCP IP Settings to open the TCP IP Settings screen 6 Confirm that the Primary PC name and Primary PC address on both screens displayed in step 3 and 5 match If they do not change the P...

Страница 85: ...work computer with a cable To connect to the network computer via a cable proceed as follows 1 Rotate the Jog Dial to select HotSync and then press the Jog Dial Or tap the HotSync icon on the Application Launcher screen The HotSync screen appears 2 Tap the Menu icon 3 Tap LAN Sync Prefs from the Options menu The LANSync Preferences screen is displayed 4 Tap LANSync 5 Tap OK The HotSync screen appe...

Страница 86: ...Comma delimited csv txt Address Book and Memo Pad only Tab delimited tab tsv txt Address Book and Memo Pad only vCard File vcf Address Book only CSV Lotus Organiser 2 x 97 Mapping Address Book only Text txt Memo Pad only Date Book archive dba vCal File vcs Date Book only Address Book archive aba To Do archive tda Memo Pad archive mpa Archive formats can only be used with the Palm Desktop for CLIÉ ...

Страница 87: ...mported data is highlighted in the application 10 To add the imported data to your CLIÉ handheld perform a HotSync operation See the Palm Desktop for CLIÉ online Help for more information on importing and exporting data Synchronizing with external data File Link The File Link feature allows you to import Address Book and Memo Pad information on your CLIÉ handheld from a separate external file such...

Страница 88: ...red port that you can use to beam information to another Palm OS PDA device that is close by and also has an IR port The IR port 1 is located at the top of your CLIÉ handheld behind the small dark shield You can beam the following information between your CLIÉ handheld and another Palm OS PDA The record currently displayed in Address Book Date Book To Do List or Memo Pad All records of the categor...

Страница 89: ... Beam command for an individual record In Address Book only Beam Business Card Beam Category 4 When the Beam dialog box appears point the IR port directly at the IR port of the receiving handheld 5 Wait for the Beam dialog box to indicate that the transfer is complete before you continue working on your CLIÉ handheld For best results your CLIÉ handheld and another Palm OS PDA should be 4 to 8 inch...

Страница 90: ...g data starts You can select the category in which you save the data in a dialog box 3 Tap Yes The data is saved to the unfiled category Incoming data or application should be placed in the Unfiled category You can press the Address Book button for about two seconds to beam your business card You can use Graffiti to beam the current entry then or and then tap If Beam Receive in the Preferences men...

Страница 91: ...that can be converted into digital data such as pictures music words sounds movies and photographs Foreseen as the universal data storage device of the future the Memory Stick can already be used with an ever increasing range of compatible products including Audio systems Visual devices VAIO products CLIÉ handhelds Mobile phones There are currently two different types of Memory Stick The generic M...

Страница 92: ...ent capacity of 88 floppy disks Reliability by way of protecting the hardware and its contents the number of terminals is reduced to only 10 pins This and the overall robust structure of the stick gives it a longer lifespan than other storage devices Durability the same Memory Stick can be used tens of thousands of times Forward compatibility the Memory Stick s current format is designed to be com...

Страница 93: ...rting it into any compatible device to transfer and share the information you have saved For you this means you can expand the capabilities of your CLIÉ handheld in the following scenarios With your still digital camera share your holiday pictures instantly by e mail Carry pictures on you by copying image files from the Internet to your VAIO to your CLIÉ handheld With your voice recorder add your ...

Страница 94: ...you can enjoy the following features 32MB 64MB and 128MB capacity versions Storage of up to 120 minutes of audio data Download and save digital music pictures movies and more Combine data files to add music to your home movies for example Transfer and share data between several digital products MagicGate Copyright Protection Technology SDMI Secure Digital Music Initiative Compliance OpenMG Jukebox...

Страница 95: ...authentication is not passed data cannot be exchanged or played back OpenMG This is a copyright protection technology that is used to manage the digital music content downloaded to the PC from CDs the Internet and or other sources Software installed on the PC records music content in encrypted form onto the hard disk As well as allowing you to enjoy music on the PC this technology protects against...

Страница 96: ...function that complies with SDMI standards thereby providing an environment where individuals can record and enjoy third party music data without worrying about copyright infringement Literary works that are recorded by individuals are permitted for private usage only Compatible devices There are nearly 80 Memory Stick enabled products on the market or announced for introduction world wide ranging...

Страница 97: ...CLIE Operating Instructions Using the Memory Stick 96 n N VAIO notebooks VAIO desktops CLIÉ Handheld Entertainment Organiser Sony mobile phones ...

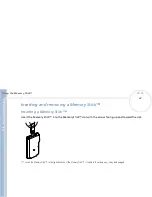
Страница 98: ...ting and removing a Memory Stick Inserting a Memory Stick Insert the Memory Stick into the Memory Stick slot with the arrow facing up and toward the slot Insert the Memory Stick in the right direction If the Memory Stick is forced in the wrong way it may be damaged ...

Страница 99: ...e removing a Memory Stick make sure that data is not being written to or read from the Memory Stick To remove a Memory Stick proceed as follows 1 Gently push the Memory Stick into the slot 1 The Memory Stick pops out a little from the CLIÉ handheld 2 Pull the Memory Stick out carefully 2 ...

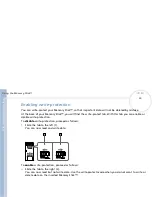
Страница 100: ... find the write protect tab With this tab you can enable or disable write protection To disable write protection proceed as follows 1 Slide the tab to the left 1 You can now read and write data To enable write protection proceed as follows Slide the tab to the right 2 You can now read but not write data Use the write protect mode when you do not want to write or delete data on the inserted Memory ...

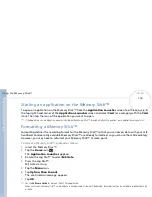
Страница 101: ...the recording format for the Memory Stick so that you can access data with your CLIÉ handheld Commercially available Memory Sticks are already formatted so you can use them immediately However you may have to reformat your Memory Stick at some point To format a Memory Stick proceed as follows 1 Insert the Memory Stick 2 Tap the Home icon The Application Launcher appears 3 Rotate the Jog Dial to se...

Страница 102: ...ave more than one To view the information on the Memory Stick proceed as follows Rotate the Jog Dial to select Card Info and press the Jog Dial Alternatively tap the Card Info icon on the Application Launcher screen The Card Info screen appears showing you the information you need Exchanging data with the Memory Stick The Memory Stick allows you to exchange data between your CLIÉ handheld and your...

Страница 103: ... different applications to the buttons on the front panel of your CLIÉ handheld and the HotSync button on the cradle and reassign the full screen pen stroke command ShortCuts Define a list of Graffiti abbreviations Jog Enable or disable the JogAssist feature and configure the options Network Configure your CLIÉ handheld for use on a network Date Time Set the current date and time the time zone of ...

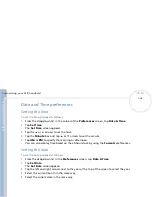
Страница 104: ...ute box and tap or arrows to set the minute 5 Tap AM or PM to specify the morning or afternoon You can also display time based on the 24 hour clock by using the Formats preferences Setting the date To set the date proceed as follows 1 From the drop down list in the Preferences screen tap Date Time 2 Tap Set Date The Set Date screen appears 3 Tap the left and right arrows next to the year at the to...

Страница 105: ...ng time proceed as follows 1 Tap Date Time from the drop down list on the Preferences screen The Date Time Preferences screen is displayed 2 Tap the down arrow next to Daylight saving 3 Tap and select On or Off General preferences Choosing font settings In all basic applications except Expense you can change the font style to make the text easier to read You can choose a different font style for e...

Страница 106: ...ook and all other aspects of your CLIÉ handheld that displays a calendar 4 Tap the Numbers drop down list and select a format Choosing country settings When you select a country the time date the week starting day and number formats are adjusted For example in Germany time is often expressed using the 24 hour clock in England time is expressed using the 12 hour clock with an AM or PM suffix A coun...

Страница 107: ...lect the preferred sound level or turn the sound off 4 Tap the Game Sound drop down list and select the preferred sound level or turn the sound off The Game Sound setting works only with games that are programmed to respond to it Viewing preferences To view your Preferences proceed as follows 1 Tap the Home icon The Application Launcher starts up 2 Rotate the Jog Dial to select Prefs and press the...

Страница 108: ...application buttons are reset to the default setting Assigning preferences to the full screen stroke You can choose whether the full screen pen stroke should activate the Graffiti Help application or one of your Application Launcher controls To assign activities to a full screen pen stroke proceed as follows 1 In the Preferences screen select Buttons from the drop down list in the top right hand c...

Страница 109: ...ata beams the current record to another Palm OS PDA 4 Tap OK You go back to the Buttons Preferences dialog box Assigning applications to HotSync buttons Button preferences let you assign different applications to the HotSync buttons on the cradle and the modem To assign applications to HotSync buttons proceed as follows 1 In the Preferences screen select Buttons from the drop down list in the top ...

Страница 110: ... that you can turn your CLIÉ handheld on or off by keeping it pressed The functions activated by the JogAssist feature differ depending on the application you use In some applications with the Jog Dial symbol part of the functions may change when the JogAssist feature is enabled The JogAssist feature does not support menu operations To make your Jog Dial and BACK button settings proceed as follows...

Страница 111: ...ice Provider or a dial in server Service templates are a set of ISP and dial in server configuration settings that you can create save and reuse To select an Internet Service proceed as follows 1 Tap Network from the drop down list on the Preferences screen The Network Preferences screen is displayed 2 Tap the down arrow next to Service and then select the predefined service template you want to u...

Страница 112: ...ssigned in this field and does not prompt you to enter a password during the login procedure If you are concerned about security select the Prompt option and do not enter a password To assign a password proceed as follows 1 In the Network Preferences screen tap the Password field 2 Enter the password you use to log into your server 3 Tap OK The Password field changes to display the word Assigned S...

Страница 113: ... appears 2 Enter the phone number for your ISP or dial in server in the Phone field 3 Enter the telephone number used to access the modem 4 If needed enter a dial prefix such as 0 to access an outside line and then tap the Dial prefix check box You can enter a comma in the field to introduce a pause in the dialing sequence Each comma equals a two second pause 5 If the phone line you are using for ...

Страница 114: ...r the Service field To duplicate an existing service template proceed as follows 1 In the Network Preferences screen tap the down arrow next to Service and then select the predefined service template you want to duplicate 2 Tap the Menu icon 3 Tap Duplicate from the Service menu A copy of the service template is added to the drop down list for the Service field To delete a service template proceed...

Страница 115: ...own arrow next to Connection type and select one of the following connection types PPP Point to Point protocol SLIP Serial Line Internet Protocol CSLIP Compressed Serial Line Internet Protocol 4 Tap the down arrow next to Idle timeout and select one of the following options 1 minute Waits one minute for you to open another application before it drops the connection 2 minutes Waits two minutes 3 mi...

Страница 116: ...gging in to a network server for example your corporate network or your Internet Service Provider ISP It is something that you are likely to receive from your IS System Administrator if your company has a system in which you log in to the corporate servers from your CLIÉ handheld using a modem or network connection To create a log in script proceed as follows 1 In the Network Preferences screen ta...

Страница 117: ...ID Transmits the User ID information entered in the User ID field of the Network Preferences screen Send Password Transmits the password entered in the Password field of the Network Preferences screen If you did not enter a password this command prompts you to enter one The Password command is usually followed by a Send CR command Delay Tells your CLIÉ handheld to wait a specific number of seconds...

Страница 118: ...and 26 If the character is any other value then the character sequence is not subject to any special processing For example the string Joe M transmits Joe followed by a carriage return Carriage return and line feed You may include carriage return and line feed commands as part of the login script when entered in the following format cr Sends or receives a carriage return lf Sends or receives a lin...

Страница 119: ... pinpoint where the log in procedure communication fails and why Setting the High Resolution Assist function The High Resolution Assist function enables the high resolution display of an application that does not support the high resolution mode To set this function proceed as follows 1 Tap HiRes from the drop down list in the Preferences screen The HiRes Preferences screen is displayed 2 To enabl...

Страница 120: ... support provides the latest information on your CLIÉ handheld On this website you will find Frequently Asked Questions FAQs An electronic version of the Operating Instructions Installation information Software updates On line knowledge base The Troubleshooting section below provides some answers on these areas Operating problems page 120 Tapping and writing problems page 121 Application problems ...

Страница 121: ...ications If you have any problems with a third party application please contact the developer or publisher of that software Operating problems I do not see anything on the screen Try each of these in turn Tap the contrast adjustment icon and adjust the contrast Recharge the unit If your CLIÉ handheld still does not operate try a soft reset My CLIÉ handheld has frozen Perform a soft reset My CLIÉ h...

Страница 122: ...ot get the handheld to recognise my handwriting For your CLIÉ handheld to recognise handwriting input with the stylus you need to use Graffiti writing Make the Graffiti character strokes in the Graffiti writing area not on the display part of the screen Write Graffiti strokes for letters in the left hand side and the strokes for numbers in the right hand side of the Graffiti writing area Make sure...

Страница 123: ...the same start time choose the Day View to see the overlapping events I cannot list memos the way I want If you cannot manually arrange the order of the memos in the list screen check the Memo Preference setting Make sure that Sort by is set to Manual If you choose to view your memos alphabetically in the Palm Desktop for CLIÉ software and then perform a HotSync operation the memos on your CLIÉ ha...

Страница 124: ...active Check that the correct conduit is installed Reinstall the HotSync Manager and make sure the correct conduit is selected To synchronise Memos To Do List items Dates and Outlook contacts you need to install Intellisync This will not work if you only have the Palm Desktop for CLIÉ software installed I cannot launch the HotSync Manager Make sure you are not running another program such as netwo...

Страница 125: ...ager is running and the Serial Port for local operations is set to the simulated port for infrared communication On your CLIÉ handheld make sure the HotSync application is set to Local with the option IR to a PC Handheld Make sure the IR port of your CLIÉ handheld is aligned directly opposite to and within a few inches of the infrared device of your computer IR HotSync operations do not work if yo...

Страница 126: ...ftware check to see you have the correct user name selected for viewing data Click the HotSync Manager and choose Custom Check that all conduits are set to synchronize files My CLIÉ handheld displays the message Waiting for sender when it is near my computer s infrared port Your computer s infrared port may be set to search automatically for the presence of other infrared devices To turn off this ...

Страница 127: ...4 and twenty centimeters approximately 8 apart and that the path between the two handhelds is clear of obstacles Beaming distance to other Palm OS PDAs may be different Move your CLIÉ handheld closer to the receiving handheld During beaming I get a message telling me the handheld is out of memory Your CLIÉ handheld requires at least twice the amount of memory available as the data you are receivin...

Страница 128: ...s Perform a HotSync operation to synchronize your data and restore the private records by transferring them from your computer to your CLIÉ handheld I forgot the password My CLIÉ handheld is locked If you assign a password and lock your CLIÉ handheld you must perform a hard reset to continue using your handheld This means you will lose all the data you saved on your CLIÉ handheld Memory Stick prob...

Страница 129: ...reen Your CLIÉ handheld is not waterproof Do not expose it to rain or moisture Make sure that water does not get inside through the crevice around the front button Treat your CLIÉ handheld like any other portable electronic equipment The CLIÉ handheld screen is made of glass Do not drop it or subject it to shock Do not carry your CLIÉ handheld in your back pocket If you sit down with your CLIÉ han...

Страница 130: ...ssage appears When this caution is displayed back up all data with a HotSync transfer before you charge the CLIÉ handheld to prevent accidental loss of data You can view data stored on your CLIÉ handheld while charging Even if the battery gradually runs out and your CLIÉ handheld cannot be turned on the system safely keeps data for one week In this case the system maintains sufficient battery powe...

Страница 131: ...lt in and non removable lithium polymer battery Battery life 15 days based on an average of 30 minutes use per day Memory 8MB SDRAM 4MB FLASH 8 MB Memory Stick Interface USB cradle infrared port LCD display mode 320x320 pixels with backlight Colour backlight color TFT screen frontlight TFT color 64k External input output interface connector IrDA 1 2 Memory Stick slot Dimensions width 71 x 118 heig...

Страница 132: ...f use Design and specifications are subject to change without notice Mass 160g including supplied stylus Accessories Optional extras USB cradle Mobile Kit for J5 6 Travel Kit Stylus Set Bundled accessories AC adapter stylus Palm Desktop Installation CD protective carrying case Operating temperature 5ºC 35ºC Model PEG N770C E ...

Отзывы: