74
Downloading and Installing Software Updates
Downloading Service Upgrades
C.4 Downloading Service Upgrades
The ShopStream Connect software allows you to download service upgrades directly to your
handheld diagnostic tools, as well as update its own software. The following pages contain a brief
description for installing a service upgrade on a handheld tool. Detailed procedures for updating
the ShopStream Connect software, connecting handheld diagnostic tools to the PC, and other
operations are found in the ShopStream Connect User’s Manual. The ShopStream Connect
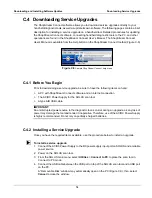
User’s Manual is available from the Help button on the ShopStream Connect toolbar (Figure C-8).
Figure C-8
Sample ShopStream Connect help menu
C.4.1 Before You Begin
Prior to downloading a service upgrade, be sure to have the following items on hand:
•
A PC with ShopStream Connect software and an internet connection
•
The AC/DC Power Supply for the SOLUS scan tool
•
A type A/B USB cable
IMPORTANT:
An uninterrupted power source to the diagnostic tool is crucial during an upgrade, as any loss of
power may damage the tool and render it inoperative. Therefore, use of the AC/DC Power Supply
is highly recommended. Do not rely on partially-charged batteries.
C.4.2 Installing a Service Upgrade
Once you have the required items available, use the procedure below to install an upgrade.
z
To install a service upgrade:
1.
Connect the AC/DC Power Supply to the DC power supply input port on SOLUS and a reliable
power source.
2.
Power on the SOLUS scan tool.
3.
From the SOLUS main menu, select
Utilities
>
Connect to PC
to place the scan tool in
Connect to PC mode.
4.
Connect the USB cable between the USB port on top of the SOLUS scan tool and a USB port
on the PC.
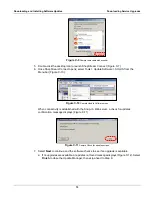
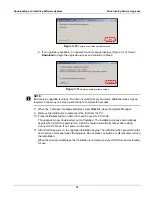
A “Removable Disk” window may automatically open on the PC (Figure C-9). If so, select
Cancel
to close the window.
Содержание Solus
Страница 1: ...User Manual August 2009 EAZ0007E76F Rev A ...
Страница 87: ...80 Index ...


