9
Introduction
Connections
2.4.3 Thumb Pad
The
Thumb Pad
moves the highlight, allowing vertical and horizontal on-screen movement. The
Thumb Pad is typically used in combination with the
Y/
a
and
N/X
buttons.
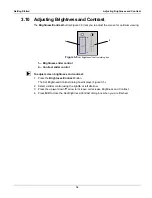
2.4.4 Brightness/Contrast Button
The
Brightness/Contrast
button opens the dialog box that allows you to adjust the screen for
optimum viewing. See “Adjusting Brightness and Contrast” on page 18 for details.
2.4.5 S Button
The
S
button can be customized to perform different functions from the
Utilities
>
Tool Setup
menu. See “S Button” on page 59 for details.
2.4.6 Power Button
The
Power
button powers on and powers off this scan tool. See “Powering On the Unit” on
page 16 and “Powering Off the Unit” on page 17 for details.
2.5 Connections
This scan tool uses the following connections (Figure 2-3 on page 5):
•
DC power adapter input
•
USB port
•
IR output
•
Data cable connector
2.5.1 DC Power Input
The AC/DC power supply provides power to the scan tool through the DC power input on top of
the unit (Figure 2-3 on page 5). For related information, see the following sections:
•
“AC/DC Power Supply” on page 11
•
“Connecting an AC/DC Power Supply” on page 16
2.5.2 USB Port
This scan tool has a USB port for connecting to a PC.
Содержание Solus
Страница 1: ...User Manual August 2009 EAZ0007E76F Rev A ...
Страница 87: ...80 Index ...


