


9880022800-EN-011210.doc
18
EN
■
Re-insertion of the oven door
Act in reverse order, holding the door sideways towards the bottom with both hands and
inserting the hinges in the openings of the front frame of the oven, (pay attention to the
positioning of the foot encasing)
.
With the oven door completely open, remove the hinge
lock bringing the locking hooks in original position or, depending on the model,
removing the rods. Slowly close the oven door and ensure it has been correctly inserted
and aligned with the side edges.
Attention.
Do not remove the hinge locking hooks from their seat when the door is not
mounted in the oven. Do not close the hinges without the weight of the door as it causes
a violent closing of the springs.
Do not rest weights on the door and do not hang them on the handle, they might damage
the product creating malfunctionings.
Also, do not use the oven until the door has been correctly re-mounted.
■
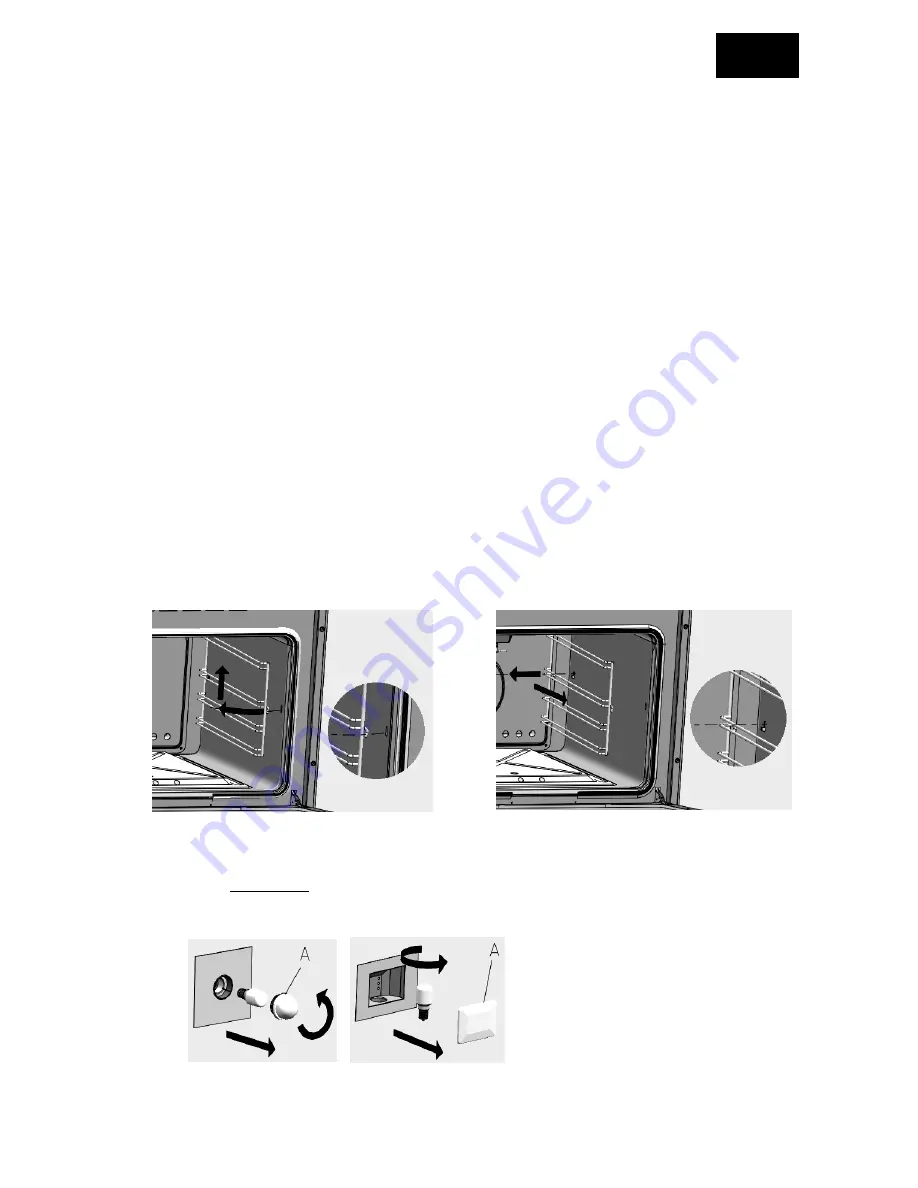
Side frames dismantling
If you have just finished using the oven, ensure the side frames have sufficiently
cooled down before removing them.
Grip the front part of the guide to be removed, lift it and pull towards the centre of the
oven until it comes out from the fastening seat
(fig. below left)
. Now pull the guide
outwards, lift the rear part and pull towards the centre of the oven until it is completely
removed from the rear fastening seat
(fig. below on right)
. Repeat the operation in
reverse order to install the guides in their seats again.
■
Replacement of the oven light
Read and follow the procedure below to prevent electric shocks and/or personal
damages: Attention: Before replacing the oven light, ensure the electric current has
been disconnected by opening the main switch.
Ensure the oven and the light are cold then remove the protection cap
A