2 9
MAINTENANCE
ENG
LIS
H
C l e a n i n g t h e i n f u s e r
The infuser must be cleaned at least once a month.
W AR NING
The infuser must not be removed w hen the
appliance is on.
Do not use force to remove the infuser.
1
Make sure the machine is correctly turned off
(see " Turning off" ).
2
Open the service door.
3
Remove the drip tray and w aste coffee container.
4
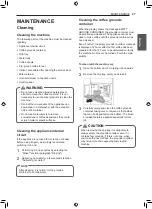
Press the tw o coloured release buttons inw ards
and at the same time pull the infuser outw ards.
W AR NING
Do not use w ashing up liquid to clean the infuser
to avoid removing the lubricant applied to the
inside of the piston.
5
Soak the infuser in w ater for about 5 minutes,
then rinse.
6
After cleaning, replace the infuserby sliding it
onto the internal support and pin at the bottom,
then push the PUSH symbol fully in until it clicks
into place.
7
Once inserted, make sure the tw o coloured
release buttons have snapped out.
8
Replace the drip tray and w aste coffee container.
9
Close the service door.
C l e a n i n g t h e m i l k c o n t a i n e r
Clean the milk container after each time you prepare
milk, as described below :
1
Lift and remove the lid.
2
Extract the milk container from the thermal
casing, holding it by the tw o side grips.
W AR NING
Th e t h e r m a l c a s i n g m u s t n o t b e f i l l e d o r
i m m e r s e d i n w a t e r
: to clean it w ipe w ith a damp
cloth.
3
Remove the milk spout and intake tube.
4
Turn the froth adj ustment dial clockw ise to the
" INSERT" position and pull off.
5
Wash all the components of the frother
thoroughly w ith hot w ater and mild w ashing-
up liquid. All components and the container are
dishw asher safe, placing them in the top basket
of the dishw asher. Pay particular attention to
check in the hollow and groove under the dial
that no milk residues remain. Scrape any residue
from the groove w ith a toothpick.


