


Chapter 4
Installation Procedure
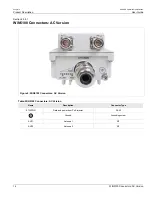
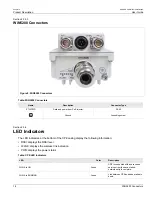
RUGGEDCOM WiN5100/WiN5200
User Guide
26
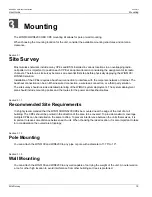
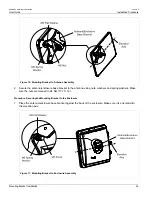
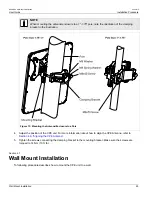
Wall Mount Installation
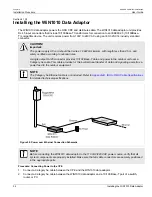
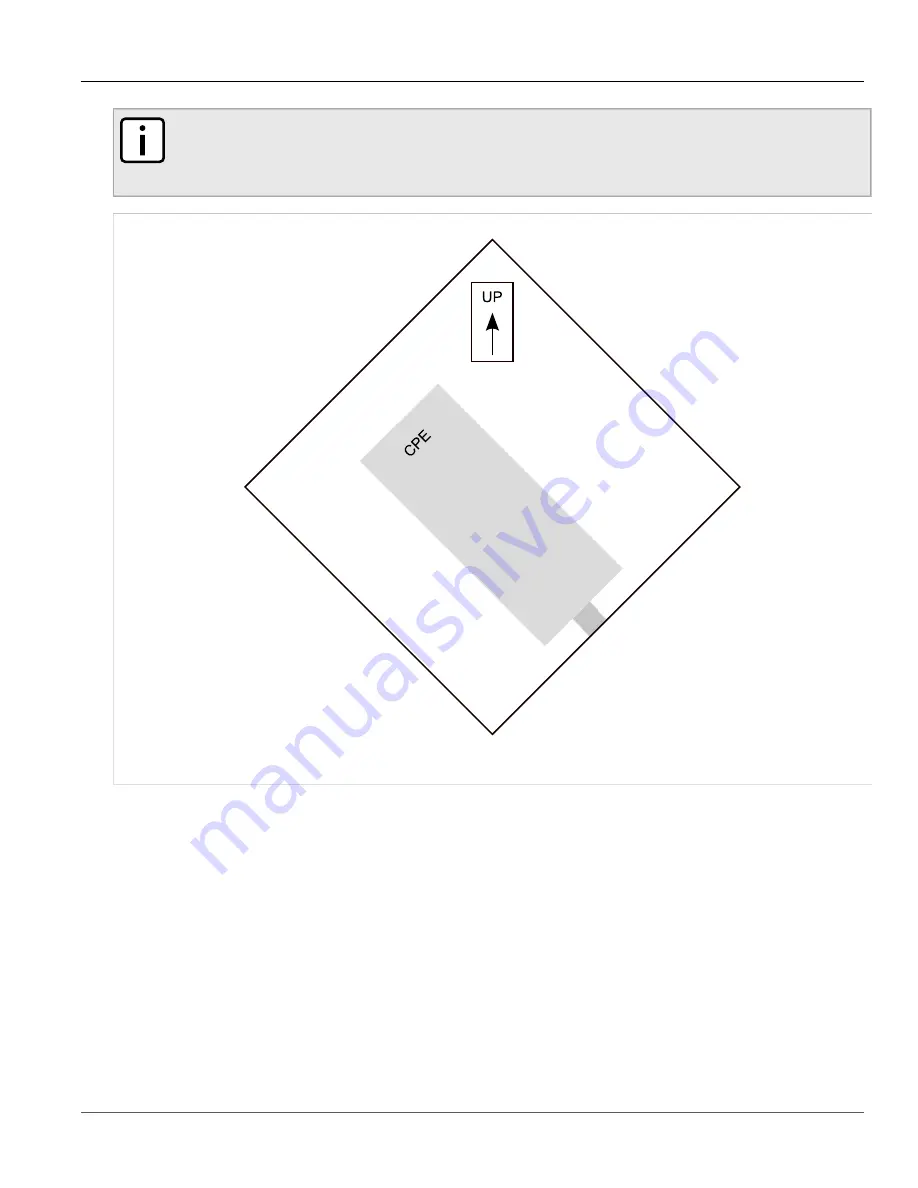
NOTE
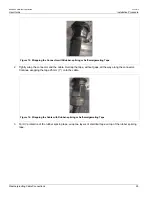
When mounting a WiN5258 or WiN5249 unit, make sure that the antenna and CPE unit are rotated by
45 degrees (when compared to other models), with the arrow on the antenna facing up, as shown in
the following figure.
Figure 14: Mounting a WiN5258 or 5249 Unit
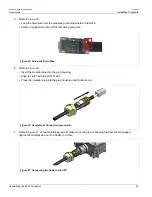
Procedure: Mounting the CPE Unit To a Wall
1. Select a mounting location on the wall.
2. Place the mounting bracket on the wall and mark 4 mounting holes.
3. Drill 4 holes and insert 4 type NC 1/4" fastening inserts into the holes.
4. Secure the mounting bracket to the wall with 4 type NS 1/4" × 1/2" HEX screws, 4 spring washers, and 4 flat
washers.
5. Connect the arm bracket to the mounting bracket using a screw, spring washer and washer. Make sure the
screw is hand tightened.
6. Connect the CPE unit to the arm bracket using a screw, spring washer and washer. Make sure the screw is
hand tightened.
7. Adjust the position of the CPE unit. For more information about how to aligned the CPE Antenna, refer to
Содержание RUGGEDCOM WiN5100
Страница 2: ...RUGGEDCOM WiN5100 WiN5200 User Guide ii ...
Страница 8: ...RUGGEDCOM WiN5100 WiN5200 User Guide FCC Statement And Cautions viii ...
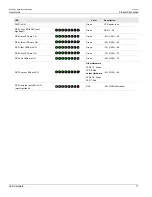
Страница 26: ...RUGGEDCOM WiN5100 WiN5200 User Guide Chapter 2 Product Description LED Indicators 18 ...
Страница 28: ...RUGGEDCOM WiN5100 WiN5200 User Guide Chapter 3 Mounting Wall Mounting 20 ...
Страница 102: ...RUGGEDCOM WiN5100 WiN5200 User Guide Chapter 6 CPE Management Interface Configuring WiMAX Radio Parameters 94 ...
Страница 106: ...RUGGEDCOM WiN5100 WiN5200 User Guide Appendix A WiN5100 WiN5200 Specifications 98 ...
Страница 114: ...RUGGEDCOM WiN5100 WiN5200 User Guide Appendix D RUGGEDCOM CPE Warranty 106 ...