


Page 9
An IP address of 10.0.1.2 is typically pre-filled in Airport Utility. Unless that
conflicts with another reserved IP address, you can keep it as is. Then click on
“
Save
”, then “
Update
”, and wait for the Airport to restart.
After the Airport is finished restarting, you can use your camera immediately
using the IP address you just reserved. Simply add
http://
in front of it and
open it in Safari, such as
http://10.0.1.2
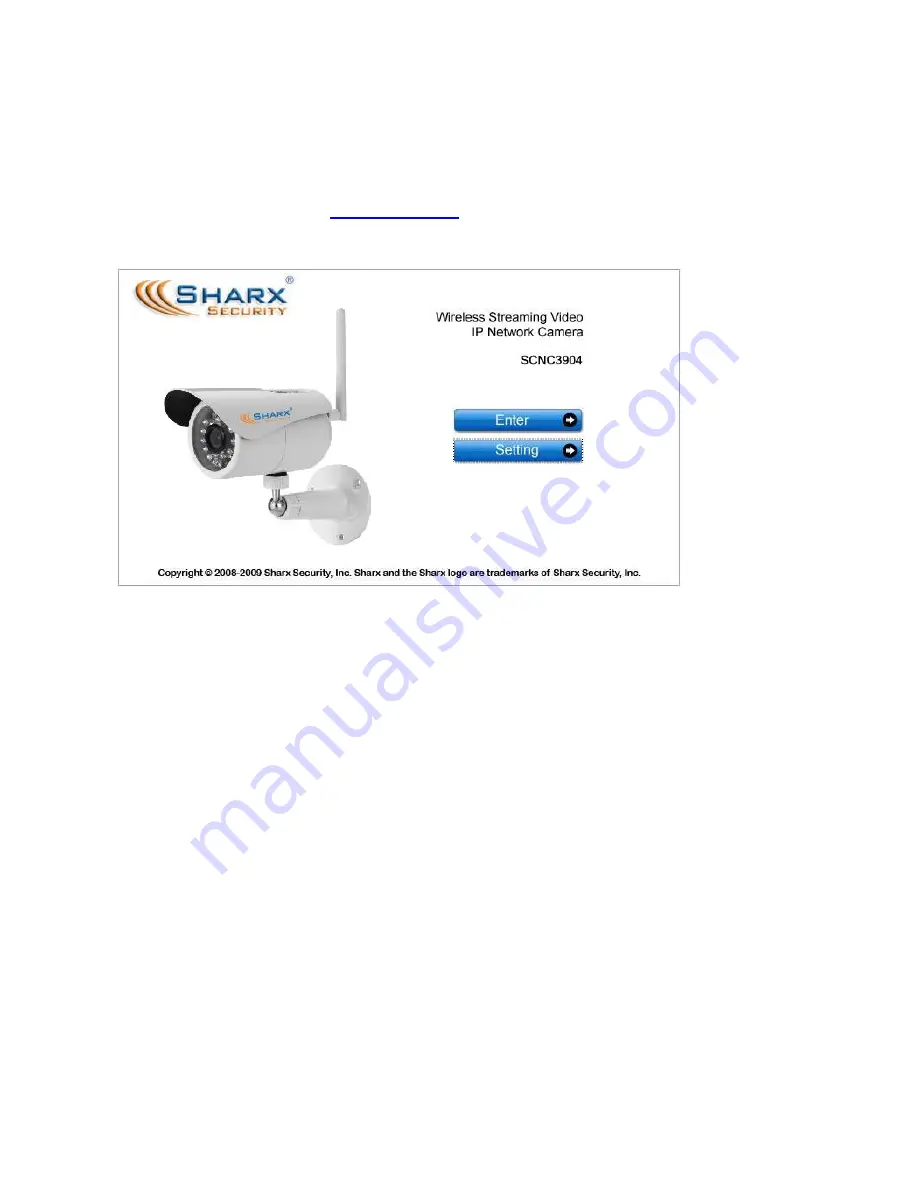
and then you should see the Sharx
Security login screen for your camera similar to the following:
To see video, click on “Enter”. Until you change it, the default login is
Username:
admin
Password:
admin
Now the Sharx IP camera should always be on your network at the IP address
that you reserved, regardless of whether you’re using the camera with a wired
network connection or wireless after completing the wireless setup.
Note: If you have trouble seeing video using Safari in Mac OSX Yosemite, go to
“
Preferences
”, then “
Advanced
”, and uncheck “
Stop plugins to save power
”.
It may be necessary to restart Safari after this setting change.
Note: if you have one of the earliest (UFO shaped) Apple Airports you should
consider replacing it with a current generation router. These oldest Apple
Airports are now obsolete and are not supported by Apple or Sharx.
Next you will probably want to set up the wireless connection, unless you
prefer to use the SCNC3904 camera with a wired network connection.
To prepare your Airport for easiest and most reliable wireless connection to a
Sharx camera, check the following settings using the Airport Utility:
Содержание SCNC3904
Страница 62: ...Page 62...


