


Page 28
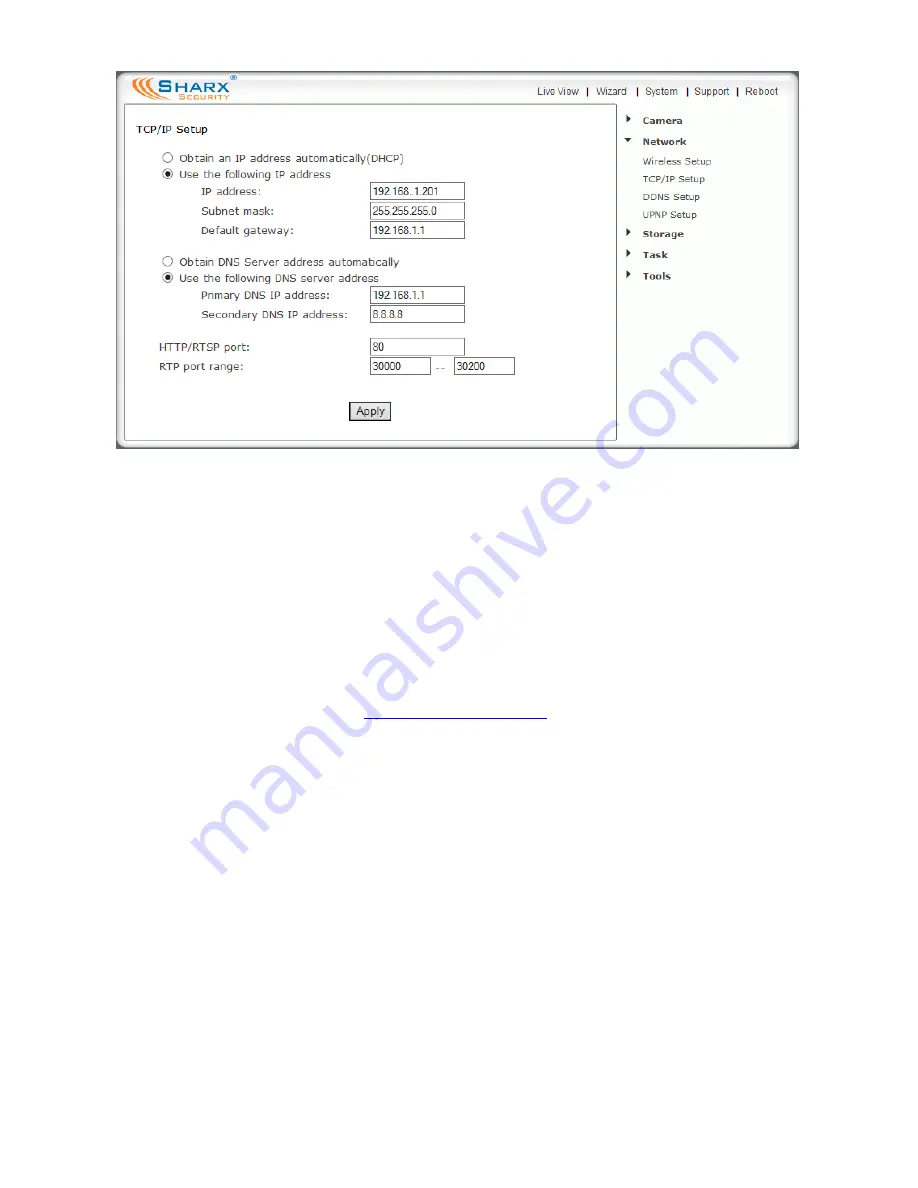
The HTTP port is usually 80. The RTP port range should start at 30000 for your
first camera. For all additional cameras the start of the range increases by 2,
for example your 2
nd
camera would have a starting RTP port of 30002, the 3
rd
camera would have 30004, 4
th
camera at 30006 etc. The RTP port range ending
address should always stay at 30200.
At this point it’s a good idea to double check your settings, and preferable take
a screenshot or take notes. After you click on “Apply”, you need to log in to
the camera at the address you just picked. Remember to add the http:// in
front of the IP address, as in
http://192.168.0.101
. If your port is not 80 you
need to add a colon : and the port number at the end of the IP address, too.
If there is no response from the camera at the new IP address, please refer to
the notes or screenshot you took before you applied the new settings.
If you catch a typo after you applied it, it is possible to recover from this in 2
ways. You can reset the camera back to factory default settings as described
towards the end of this manual. Or you can temporarily set up your router
such that the wrong IP address would work with it.
If your IP address assignment was successful, from now on, regardless of what
computers or other devices you have on your own network and regardless of
the order that you turn them on or off, your camera’s IP address will always be
the same. However, you have to make sure that you never give the same IP
address to more than one device.
Содержание SCNC3904
Страница 62: ...Page 62...


