


Page 46
NAS drive setup
The “
Storage Setup
” submenu allows you to select a NAS (network attached
storage) drive instead of MicroSD as the destination for the camera’s
standalone recording. If NAS is selected you need to make sure your NAS drive
has a permanently assigned IP address that does not change after a restart.
You also need to know the so-called network “
share
” name for your drive, as
well as username and password.
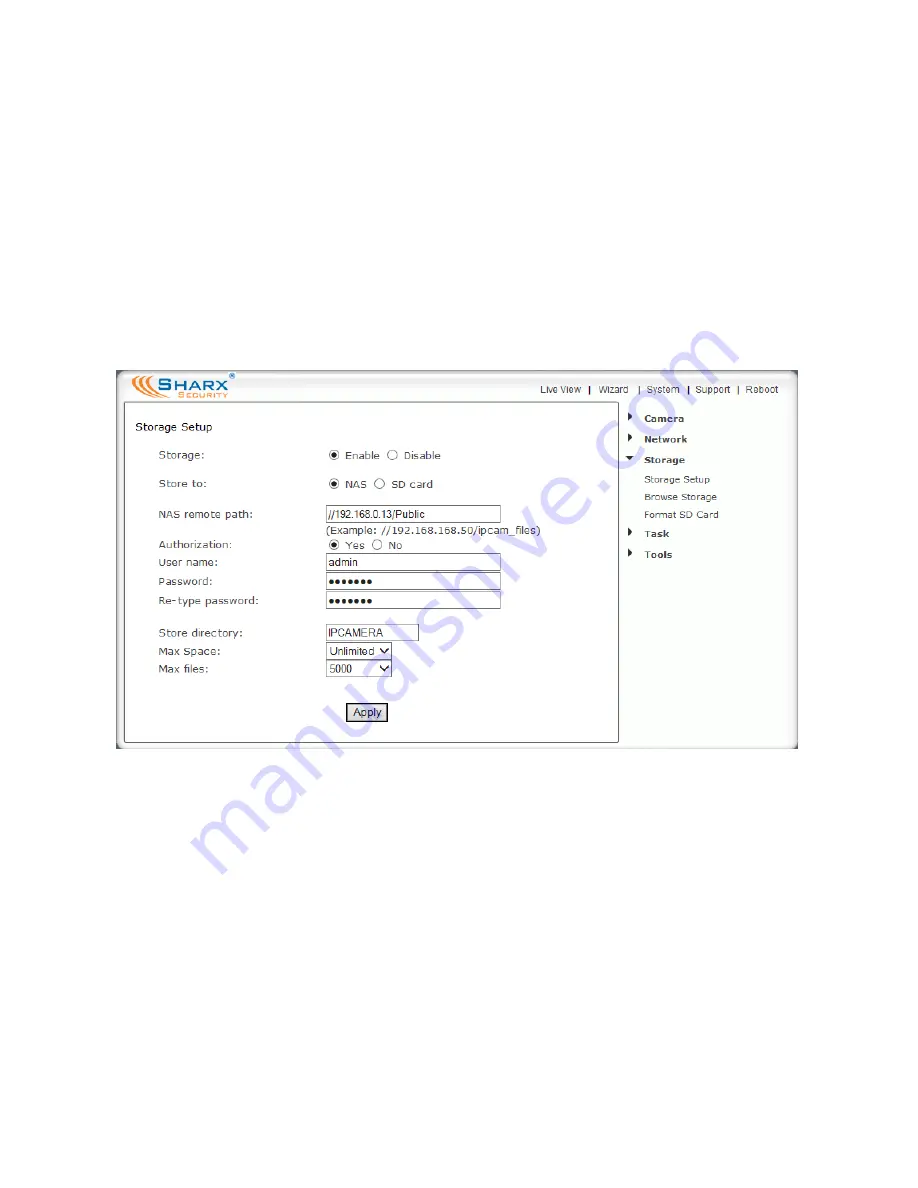
It is very important to use the correct format for specifying the NAS path:
Exactly 2 forward slashes, IP address, 1 slash, and the share name
(without
spaces). So the NAS setup screen would be filled in similar to the following:
The share name is the name of the top level folder that a NAS drive shows on
the network. You can check it by clicking on the icon for the NAS in your PC’s
“Network” or “My Network Places” folder, or on a Mac by using Finder, then
“Go to…” and “Network” and then clicking on the NAS icon.
In the example on the next page, the drive TC1 has a network share named
“disk”, and MYBOOKWORLD has the shares “SharxCam1” and “Public”. For
NAS drives
other
than Apple Time Capsule,
if your share name has spaces in it
you need to rename it without spaces
. Each NAS drive has its own menus.
Consult your NAS manual for details on creating or renaming network shares.
A Time Capsule creates shares automatically based on user accounts.
IMPORTANT: Only specify the share name, not folder names. For example,
//192.168.0.13/sharename/foldername would not work
.
Содержание SCNC3904
Страница 62: ...Page 62...


