Sharp AL-2061 Скачать руководство пользователя страница 138

USER SETTINGS

136

4

AUTO SHUT-OFF 
TIME

1: 5 MIN.

2: 30 MIN.
3: 60 MIN.
4: 120 MIN.
5: 240 MIN.

• This function automatically 

switches the machine to a state 
that consumes even less power 
than preheat mode if the set 
duration of time elapses without 
the machine being used when 
the power is on. All lights 
except the power save indicator  
go off. To resume normal 
operation, press the [START] 
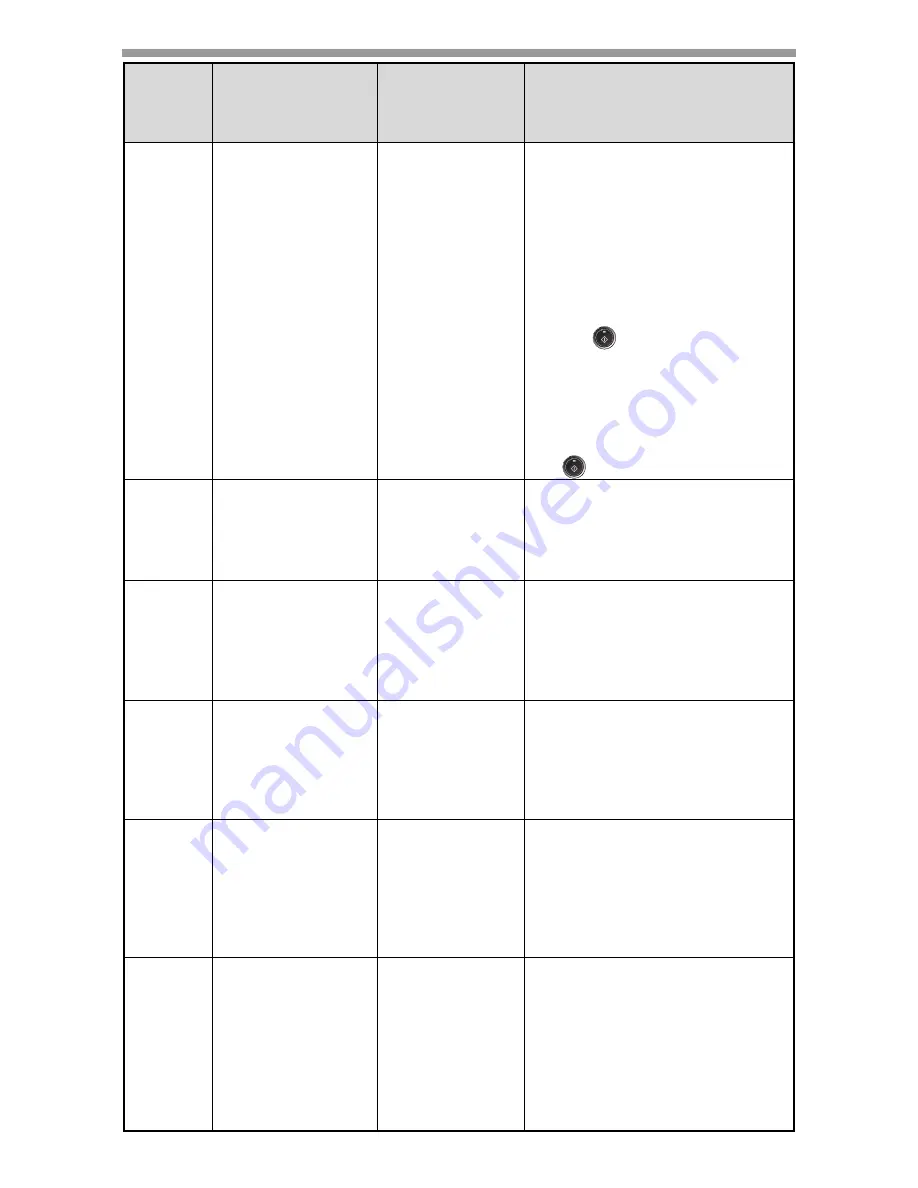
key (

). Normal operation 

also resumes automatically 
when a print job is received or 
scanning is begun from a 
computer. While in auto power 
shut-off mode, no keys
 (except the [START] key 
(

)) can be used.

7

LAYOUT IN 2IN1

1: PATTERN 1

2: PATTERN 2

• Use this setting to select the 

layout pattern when two original 
pages are copied onto a single 
sheet of paper (see page 34 for 
the layout patterns).

8

OFFSET 
FUNCTION

1: ON

2: OFF

• When enabled, this function 

offsets the position in the 
paper output tray of sets of 
copies during copy job, and 
print jobs when using the 
printer function.

9

ROTATE ORIG. 
IMAGE

1: ON

2: OFF

• When two-sided copying is 

performed, this function rotates 
the image on the back of the 
original. This is convenient 
when binding the copies at the 
top (tablet binding).

10

AE/TEXT 
RESOLUTION

1: 300dpi

2: 600dpi

• This setting is used to change 

the copy resolution in AUTO 
and TEXT mode from 600 x 
300 dpi to 600 x 600 dpi (high-
quality mode). Scanning is 
slower when high-quality 
mode is used.

11

2-SIDED COPY 
MODE

1: HI-SPEED 

2: NORMAL

• If the memory fills up when 

two-sided copying is 
performed, "NORMAL" can be 
selected to make copying 
possible. However, 
"NORMAL" results in a slower 
copying speed. Normally "HI-
SPEED" is selected to enable 
fast two-sided copying.

Program

number

Program name

Setting codes

(factory default

setting appears

in bold)

Explanation

Содержание AL-2061

Страница 1: ...DIGITAL MULTIFUNCTIONAL SYSTEM OPERATION GUIDE for general information AL 2061 MODEL ...

Страница 2: ...ional law Other items may be prohibited by local law Money Stamps Bonds Stocks Bank drafts Checks Passports Driver s licenses In some areas the POWER switch positions are marked I and on the copier instead of ON and OFF If your copier is so marked please read I for ON and for OFF Caution For a complete electrical disconnection pull out the main plug The socket outlet shall be installed near the eq...

Страница 3: ...LECTING THE TRAY 26 MAKING A COPY DARKER OR LIGHTER 27 REDUCTION ENLARGEMENT ZOOM 28 4 CONVENIENT COPY FUNCTIONS AUTOMATIC TWO SIDED COPYING 29 SORT COPY 32 COPYING MULTIPLE ORIGINALS ONTO A SINGLE SHEET OF PAPER 2 IN 1 COPY 34 CREATING MARGINS WHEN COPYING MARGIN SHIFT 37 ID CARD COPY 39 5 INSTALLING THE SOFTWARE SOFTWARE 40 BEFORE INSTALLATION 41 INSTALLING THE SOFTWARE 42 HOW TO INSTALL SHARPDE...

Страница 4: ...ITION SETTINGS 80 ABOUT THE WEB PAGES FOR THE ADMINISTRATOR 83 PROTECTING INFORMATION PROGRAMMED IN THE WEB PAGE PASSWORDS 84 KEY OPERATOR PROGRAMS 85 E MAIL STATUS AND E MAIL ALERT SETTINGS 87 REMOVING THE SOFTWARE 90 PRINTER SPECIFICATIONS 90 PRINTER DRIVER SPECIFICATIONS 91 USING THE SCANNER MODE 92 7 SCANNER FUNCTIONS ABOUT THE SCAN TO USB AND NETWORK SCANNER FUNCTION 93 SETTINGS AND PROGRAMMI...

Страница 5: ...RE 154 MISFEED REMOVAL 157 TD TONER DEVELOPER CARTRIDGE REPLACEMENT 161 DRUM CARTRIDGE REPLACEMENT 163 CHECKING THE TOTAL COUNT AND DRUM CARTRIDGE LIFE 165 CLEANING THE MACHINE 166 TRANSFER CHARGER 168 ABOUT SUPPLIES AND OPTIONS 169 10 OPTIONAL EQUIPMEN 250 SHEET PAPER FEED UNIT MX CS10 170 11 APPENDIX SPECIFICATIONS 171 ...

Страница 6: ...strations of driver screens and other computer screens show the screens that appear in Windows Vista Some of the names that appear in these illustrations may differ slightly from the screens that appear in other operating systems The explanations in this manual assume that the person who will install the product and the users of the product have a working knowledge of Microsoft Windows This operat...

Страница 7: ...cate halftone original images such as monochrome photos and color photos Enhanced copying features Zoom copies can be made from 25 to 400 in increments of 1 When the RSPF is being used the zoom copy ratio range is 50 to 200 Continuous copying of up to 99 copies is possible Sets of output can be offset from each other for easy separation offset function Sorting by sets is possible without the need ...

Страница 8: ...llows the machine to be used as a network printer Color scanner function The accompanying scanner driver can be installed and the machine connected to a computer using a USB cable to enable use as a scanner Environment and people friendly design Preheat mode and auto power shut off mode are provided to reduce power consumption when the machine is not in use A universal design has been implemented ...

Страница 9: ...fer charger Side cover open button Charger cleaner Bypass tray paper guides Paper holder arm Original output tray extension Paper output tray The paper output tray has a paper holder arm The paper holder arm presses gently on the output paper to stack it RSPF Exit area 2 3 1 5 7 6 9 8 10 11 12 13 14 Bypass tray Original guides Document feeder tray Document feeder cover 5 3 12 15 4 Drum cartridge T...

Страница 10: ...hen an original is placed in the RSPF Error indicator This lights steadily or blinks when a paper misfeed or other error occurs TRAY SELECT key Use to select the paper tray that has the desired paper for copying Tray location indicator Indicates the selected paper tray The indicator blinks when the tray is out of paper or is not closed MENU key Press this key to select the paper size for copying t...

Страница 11: ... setting menu this returns the settings and display to the initial state START key Ready indicator The ready indicator lights up when copying or scanning is possible To begin copying press the START key The START key is also pressed to return to normal operation from auto power shut off mode Shows the current copy ratio Shows the selected paper size Shows the number of copies that has been entered...

Страница 12: ...e setting The first time the power is turned on after shipment from the factory a message will appear in English in the display asking you to select the language Select the language with the key or key and then press the OK key The language can also be changed in the user programs p 138 If you use the machine in a country other than the country where the machine was purchased you will need to make...

Страница 13: ...ected for the order of display of the date Use the following procedure to set the date and time 1 Enter the year two digits month two digits and day two digits with the numeric keys 2 Enter the time hour two digits and minute two digits with the numeric keys Enter the hour in the following range When 12 hour format is selected 01 to 12 When 24 hour format is selected 00 to 23 3 Press the key or ke...

Страница 14: ...hen press the OK key 3 Press the key or key until 32 DATE TIME FORMAT appears and then press the OK key 4 Press the key or key until 1 TIME FORMAT appears and then press the OK key 5 Press the key or key to select 1 12HOUR or 2 24HOUR Be sure that the COPY mode is selected before pressing MENU key 1 USER PROGRAM Selection 32 DATE TIME FORMAT Selection 1 TIME FORMAT Selection ...

Страница 15: ...13 PREPARATIONS 6 Press the OK key 7 Press the MENU key Press the MENU key to exit ...

Страница 16: ... until 2 DATE FORMAT appears and then press the OK key 5 Press the key or key to select the display order The selections are as follows 1 MMDDYYYY 2 DDMMYYYY 3 YYYYMMDD Be sure that the COPY mode is selected before pressing MENU key This selection does not affect the order of the date that appears in SETTING THE DATE AND TIME in step 1 on page 11 The date in this step always appears in the format ...

Страница 17: ...al settings all settings and functions selected to that point are canceled The AUTO CLEAR can be changed in the user programs p 135 Scanning unit scan head When the machine is able to copy or scan the ready indicator is on the scanning unit is lit To change the date and time or the format after once they are set see page 138 USER PROGRAMS and select program number 31 or 32 of copy mode Copy ratio ...

Страница 18: ...f mode This function automatically switches the machine to a state that consumes even less power than preheat mode if the set duration of time elapses without the machine being used when the power is on The power save indicator lights up the display shows a message indicating that the machine is in auto power shut off mode To resume normal operation press the START key Normal operation also resume...

Страница 19: ...nthetic materials Do not use envelopes that are filled with air or envelopes that have labels or stamps attached These will damage the machine 3 When using paper heavier than 104 g m2 use paper that is A4 or smaller Paper tray type Paper type Size Weight Capacity Paper tray Standard paper Recycled paper A4 B5 A5 56 g m2 to 80 g m2 250 sheets 1 The paper should not exceed the line on the tray Bypas...

Страница 20: ...ies of special paper available on the market and some cannot be used with this machine Before using special paper contact a SHARP service center Before using other than SHARP recommended paper make a test copy to see if the paper is suitable LOADING THE PAPER TRAY 1 Raise the handle of the paper tray and pull the paper tray out until it stops 2 Remove the pressure plate lock Rotate the pressure pl...

Страница 21: ...e remaining paper out and combine it into a single stack with the new paper Make sure that all the paper in the stack is the same size and type When loading paper ensure that there is no space between the paper and the guide and make sure that the guide is not set too narrow and causes the paper to bend Incorrect loading will cause the paper to skew or misfeed If you loaded a different size of pap...

Страница 22: ...en reload as a single stack The paper to be added must be the same size and type as the paper already in the tray Do not use paper that is smaller than the original This may cause smudges or unclean images Do not use paper that has already been printed on by a laser printer or plain paper fax machine This may cause smudges or unclean images Envelopes Do not use the following envelopes as misfeeds ...

Страница 23: ...apers such as transparency film labels and envelopes must be fed one sheet at a time through the bypass tray When copying onto transparency film remove each copy promptly Do not let copies stack up To close the bypass tray perform step 1 and then step 2 in the illustration and push the round projections at the right of the tray until they click Note for loading thick paper Copying on thick paper r...

Страница 24: ...nt guide to match the width of the paper and move the left guide to the appropriate slot as marked on the tray The front guide is a slide type guide Grasp the locking knob on the guide and slide the guide to the indicator line of the paper to be loaded The left guide is an insert type guide Remove it and then insert it at the indicator line of the paper to be loaded The paper size setting cannot b...

Страница 25: ...s and then press the START key Copying books or originals with folds or creases Press down on the RSPF while copying as shown If the RSPF is not completely closed shadows may appear on the copy or it may be fuzzy Straight originals with folds or creases well before placing The document glass can scan up to an A4 original When a copy is made the edges will not be copied image loss For the image los...

Страница 26: ...led originals before placing them in the document feeder tray Curled originals may cause misfeeds Place originals horizontally Before placing originals in the document feeder tray be sure to remove any staples or paper clips from them When a copy is made the edges will not be copied image loss For the image loss see the SPECIFICATIONS p 171 When using the margin shift function check the position o...

Страница 27: ...per Original output tray extension When placing an original larger than A4 size pull out the original output tray extension Capacity of paper output tray Paper output tray extension When copying onto paper larger than A4 size pull out the paper output tray extension Paper holder arm The paper output tray has a paper holder arm The paper holder arm presses gently on the output paper to stack it p 7...

Страница 28: ...howing 0 SELECTING THE TRAY Press the TRAY SELECT key Each time you press the TRAY SELECT key the location indicated by the tray location indicator changes in the following order paper tray bypass tray If you enter the wrong number press the CLEAR key and enter the correct number The tray location indicator will blink when there is no paper in the paper tray or when the tray is not closed or is im...

Страница 29: ...nd background shadows TEXT The exposure is raised for light areas and lowered for dark backgrounds to make text easier to read PHOTO Halftones in the photo are reproduced with greater clarity 1 Check the original and place the original s 2 Press the EXPOSURE key to select the original type The original image type changes as follows each time the EXPOSURE key is pressed AUTO TEXT PHOTO 3 If needed ...

Страница 30: ... ratios change as follows each time the ZOOM key is pressed 100 86 70 50 25 400 200 141 Fine adjustment of the ratio The ratio can be adjusted from 25 to 400 in increments of 1 Use the key or the key for fine adjustment 4 Select the number of copies and any other copy settings and then press the START key The copy will be delivered to the paper output tray To return the ratio to 100 press the ZOOM...

Страница 31: ...ion of the paper SHORT EDGE Select when binding the paper at the short edge LONG EDGE Select when binding the paper at the long edge Original Paper Usable paper Document glass One sided original Two sides A4 B5 A5 The bypass tray cannot be used RSPF One sided original Two sides Two sided original Two sides Two sided original One side A4 B5 A5 Special paper cannot be used The bypass tray can only b...

Страница 32: ...mage press the key 5 Replace the original with the next original and close the RSPF and then press the START key Repeat step 5 until all originals have been scanned Copies will be output each time two originals have been scanned When the number of original pages is odd and START NEXT SCAN START PRINT appears press the key after all pages have been scanned If you need to clear the data scanned into...

Страница 33: ...from two sided originals 3 Press the OK key If you selected 1 TO 2 in step 2 select LONG EDGE or SHORT EDGE and press the OK key LONG EDGE and SHORT EDGE are shown in the illustration on page 29 4 If you selected 2 TO 2 or 2 TO 1 press the key or key to select the original size and then press the OK key The following original sizes can be selected A4 B5 A5 8 5x14 8 5x13 8 5x11 8 5x5 5 5 Select the...

Страница 34: ...epeat step 5 until all originals have been scanned into memory 6 When all originals have been scanned press the key The copies are delivered to the paper output tray The number of pages that can be scanned varies depending on the original type photo text etc and the amount of memory allocated to the printer The amount of memory allocated to the printer can be changed with MEM FOR PRINTER in the us...

Страница 35: ...ult output mode for copying from the RSPF is sort mode p 138 In this case go directly to step 4 A checkmark will automatically appear in the display p 9 If SORT AUTO SELECT is disabled the default output mode will be non sort mode Follow the steps below to select sort mode To cancel the sort copy job press the CLEAR key To cancel sort copy mode press the CLEAR ALL key If the memory becomes full If...

Страница 36: ...and then press the OK key 3 Press the key to move to the ON position and then press the OK key An appropriate ratio setting will be automatically selected based on the size of the originals the size of the paper When using the document glass reduction is possible to 25 When using the RSPF reduction is possible to 50 Certain combinations of original size and paper size 2 IN 1 copying cannot be used...

Страница 37: ... image press the key 6 Replace the original with the next original and then press the START key Repeat step 6 until all originals have been scanned Copies will be output each time two originals have been scanned When the number of original pages is odd and START NEXT SCAN START PRINT appears press the key after all pages have been scanned To clear the data in memory press the CLEAR key When the CL...

Страница 38: ...s the key or key to select the original size and then press the OK key The following original sizes can be selected A4 B5 A5 8 5x14 8 5x13 8 5x11 8 5x5 5 5 Select the number of copies and other settings and press the START key The copy is delivered to the paper output tray To cancel 2 IN 1 copying press the CLEAR key To cancel 2 IN 1 copy mode press the CLEAR ALL key SPECIAL FUNCTION 2IN1 2IN1 ON ...

Страница 39: ...the E SORT SP FUN key until MARGIN SHIFT appears and then press the OK key This feature cannot be used with the 2 IN 1 feature The margin width can be changed with MARGIN WIDTH in the user programs p 137 Note that a margin is created by shifting the image and thus if the image is shifted too far the edge of the image may be cut off LONG EDGE SHORT EDGE RSPF Document glass Margin Margin Original Co...

Страница 40: ... press the OK key Select LONG EDGE or SHORT EDGE For the margin position see the previous page 5 Select the number of copies and other settings and then press the START key The copy is delivered to the paper output tray To cancel margin shift copying press the CLEAR key To cancel margin shift press the CLEAR ALL key MARGIN SHIFT ON OFF MARGIN SHIFT LONG EDGE ...

Страница 41: ...ID card on the document glass and press the START key When scan is finished copy will begin ID card copy feature cannot be used in combination with two sided copy and sort functions The following paper sizes can be used A5R A4 B5 8 5 x5 5 R 8 5 x11 8 5 x14 and 16K A5R and 8 5 x5 5 R can only be used in bypass tray The image may cut off even if using standard paper size In ID card copy mode scan ar...

Страница 42: ... document PC Fax driver This enables you to send a fax from your computer to a fax machine via the machine Sharpdesk Network Scanner Tool Sharpdesk is an integrated software environment that makes it easy to manage documents and image files and launch applications Network Scanner Tool is a utility that helps you use Scan to Desktop Those are contained in the separate Sharpdesk CD ROM If you need m...

Страница 43: ...on method Computer type IBM PC AT or compatible computer equipped with a USB2 0 1 or 10Base T 100Base TX LAN interface Operating system 2 3 4 Windows 2000 Professional Windows XP Windows Server 2003 Windows Vista Windows Server 2008 Windows 7 Display 1024 x 768 dots resolution and 16 bit color or higher is recommended Hard disk free space 150 MB or more Other hardware requirements An environment o...

Страница 44: ... Yes button If you need to use a different connection method after installing the software using a USB or network connection you must first uninstall the software and then install it using the new connection method In the following explanations it is assumed that the mouse is configured for right hand operation The scanner feature only works when using a USB cable If an error message appears follo...

Страница 45: ... Readme button to show information on packages that are selected 9 The files required for installation of the MFP driver are copied Follow the on screen instructions When The installation of the SHARP software is complete appears click the OK button If you are using Windows Vista or 7 and a security warning window appears be sure to click Install this driver software anyway If you are running Wind...

Страница 46: ... the driver Follow the on screen instructions This completes the installation of the software If you installed Button Manager set up Button Manager as explained in SETTING UP BUTTON MANAGER p 57 After the installation a message prompting you to restart your computer may appear In this case click the Yes button to restart your computer If you are using Windows Vista or 7 and a security warning wind...

Страница 47: ...installed Do not connect the USB cable before installing the printer driver The USB cable should be connected during installation of the printer driver If the machine will be connected using a USB 2 0 port of your computer please purchase a USB cable that supports USB 2 0 Use the machine s HI SPEED mode only when using a computer that is running Windows 2000 XP Vista or 7 Even when the Microsoft U...

Страница 48: ...con 5 Double click the setup icon In Windows Vista 7 if a message screen appears asking you for confirmation click Allow 6 The SOFTWARE LICENSE window will appear Make sure that you understand the contents of the license agreement and then click the Yes button 7 Read the message in the Welcome window and then click the Next button Interface cables for connecting the machine to your computer are no...

Страница 49: ...fault printer If you do not wish to set either printer driver as the default printer select No If the machine is not found make sure that the machine is powered on and connected to your computer and then search again If the machine is still not found use the custom installation procedure to directly specify the IP address If you clicked the Custom installation button in step 8 the following window...

Страница 50: ...tings To install the Printer Status Monitor see Installing the printer status monitor p 52 To install the PC Fax see part 11 page 43 44 If you are using Windows 2000 XP Server 2003 If a warning message regarding the Windows logo test or digital signature appears be sure to click the Continue Anyway or Yes button If you are using Windows Vista 7 Server 2008 If a security warning window appears be s...

Страница 51: ...g you for confirmation click Allow 4 The SOFTWARE LICENSE window will appear Make sure that you understand the contents of the license agreement and then click the Yes button 5 Read the message in the Welcome window and then click the Next button 6 Click the Custom button of the Connect via the network menu To configure the appropriate settings in the print server see the operation guide or help f...

Страница 52: ...7 the Add Network Port button does not appear 10 When the model selection window appears select model name of your machine and click the Next button 11 Follow the on screen instructions 12 When the installation completed screen appears click the OK button If the shared printer does not appear in the list check the settings in the printer server If you are using Windows 2000 XP Server 2003 If a war...

Страница 53: ...er installation see CONFIGURING THE PRINTER DRIVER p 55 to check the printer driver settings To install the Printer Status Monitor see Installing the printer status monitor p 52 After the installation a message prompting you to restart your computer may appear If this message appears click the Yes button to restart your computer ...

Страница 54: ...ck the setup icon In Windows Vista 7 if a message screen appears asking you for confirmation click Allow 4 The SOFTWARE LICENSE window will appear Make sure that you understand the contents of the license agreement and then click the Yes button 5 Read the message in the Welcome window and then click the Next button 6 Click the Custom button of the Connect via the network menu You can show the SOFT...

Страница 55: ...t the Add this program to your Startup folder checkbox 10 Click the Close button in the window of step 7 This completes the installation For the procedures for using the Printer Status Monitor see the Help file Follow these steps to view the Help file Click the Windows start button select All Programs Programs in Windows 2000 select SHARP Printer Status Monitor and then select Help After the insta...

Страница 56: ...ter your licence number please refer to the back of the Sharpdesk CD ROM to see this licence number 5 Enter your provided licence number and follow up the instructions shown on the screen 6 At the end of the installation please click on the Close button Viewing the online manuals The Sharpdesk CD ROM that accompanies the machine contains the online manuals in PDF format To view the manuals in PDF ...

Страница 57: ...ndows Server 2003 Server 2008 click the Start button and then click Printers and Faxes In Windows 2000 click the Start button select Settings and then click Printers 2 Click the SHARP XX XXXX printer driver icon and select Properties from the File menu In Windows Vista 7 from the Organize menu select Properties 3 Click the Configuration tab and set the printer configuration based on the options th...

Страница 58: ... of paper that is loaded in each tray Select a tray in the Paper source menu and select the size of paper loaded in that tray from the Set Paper Size menu Repeat for each tray 5 Click the OK button in the Set Tray Status window 6 Click the OK button in the printer properties window ...

Страница 59: ...dows 7 right click the SHARP AL xxxx icon and select Scan properties In Windows XP select Properties from the File menu 3 In the Properties screen click the Events tab 4 Select SC1 from the Select an event pull down menu 5 Select Start this program and then select Sharp Button Manager Z from the pull down menu 6 Repeat Steps 4 and 5 to link Button Manager to SC2 through SC6 Select SC2 from the Sel...

Страница 60: ...he Scanner events pull down menu Select Sharp Button Manager Z in Send to this application and click the Apply button Do the same for each ScanMenu through SC6 When the settings have been completed click the OK button to close the screen Button Manager is now linked to the scan menu 1 through 6 The scan settings for each of scan menu 1 through 6 can be changed with the setting window of Button Man...

Страница 61: ...plained in the SET UP THE SOFTWARE If a problem occurs in printer or scanner mode see page 151 When using USB 2 0 Hi Speed mode be sure to read System requirements for USB 2 0 Hi Speed mode below to verify that your system and the machine settings are configured appropriately System requirements for USB 2 0 Hi Speed mode The following system is required to use USB 2 0 Hi Speed mode Your computer m...

Страница 62: ...bs received while the machine is copying will be stored in memory When the copy job is finished the print jobs will begin printing Printing is not possible when the front or side cover is opened for machine maintenance or when a misfeed occurs or the machine runs out of paper or toner or when the drum cartridge reaches its replacement time ...

Страница 63: ...ings click the Preferences button to open the printer driver setup screen The printer driver setup screen will appear Windows 2000 does not have the Preferences button in this dialog box Select settings as needed on each of the tabs in the setup screen PRINTER DRIVER SETTINGS p 64 TWO SIDED PRINTING p 65 PRINTING MULTIPLE PAGES ON ONE PAGE p 67 FITTING THE PRINTED IMAGE TO THE PAPER p 68 ROTATING ...

Страница 64: ...er mode with the mode select key on the machine and then press the CLEAR key or the CLEAR ALL key CANCEL PRINT JOB will appear in the display Select YES and press the OK key When Paper Source is set to Auto Select If Paper Source is set to Auto Select in the Paper tab of the printer driver setup screen and the correct size of paper for a print job is not loaded in the machine the printing procedur...

Страница 65: ...the start button and then click Control Panel On Windows 2000 click the Start button and select Settings On Windows Server 2003 Server 2008 click the Start button and then click Printers and Faxes Go to step 3 2 Click Printers and Other Hardware and then click Printers and Faxes On Windows Vista 7 click Printer On Windows 2000 click Printers 3 Click the SHARP XX XXXX printer driver icon and select...

Страница 66: ...on from a list of choices Print setting image This shows the effect of the selected print settings Checkbox Click on a checkbox to activate or deactivate a function Machine image The paper tray in blue selected in Paper selection on the Paper tab You can also click on a tray to select it Check button Allows you to select one item from a list of options OK button Click this button to save your sett...

Страница 67: ...d the image of the machine will vary depending on the model The printer driver setup screen allows you to select various functions For information on the printer functions see PRINTER DRIVER SPECIFICATIONS p 91 Paper sizes that can be used for two sided printing are Letter Legal Folio Invoice A4 A5 B5 Foolscap and 16K When using two sided printing select a source other than Bypass Tray for the Pap...

Страница 68: ...ng examples show how 8 pages are printed when pamphlet style is selected Print data Printing result Right Turning Pamphlet Right Turning Pamphlet Only letter invoice A4 and A5 size paper can be used for pamphlet style printing Because four pages are printed on each sheet of paper blank pages are automatically added at the end when the total number of pages is not a multiple of four When Tiled Pamp...

Страница 69: ...he printer driver For example when 2 Up or 4 Up is selected the result will be as follows depending on the selected order If you select the Border checkbox borderlines will be printed around each page The N Up Printing setting is not available when Zoom is selected FITTING THE PRINTED IMAGE TO THE PAPER p 68 N Up Left to Right Right to Left 2 Up N Up Right and Down Down and Right Left and Down Dow...

Страница 70: ...up screen 2 Select the original size A4 of the print image in Paper Size 3 Check the Fit to Paper Size box 4 Select the actual size of paper to be used for printing B5 The size of the printed image will be automatically adjusted to match the paper loaded in the machine The Fit To Paper Size setting is not available when Zoom is selected PRINTING MULTIPLE PAGES ON ONE PAGE p 67 If A3 Fit to Page B4...

Страница 71: ...nly be loaded in one orientation To use the feature select the image orientation in Image Orientation on the Main tab and then select the Rotate 180 degrees checkbox See BASIC PRINTING p 61 for details on how to open the printer driver Printing result Rotate 180 degrees Rotate 180 degrees The procedure for loading paper is explained in the operation guide for the machine ABCD ABCD ...

Страница 72: ... below See BASIC PRINTING p 61 for details on how to open the printer driver How to Print a Watermark From the Watermark drop down list select the watermark that you wish to print for example CONFIDENTIAL and start printing Print sample You can enter text to create your own custom watermark For details on watermark settings view printer driver Help PRINTER DRIVER SETTINGS p 64 ...

Страница 73: ...graphics in black Lines and vector graphics that are any color other than white are printed in black To use this function open the printer driver setup screen and select the Vector To Black checkbox in the Advanced tab Print data Printing result Text To Black Text To Black When using the PCL6 printer driver if Print as graphics is selected in TrueType Mode of Font in the Advanced tab this function...

Страница 74: ...ter Status Monitor Note the following points before using the Printer Status Monitor Printing via a server When the first print job is executed after starting up the Printer Status Monitor the machine s IP address is automatically set in the Printer Status Monitor Direct printing without a server Install and configure the software as explained in INSTALLING THE PRINTER DRIVER in the software setup...

Страница 75: ...he Start button point to All Programs Programs in Windows 2000 and then SHARP Printer Status Monitor Select Printer Status Monitor Using the printer utilities For information on using the Printer Status Monitor see the Help files The Help files can be viewed as follows Click the Start button point to All Programs Programs in Windows 2000 and then SHARP Printer Status Monitor Select Help ...

Страница 76: ... to change the Printer Status Monitor settings follow the steps below 1 Right click the Printer Status Monitor icon on the task bar and select Preferences from the pop up menu 2 Change the Printer Status Monitor settings as desired For information on the Printer Status Monitor settings see Printer Status Monitor Help Click the Help button in the settings window ...

Страница 77: ...ner and paper remain in the machine 1 Right click the Printer Status Monitor icon on the task bar and select SHARP XX XXXX Status from the pop up menu 2 Click the Detail button The window expands to show machine status details The icon turns red when printing is not possible due to a machine error or other problem ...

Страница 78: ...he Hide detail button By default the collapsed window initially appears when SHARP XX XXXX Status is selected in Step 1 If desired you can change the setting to have the expanded window initially appear Changing the Printer Status Monitor settings p 74 ...

Страница 79: ... FORCED OUTPUT setting in the user programs see USER PROGRAMS in the Operation Guide When FORCED OUTPUT is set to OFF Select printer mode with the mode select key on the machine check the message in the display load paper in the bypass tray and then press the START key to begin printing When FORCED OUTPUT is set to ON Printing takes place on the paper loaded in the machine even though the paper si...

Страница 80: ...menu frame to view information on the various function settings that can be configured remotely over the network from the machine s Web pages For the settings of each function see the explanations in Help 1 Open the Web browser on your computer Supported browsers Internet Explorer 5 5 or later Safari 1 5 or later Firefox 2 0 or later 2 In the Address field of your Web browser enter the IP address ...

Страница 81: ... output trays toner and other supplies and page counts Out of paper and other warnings appear in red Device Configuration Shows what options are installed Network Status Shows the network status Information on General and TCP IP is shown on the respective pages Printer Test Page The Printer Settings List and various font lists can be printed Condition Settings Configure basic printer settings CONF...

Страница 82: ...ver is used and the same settings are configured both in the printer driver and in the above screens the settings configured in the printer driver override the settings in the above screens If a setting is available in the printer driver use the printer driver to configure the setting Condition Settings This displays the page for configuring the printer condition settings Default PCL Select the ty...

Страница 83: ...ngs Factory default settings Symbol Set PC 8 Font 0 Courier internal font Line Feed Code CR CR LF LF FF FF Wide A4 Disable Item Selections Description Copies 1 999 This is used to select the number of copies Orientation Portrait Landscape This sets the orientation of the printed page Select Portrait when the image is longer in the vertical direction or Landscape when the image is longer in the hor...

Страница 84: ...ich country s characters PCL symbol set are assigned to certain of the symbols in the character code list The factory default setting is PC 8 Font Select one internal or one external font This specifies which PCL font to use for printing One font can be specified from among the internal fonts The factory default setting is 0 Courier Line Feed Code CR CR LF LF FF FF CR CR LF LF LF FF FF CR CR LF CR...

Страница 85: ...password that you would like to establish and click the Submit button One password can be established for the administrator and one password can be established for users PROTECTING INFORMATION PROGRAMMED IN THE WEB PAGE PASSWORDS p 84 Key Operator Programs Setting changes can be prohibited and interface settings can be configured KEY OPERATOR PROGRAMS p 85 Status Message Configure parameters requi...

Страница 86: ...st time enter Sharp in Admin Password 3 Enter passwords in User Password and Admin Password A maximum of 7 characters and or numbers can be entered for each password passwords are case sensitive Be sure to enter the same password in Confirm Password as you did in New Password 4 When you have finished entering all items click Submit The entered password is stored After setting the password turn the...

Страница 87: ...he network port and set restrictions Configuring a setting in the key operator programs 1 Click Key operator programs in the menu frame The Default Settings screen of the Key operator programs will appear If you wish to select a setting in the Default Settings screen go to step 3 2 Click the desired setting 3 Make a selection for the setting in the screen that appears See Key operator programs p 8...

Страница 88: ...sed to print out the print data from the computer in hexadecimal and in the corresponding text characters based on ASCII code This allows you to check whether or not print data is being correctly sent from the computer I O Timeout 1 60 999 sec During reception of a print job if remaining data is not received after the time set here elapses the port connection is broken and the next print job is be...

Страница 89: ...ill appear 2 Enter the machine information For detailed information click the Help button in the upper right hand corner of the window 3 Click Submit to store the entered information SMTP setup The Status and alert e mail functions use SMTP Simple Mail Transport Protocol to send e mail The following procedure is used to set up the e mail environment This must be done by the system administrator or...

Страница 90: ...tatus Message Setup screen will appear 2 Enter the required information including the destination addresses and time schedule For detailed information click the Help button in the upper right hand corner of the window 3 Click Submit to store the entered information When the E mail Status settings are completed printer count information will be sent periodically by e mail to the specified e mail ad...

Страница 91: ...up screen will appear 2 Enter the destination addresses For detailed information click the Help button in the upper right hand corner of the window 3 Click Submit to store the entered information If these parameters are set event information for the printer will be transmitted to the specified addresses via E mail each time a specified event occurs The meaning of each event item is shown below Exa...

Страница 92: ...operating manual or to the help files for your operating system 4 Restart your computer PRINTER SPECIFICATIONS When reinstalling the software install it correctly as explained in software setup guide Printing speed Max 20 ppm when printing on A4 size paper Resolution 600 dpi 300 dpi Memory Standard memory 128 MB Emulation PCL6 Installed fonts PCL6 compatible 80 outline fonts and 1 bitmap font Inte...

Страница 93: ... 16 Order Selectable Border Yes No Paper Paper Size Yes Custom Paper Size 1 size Source Selection Yes Cover Settings Yes Graphics Resolution 600 300 dpi Graphics Mode Yes Zoom Yes Fit to Page Yes Fonts Resident fonts 80 fonts Selectable download fonts bitmap TrueType Graphics Other functions Auto configuration Settings Yes only when connected via network ROPM Yes Overlay Yes Watermark Yes Bitmap C...

Страница 94: ...ing See NORMAL COPYING p 23 Scanner mode cannot be used at the following times A misfeed has occurred paper misfeed or original misfeed in the RSPF The user programs are being used The tray paper size is being set The machine is being used in copy mode The front cover or side cover is open ...

Страница 95: ... Scan to FTP in this manual When sending a scanned image to an FTP server an e mail message can also be sent to a preset e mail address to inform the recipient of the location of the scanned image data This is called Scan to FTP Hyperlink in this manual 2 A scanned image can be sent to a computer connected to the same network as the machine This is called Scan to Desktop in this manual Before Scan...

Страница 96: ...frame to view information on the various function settings that can be operated remotely over the network from the machine s Web pages For the settings of each function see the explanations in Help 1 Open the Web browser on your computer Supported browsers Internet Explorer 5 5 or later Safari 1 5 or later Firefox 2 0 or later 2 In the Address field of your Web browser enter the IP address of the ...

Страница 97: ... information as well as the status of TCP IP Image Send Management This is the base screen for storing editing and deleting destination information Scan to USB Store scanning settings for Scan to USB Destination p 100 Store destinations for Scan to FTP Scan to FTP Hyperlink Scan to Desktop and Scan to E mail You can also edit or delete previously stored destination information Network Scanning Thi...

Страница 98: ...nation you can select one of the stored scanned modes The settings of the selected scan mode will be used when you scan an image and send it to that destination p 100 to p 106 including Scan to USB 1 Click Scan to USB in the menu frame of the Web page 2 Select the desired scanning settings Refer to the following table for information on each setting 3 When you have finished selecting the settings ...

Страница 99: ...image reproduction is required such as a photograph or an illustration Note that a high resolution setting will result in a larger file size and transmission may not be successful if there is insufficient memory or disk capacity in the server to which the image is sent or if the administrator of the server has restricted the file size If transmission is not successful you can try such measures as ...

Страница 100: ...ct the desired scanning settings Refer to the following table for information on each setting 4 When you have finished selecting the settings click Submit The selected settings are stored Scan Mode settings Item Description Default setting Name Enter a name for the scan mode up to 32 characters Color Mode Select Full Color Grayscale or Mono 2 gradation for the color mode Full Color Resolution Sele...

Страница 101: ...ograph or an illustration Note that a high resolution setting will result in a larger file size and transmission may not be successful if there is insufficient disk capacity in the server to which the image is sent or if the administrator of the server has restricted the file size If transmission is not successful you can try such measures as reducing the number of scanned pages in the file or red...

Страница 102: ... combined with Rapid Dial destinations can also be stored Multiple e mail addresses can be stored as a group up to 100 Note that this may reduce the maximum number of destinations normally 200 that can be stored E mail See below FTP See page 101 Desktop See page 104 Group E mail See page 106 Fax See page 108 Speed dial See page 109 Group Fax See page 110 Storing destinations for Scan to E mail 1 C...

Страница 103: ...tination maximum of 10 characters When the destination list is displayed in the destination control screen the initial text is used to group the destinations Custom Index Names can be assigned to the custom indexes as desired p 95 allowing convenient grouping of destinations Select a custom index for the destination to be stored E mail Address Required Enter the e mail address of the destination u...

Страница 104: ...ail Destination an e mail will be sent to the recipient informing them of the file format and location of the scanned image data Scan to FTP Hyperlink A hyperlink to the file server to which the scanned image data was sent appears in the e mail and the recipient can click the hyperlink to go directly to the location where the image data is stored Use Scan Mode to select a set of previously stored ...

Страница 105: ...ver maximum of 127 characters User Name Optional Enter the login user name for the FTP server maximum of 32 characters Password Optional Enter the login password for the FTP server maximum of 32 characters Directory Optional If you wish to specify a destination directory on the FTP server enter the directory maximum of 200 characters Enable Hyperlink to FTP server to be e mailed Checkbox 2 When yo...

Страница 106: ...information appears when Destination is selected in the menu frame followed by Desktop This page is used mainly by the system administrator in the following circumstance When another machine that also has the network function is added to your network and you wish to send an image scanned on the new machine to a destination stored on the existing machine See Storing destinations for Fax p 108 to se...

Страница 107: ... of destinations Select a custom index for the destination to be stored Hostname or IP Address Required Enter the IP address or host name of the FTP server maximum of 127 characters Port Number Required Enter a port number from 0 to 65535 for the desktop network scanner tool Process Directory Optional Enter the destination directory name for the file maximum of 200 characters The file will be proc...

Страница 108: ...tly transmit to a fixed group of destinations you can store the destinations as a group 1 Click Destination in the menu frame of the Web page 2 Click Group E mail 3 Enter the destination information For the settings see the following table 4 When you have completed all of the entries click Submit The entries will be stored Up to 100 destinations can be stored in one group ...

Страница 109: ...Address es Required Select the address of each destination from the E mail list box Programmed e mail destinations appear in each of the destination lists To select multiple destinations click each address while holding down the Ctrl key on the keyboard If you need to cancel an address that has been selected click the address again while holding down the Ctrl key If an LDAP server is being used yo...

Страница 110: ...for the destinations up to 3 characters When the destination list is displayed in the destination control screen the initial text is used to group the destinations ID This allows key assignment of the destination on the Fax rapid key Enter figure among 1 to 18 If it is left blank certain number is automatically assigned Fax No Required Enter the Fax number to send Fax up to 40 digits Pause Hyphen ...

Страница 111: ... text for the destinations up to 3 characters When the destination list is displayed in the destination control screen the initial text is used to group the destinations ID This allows key assignment of the destination on the Fax rapid key Enter figure among 1 to 18 If it is left blank certain number is automatically assigned Speed Dial Enter destination address Speed Dial number from 0 to 99 If t...

Страница 112: ...n list is displayed in the destination control screen the initial text is used to group the destinations Speed Dial Enter destination address Speed Dial number from 0 to 99 If this is submitted with blank a certain number is automatically assigned Address es Required Fax No Selecet destinations to store as a group destination in the Text Box and the List Box up to 100 destinations can be seleted F...

Страница 113: ...ion in the same way as you initially stored it When finished be sure to click Submit to save your changes 4 To delete the selected destination click Delete at the bottom of the Destinations List A message appears asking you to confirm the deletion Click Yes to delete If you attempt to delete a programmed destination in the following situations a warning message will appear and deletion will not be...

Страница 114: ...Shows the information programmed in e mail FTP desktop and group destinations Print group list Shows only the information programmed in group e mail destinations 1 Click Destination in the menu frame of the Web page 2 To print the individual list click Print Individual List at the bottom of the destinations list 3 To print the group list click Print Group List at the bottom of the destinations lis...

Страница 115: ...ct transmission methods for the network scanner function and configure settings for Scan to E mail Passwords p 117 The administrator can establish passwords to protect the Web site Enter the password that you wish to establish and click the Submit button A password can be set for the administrator and users Quick Setup p 116 This is used to configure basic settings for the SMTP DNS and LDAP server...

Страница 116: ...anning setup page appears 2 Select the transmission methods that you wish to use Select the scanner delivery methods that you want to use In the Enable Scanner Delivery to field click the checkbox next to each method that you want to use so that a checkmark appears in the checkbox All transmission methods are initially selected factory default settings 3 Configure the Advanced Setup settings Selec...

Страница 117: ...ally selected 6 Selecting an e mail subject only used for Scan to E mail The setting is used to enter the subject that appears in the recipient s e mail program when you perform Scan to E mail This setting is not necessary if you will not be using Scan to E mail Enter a subject maximum of 80 characters If nothing is entered Scanned image from Device Name will appear The name that appears in Device...

Страница 118: ...esses are managed on your network by an LDAP server the e mail addresses stored in the LDAP server can be used for Scan to E mail To allow the machine to use the e mail addresses in the LDAP server the LDAP server settings must be configured in the Web page Configuring DNS SMTP and LDAP server settings 1 Click Quick Setup in the menu frame 2 Enter the required information in DNS SMTP and LDAP For ...

Страница 119: ...hen establishing a password for the first time enter Sharp in Admin Password 3 Enter passwords in User Password and Admin Password A maximum of 7 characters and or numbers can be entered for each password passwords are case sensitive Be sure to enter the same password in Confirm Password as you did in New Password 4 When you have completed all entries click Submit The entered password is stored Af...

Страница 120: ...s shown on the display Then press OK to enter Scan to USB mode 2 Place the original p 23 3 Press the OK key and then key or key to select the desired original size to scan 4 Press the OK key and then key or key to select the color mode COLOR GRAY and B W When B W mode is selected Press the EXPOSURE key to select the original type The original image type changes as follows each time the EXPOSURE ke...

Страница 121: ...ake sure that the SCAN USING USB NETWORK is shown on the display Then press OK to enter Scan to USB and Network Scan mode The initial display will be SCAN USING SCAN TO USB 3 Place the original in the document feeder tray or on the document glass For information on how to place the original see Image orientation and standard original loading orientation p 124 4 Select ADDRESS SEARCH and then press...

Страница 122: ...eration to return to the previous step of the operation To cancel a scanning operation and return to the initial state of scanner mode press the CLEAR ALL key The network scanner function cannot scan both sides of an original placed in the RSPF The scan settings stored in a scan mode cannot be edited if the scan mode has been selected for a destination You can either store the desired settings in ...

Страница 123: ...lace the original in the document feeder tray or on the document glass For information on how to place the original see Image orientation and standard original loading orientation p 124 4 Select INPUT ADDRESS using the key or key and then press the OK key If INPUT ADDRESS does not appear make sure that Scan to ad hoc E mail is enabled in the Web page p 114 5 Enter the destination e mail address an...

Страница 124: ... Scan to USB and Network Scan mode The initial display will be SCAN USING SCAN TO USB 3 Place the original in the document feeder tray or on the document glass For information on how to place the original see Image orientation and standard original loading orientation p 124 4 Select GLOBAL ADDRESS using the key or key and then press the OK key 5 Enter search characters and press the OK key Destina...

Страница 125: ... time the key or key is pressed A4 B5 A5 8 5x14 8 5x13 8 5x11 8 5x5 5 7 Press the OK key and then key or key to select the color mode COLOR GRAY and B W and exposure level For the setting see page 118 8 Press the START key to begin scanning The original is scanned using the settings of the scan mode that has the Default Scan Mode checkbox selected ...

Страница 126: ...e glass When using the RSPF the original should be placed face up in the middle of the document feeder tray with the top of the original to the right The network scanner function cannot scan both sides of an original placed in the RSPF Long horizontal originals from A4 can only be placed as shown below For this reason the scanned image will be rotated 90 when viewed on a computer Document glass RS...

Страница 127: ...st character and then enter the second character If you enter an incorrect character or number follow these steps to correct the mistake 1 Press the key or key to move the cursor to the character immediately following the incorrect character 2 Press the CLEAR key The character in front of the cursor is deleted 3 Enter the correct character The character is inserted in front of the cursor Character...

Страница 128: ...Application Selection area Button Manager scan menu factory default 4 Set up the Colour Mode Edge and other scan settings in the Scan Setup area 5 Click the OK button This completes the settings If the Button Manager icon does not appear on the task bar click the Start button select All Programs Programs in Windows 2000 select Sharp Button Manager Z and then click Button Manager to start Button Ma...

Страница 129: ... p 118 You can use Button Manager to select and change the functions of the six scan menus Refer to Button Manager settings p 126 Tab Click to set scan menu options Each tab contains scan settings for the scan menu Application Selection area Select the start up application here Show TWAIN setting screen when scanning Checkbox You can select whether or not the TWAIN screen is shown When the checkbo...

Страница 130: ... place the original see Image orientation and standard original loading orientation p 124 4 Press the key or key to select the desired Button Manager scan menu setting The application numbers are initially as follows 5 Press the START key to begin scanning Scanning is not possible during a copy job If the SCAN MODE is selected during a print job the scan job will be stored When scanning an origina...

Страница 131: ... the document glass RSPF 2 After starting TWAIN compliant application click the File menu and select a menu to scan 3 Select SHARP MFP TWAIN Z and click the Select button 4 Select the menu to acquire an image from the application s File menu The scanner driver setup screen will appear Scanner driver settings p 131 Scanning is not possible during a copy job The method for accessing the menu to sele...

Страница 132: ...ing button press the Esc key on your keyboard If the angle of the image is not correct reset the original and click the Preview button again If the preview image is not oriented correctly click the Rotate button in the preview screen This rotates the preview image 90 degrees clockwise allowing you to correct the orientation without resetting the original Preview screen p 132 If you set multiple pa...

Страница 133: ...e settings click the Help button in the preview screen to display Help Image Area menu Set the scanning area To scan the original size detected by the machine select Auto The scanning area can also be specified as desired in the preview window Zoom Preview checkbox When this is selected the selected part of the preview image will be enlarged when the Preview button is clicked To return to the regu...

Страница 134: ... the image file is created in the orientation shown in the preview screen Image Size button Click to open a dialog box that allows you to specify the scanning area by entering numbers Pixels mm or inches can be selected for the units of the numbers By initially specifying a scanning area numbers can be entered to change that area relative to the top left corner as a fixed origin Auto Scan Area Jud...

Страница 135: ... original size in Page size 4 Click the Scan button Scanning begins and the image is acquired into Paint Use Save in your application to specify a file name and folder for the scanned image and save the image To cancel a scanning job after clicking the Scan button click the Cancel button The method for accessing the menu to select the scanner depends upon the application For more information refer...

Страница 136: ...elect Document Feeder for the Paper source and specify the original size in Page size You can click the Preview button to display the preview image 5 Specify a group name format and folder for saving the image and then click the Next button JPG BMP TIF or PNG can be selected for the format To begin scanning click the Next button 6 When scanning ends select the next task that you wish to perform an...

Страница 137: ...15 if no keys are pressed for a preset period of time following the end of a copy job This program is used to select the period of time Auto clear time can also be disabled 2 PREHEAT MODE 1 30 SEC 2 1 MIN 3 5 MIN 4 30 MIN 5 60 MIN 6 120 MIN 7 240 MIN This function automatically switches the machine to a low power consumption state if the set duration of time elapses without the machine being used ...

Страница 138: ... 8 OFFSET FUNCTION 1 ON 2 OFF When enabled this function offsets the position in the paper output tray of sets of copies during copy job and print jobs when using the printer function 9 ROTATE ORIG IMAGE 1 ON 2 OFF When two sided copying is performed this function rotates the image on the back of the original This is convenient when binding the copies at the top tablet binding 10 AE TEXT RESOLUTIO...

Страница 139: ...ger time you can prevent settings from being changed by the accidental pressing of a key 16 KEY TOUCH SOUND 1 LOW 2 HIGH 3 OFF This sets the volume of beep signals p 141 17 SOUND AT DEFAULT 1 ON 2 OFF Use this to sound a beep when a base setting is selected p 141 18 TONER SAVE MODE 1 ON 2 OFF This mode reduces toner usage by about 10 when copying Toner save mode is effective when the exposure mode...

Страница 140: ...pying from the bypass tray When B5 is selected a copy of a letter size original will only be printed up to invoice size 28 LSU SETTING 1 ON 2 OFF Select whether copying is only allowed when the polygon motor is rotating or also when the polygon motor is stopped 29 PAPER TYPE 1 PLAIN PAPER 2 HEAVY PAPER Set the temperature of the fusing unit when the bypass tray is used 30 DISPLAY CONTRAST 1 LIGHTE...

Страница 141: ...e this program to change the USB 2 0 mode to Hi Speed Note that the setting should not be changed while running a TWAIN driver For the system requirements see System requirements for USB 2 0 Hi Speed mode p 59 3 AUTO TRAY SWITCH 1 ON 2 OFF This is selectable when the optional paper tray is installed This is not shown when the optional tray is not installed 4 ENABLE TCP IP 1 ON 2 OFF This is to sel...

Страница 142: ...er with the numeric keys 3 Press the key or key to change the setting of the selected item See USER PROGRAM p 135 to p 139 for the program code 4 Press the OK key Your selection appears briefly and then the previous screen appears If you mistakenly select the wrong item press the CLEAR key and repeat the procedure from step 2 To cancel a setting for a user program press the MENU key When AE LEVEL ...

Страница 143: ...w The base setting beep is initially disabled If you wish to enable the base setting beep see SOUND AT DEFAULT on page 137 If you wish to change the volume of the beep signals or disable them see KEY TOUCH SOUND on page 137 The beep patterns of each type of beep signal are as follows Key entry beep One beep Invalid key beep Two beeps Base setting beep Three beeps Base settings The base settings ar...

Страница 144: ...location indicator Blinks BYPASS ADD PAPER The indicated paper tray is not attached is attached incorrectly or has run out of paper 18 TRAY ADD PAPER CLOSE PAPER TRAY Error indicator Blinks CLEAR PAPER JAM A paper misfeed has occurred Remove the misfeed as explained in MISFEED REMOVAL 157 SPF RSPF JAM FRONT OR SIDE COVER OPEN CLOSE COVERS The cover is open Close the cover CLOSE THE SPF RSPF COVER ...

Страница 145: ...MARGIN SHIFT 2 IN 1 copy and margin shift cannot be used in combination 34 37 ZOOM CAN NOT BE CHANGED IN 2IN1 Copy ratio can not be changed in 2 IN 1 copy 28 34 THIS MENU IS NOT SELECTABLE WITH DATA This appears if you attempt to change a user program setting while print job is in progress 135 NO XX SIZE TRAY There is no paper for printing Press the MODE SELECT key to switch to printer mode and fo...

Страница 146: ...image was not sent because the server was busy or there was too much traffic Wait briefly and then try again CE 05 The scanned image was not sent because the directory of the destination FTP server was not correct Make sure that the correct FTP server information is configured in the Web page 108 CE 09 The size of the scanned image file exceeds the upper limit set in Maximum Size of File in the We...

Страница 147: ...on environment If large image data files are repeatedly sent the resulting burden on the network may slow down the speed of other unrelated data transmissions and in some cases may even cause the mail server or network to go down The images on the following page will produce the following file sizes when scanned as A4 size or 8 1 2 x 11 size originals All sizes are for image files created in TIFF ...

Страница 148: ...al image samples The original images shown below are samples to help you understand the above explanations Note that these images are smaller than the actual originals the actual originals are A4 8 1 2 x 11 size Text original A Photo original B ...

Страница 149: ...s in auto power shut off mode In auto power shut off mode all lights are off except the power save indicator Press the START key to resume normal operation 16 TD Cartridge is not set to the right position Check if the TD Cartridge is correctly set pushing it all the way in 162 Copies are too dark or too light Select the correct original type for the original Select AUTO with the EXPOSURE key or pr...

Страница 150: ...he image disappears in places The paper is outside of the specified size and weight range Use copy paper within the specified range 17 Paper curled or damp Do not use curled or crimped paper Replace with dry copy paper During periods when the machine is not used for a long time remove the paper from the tray and store it in a dark place in a bag to prevent moisture absorption Copies are smudged or...

Страница 151: ...of paper inside machine Remove all pieces of misfed paper 158 Too much paper is loaded in the tray If the stack of paper is higher than the indicator line on the tray remove some of the paper and reload so that the stack does not exceed the line 19 Some sheets of paper stick together Fan the paper well before loading it 18 The guides on the bypass tray do not match the width of the paper Adjust th...

Страница 152: ...anned to that point or cancel the job and clear the data from memory 33 The tray is out of paper Load paper 19 The power save indicator is lit Other indicators are lit If other indicators are lit the machine is in preheat mode Press any key on the operation panel to resume normal operation 16 Only the power save indicator is lit If only the power save indicator is lit the machine is in auto power ...

Страница 153: ...nt does not support the format of the received image data Try selecting a different file type TIFF PDF JPEG and or a different compression format None MH G3 MMR G4 when sending the image data Otherwise have the recipient use Sharpdesk or a viewer program that supports the above combinations of file types and compression formats When the same file name is used for two successive Scan to FTP transmi...

Страница 154: ...n selecting scan settings to ensure that an image file is created that suits the purpose of transmission in terms of image quality and file size Scan settings are configured in the Web page Color mode Select a color mode that is appropriate for the use of the document to be scanned so that the file size will not be larger than necessary Scanning a document with the color mode set to gray scale or ...

Страница 155: ... the computer or if it is not configured for use on the network For more information consult your network administrator Are you using a port that was created with Standard TCP IP Port If you are using a port created using Standard TCP IP Port printing may not take place correctly if SNMP Status Enabled is selected in the port settings of the printer driver Open the printer driver properties and cl...

Страница 156: ...k the start button and then click Control Panel In Windows 2000 click the Start button select Settings and then click Control Panel 2 Click Performance and Maintenance and then click System In Windows 2000 double click the System icon 3 Click the Hardware tab and then click the Driver Signing button 4 Check What action do you want Windows to take File signature verification in Windows 2000 If Bloc...

Страница 157: ...the Device Manager button Universal Serial Bus controllers will appear in the list of devices 3 Click the icon beside Universal Serial Bus controllers Two items should appear your controller chipset type and Root Hub If these items appear you can use the USB port If the Universal Serial Bus controllers shows a yellow exclamation point or does not appear you must check your computer manual for USB ...

Страница 158: ...r devices If AL XXXX and SHARP AL XXXX appear select and delete both of these items 4 Install the software as explained in INSTALLING THE SOFTWARE Removing the software If you need to remove the software follow these steps 1 Click the start button and then click Control Panel On Windows 2000 click the Start button select Settings and then click Control Panel 2 Click Add or Remove Programs On Windo...

Страница 159: ...med or the CLEAR key is pressed If an original misfeed occurs in the RSPF the machine will stop and the error indicator will blink To remove a misfeed from the RSPF see D Misfeed in the RSPF p 160 1 Open the bypass tray and then open the side cover 2 Check the misfeed location Remove the misfed paper following the instructions for each location in the illustration below If the error indicator blin...

Страница 160: ...open button The error indicator will go out and the ready indicator will light up B Misfeed in the fusing area 1 Lower the fusing unit release lever The fusing unit is hot Do not touch the fusing unit when removing misfed paper Doing so may cause a burn or other injury Do not touch the surface of the drum green portion of the drum cartridge when removing the misfed paper Doing so may damage the dr...

Страница 161: ...ease lever See B Misfeed in the fusing area p 158 2 Open the front cover To open the front cover see START GUIDE 3 Rotate the roller rotating knob in the direction of the arrow and gently remove the misfed paper from the exit area The fusing unit is hot Do not touch the fusing unit when removing misfed paper Doing so may cause a burn or other injury Do not touch the surface of the drum green porti...

Страница 162: ...own on the RSPF jam release lever while pulling out the original When finished close the document feeder cover B Open the document feeder cover Next open the RSPF and rotate the roller in the direction of the arrow If the misfed original is in the state X pull the original out as it feeds out into the exit area If the misfed original is in the state Y pull the original down and out When finished l...

Страница 163: ...perating the error indicator will blink and REPLACE THE TD CARTRIDGE will appear in the display Follow the procedure below to replace the TD cartridge 1 Open the bypass tray and then open the side cover while pressing the side cover open button 2 Push gently on both sides of the front cover to open the cover During a long copy run of a dark original TONER REPLENISHMENT IN PROGRESS appears in the d...

Страница 164: ... cover and pull the tab to your side to remove the cover 5 While pushing the lock release button gently insert the TD Toner Developer cartridge until it locks into place After removing the TD cartridge do not shake it or tap on it Doing so may cause toner to leak from the cartridge Put the old cartridge immediately in the bag contained in the box of the new cartridge Dispose of the old TD cartridg...

Страница 165: ...in the display For more information on purchasing a drum cartridge see START GUIDE When the error indicator blinks and REPLACE THE DRUM CARTRIDGE appears in the display the machine will stop operating until the cartridge is replaced Replace the drum cartridge at this time 1 Remove the TD cartridge see TD TONER DEVELOPER CARTRIDGE REPLACEMENT p 161 When closing the covers be sure to close the front...

Страница 166: ... cartridge To install the TD cartridge see START GUIDE 5 Close the front cover and then the side cover by pressing the round projections near the side cover open button The drum replacement required error indicator will go out and the ready indicator will light up Do not touch the surface of the drum green portion Doing so may cause smudges on the copies When closing the covers be sure to close th...

Страница 167: ...d then press the OK key 2 Press the key or key to display the count of each function The count of each function changes as follows each the key or key is pressed TOTAL OUTPUT Total number of ages output by the machine COPIES Total number of copies SPF RSPF Total number of pages scanned using the RSPF 2 SIDED PRINT Total number of pages printed by two sided print PRINTS Total number of pages printe...

Страница 168: ...ssary dampen the cloth with a glass cleaner Do not spray flammable cleaner gas Gas from the spray may come in contact with the internal electrical components or high temperature parts of the fusing unit creating a risk of fire or electrical shock Before cleaning be sure to turn the power switch off and remove the power cord from the outlet Do not use thinner benzene or other volatile cleaning agen...

Страница 169: ...cloth Wipe only the parts that are indicated in the illustration 3 Replace the TD Toner Developer cartridge and drum cartridge as explained in TD TONER DEVELOPER CARTRIDGE REPLACEMENT p 161 and DRUM CARTRIDGE REPLACEMENT p 163 If copies start becoming streaky or blotchy the transfer charger may be dirty Clean the charger using the following procedure 4 Do not touch the surface of the drum green po...

Страница 170: ...the transfer charger gently slide the cleaner to the left end and then remove it Repeat this operation two or three times 4 Return the charger cleaner to its original position Close the side cover by pressing the round projections near the side cover open button 5 Turn the power switch on p 10 Slide the charger cleaner from the right end to the left end along the groove of the transfer charger If ...

Страница 171: ... appropriate cable for your computer USB interface cable USB cable that supports USB 2 0 LAN interface cable Shielded type cable Be sure to use only genuine SHARP parts and supplies For best copying results be sure to use only SHARP Genuine Supplies which are designed engineered and tested to maximize the life and performance of SHARP copiers Look for the Genuine Supplies label on the toner packag...

Страница 172: ... choice of paper size readily available for copying The procedures for loading paper in the paper tray of paper feed unit changing the paper size and selecting the paper tray are same as for the paper tray in the unit See START GUIDE and CHANGING A TRAY S PAPER SIZE SETTING p 22 This option may not be available please check with your local vendor Tray Lower side cover ...

Страница 173: ...me 2 8 0 seconds When user program 24 is set to OFF 10 7 seconds When user program 24 is set to ON paper A4 exposure mode AUTO copy ratio 100 Warm up time 3 Approx 0 sec Copy ratio Document glass Variable 25 to 400 in 1 increments total 376 steps Fixed preset 25 50 70 86 100 141 200 400 RSPF Variable 50 to 200 in 1 increments total 151 steps Fixed preset 50 70 86 100 141 200 Exposure system Docume...

Страница 174: ... mm W x 460 mm D Weight 4 Approx 18 5 kg Dimensions 518 mm W x 460 mm D x 376 mm H Operating conditions Temperature 10 C to 30 C Humidity 20 to 85 Noise level Sound power level LwAd Copying mode 6 7 B Standby mode Sound pressure level LpAm reference Bystander positions Copying mode 51 dB Standby mode Less than background noise Noise emission measurement in accordance with ISO7779 Print speed Max 2...

Страница 175: ...se T 100 Base TX Ethernet USB 2 0 Full Speed Hi Speed compatible interface Drop out color Yes Supported operating systems Windows 2000 Professional XP Vista 7 Void area None Interface cables USB cable USB cable that supports USB 2 0 Please purchase a commercially available USB cable LAN cable Shielded type cable Please purchase a commercially available LAN cable Scanner utilities Button Manager Sh...

Страница 176: ...sposing of this product correctly you will help ensure that the waste undergoes the necessary treatment recovery and recycling and thus prevent potential negative effects on the environment and human health which could otherwise arise due to inappropriate waste handling 2 In other Countries outside the EU If you wish to discard this product please contact your local authorities and ask for the cor...

Страница 177: ...SHARP ELECTRONICS Europe GmbH Sonninstraße 3 D 20097 Hamburg ...

Страница 178: ...EN 1 AL 2061 OPERATION GUIDE ...

Отзывы: