8.
Save to File – this allows you to save the generated gcode to your local computer, or an SD
card if you’ve got one inserted.
9.
Printer and material settings panel.
Now that you’ve got an idea of what’s going on with the Cura interface, let’s download a
model so we can explore Cura more fully.
Open a browser and go to
https://repables.com/r/118/
. This is a tiny medallion with the
SeeMeCNC “blinky” eyes logo on it.
Once you’ve got the file downloaded and un-zipped, click on the Open icon
to load the model into Cura. You’ll notice that it doesn’t appear that Cura loaded
anything at all, but it really did! Click on the “top down view” icon, highlighted below.
You’ll notice that there’s a tiny yellow dot in the center of the build plate.
That’s actually the medallion! Because of how Cura interprets the size of the
model, this makes for an excellent demonstration model. We’re going to need to resize the
model in order to make it large enough to make a good first print example.
Adjustment Tools
In order to make the model easy to click on, we’ll have to zoom in a bit on the build plate.
You can zoom in either by using the scroll wheel on your mouse, or you can hold down the
space bar while you move your mouse vertically. Once you can easily see the medallion model,
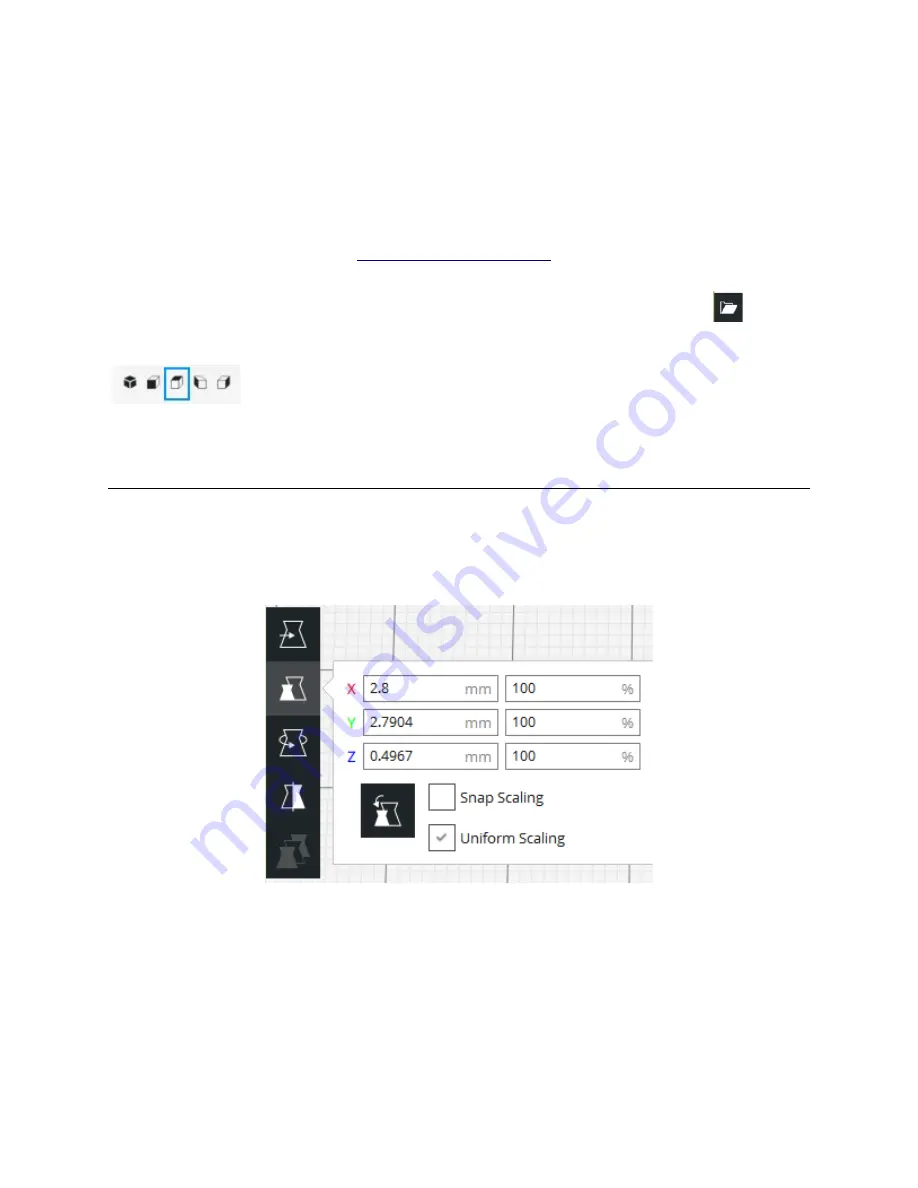
click on it. If the Scale tool doesn’t open automatically, click on it.
As you can see, Cura thinks the medallion model as being a minuscule 2.8mm wide and
only 0.5mm tall! Since we’re not printing ant medallions, we’ve got to scale this thing up!
Click in the box next to the red “X” and type in “25.4”. This will scale the whole model up
so that it’s around 1 inch in diameter and can be more easily printed. If you want to make it
bigger than that, go for it! Make sure you’ve got
Uniform Scaling
checked. This ensures that
the other parameters are scaled to the same percentage as the axis you’re changing – thus
“uniform” scaling.
6
Scaling tool selected.


