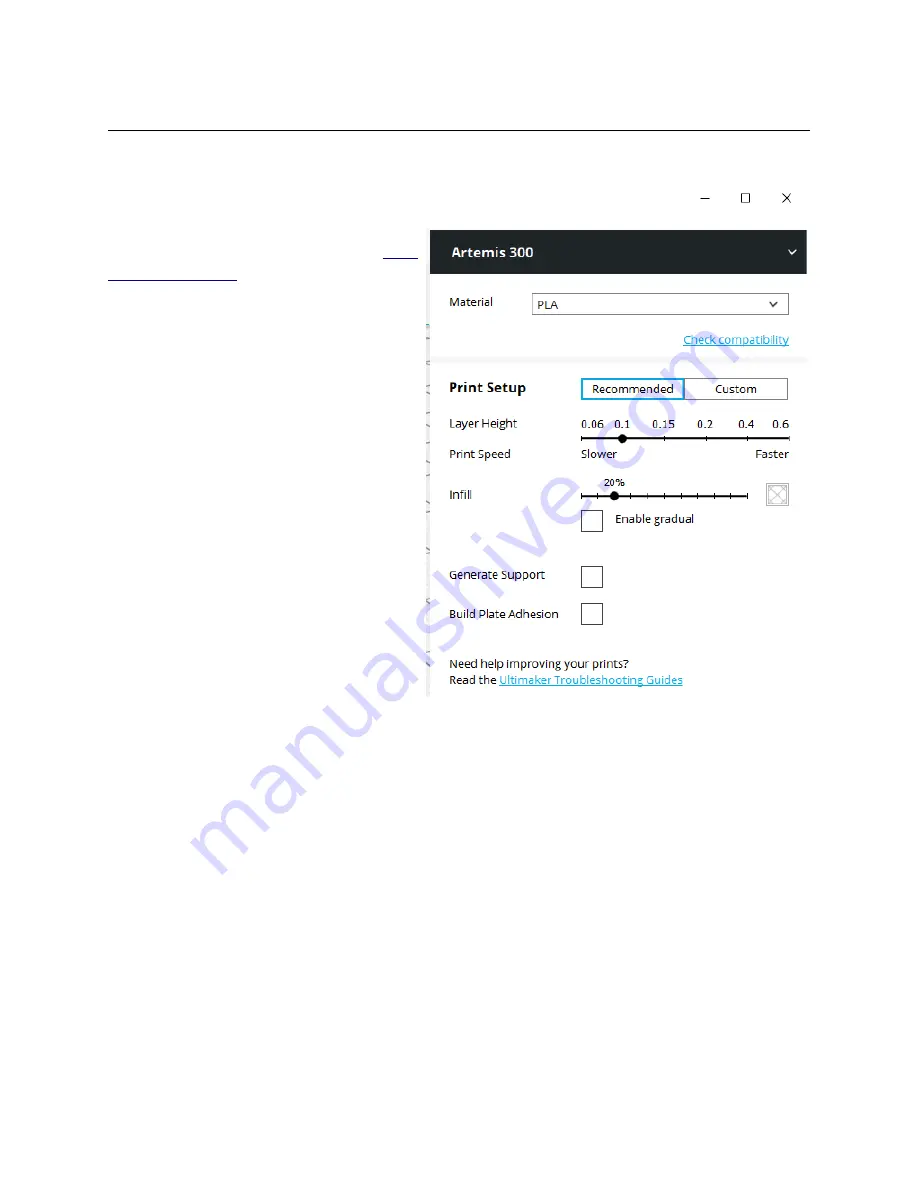
The Printer and Material Settings Panel
The Printer and Material Settings Panel is where you’ll choose what printer you’re going
to print with, what material you’re going too use and what settings will be used for that print.
As you can see on the right, I’ve got
an Artemis 300 printer selected. This
model was added when following the
Cura
quick setup guide
. The material settings
included in Cura offer a great baseline for
generic materials as well as a number of
vendor specific materials. Note that the
material settings only provide a starting
point for a number of settings and those
settings can (and usually are) over-ridden
when you select a printing profile.
The “
Recommended
” setting cuts
down the myriad of print configuration
selections to just the few you see on the
right. If you want to adjust other settings or
choose one of the SeeMeCNC profiles you
imported, you’ll need to click on the
“
Custom
” button.
The
Layer Height
slider controls
how thick each print layer will be,
expressed in mm. Since the layer height
directly effects print speed, the Cura
authors have grouped
Print Speed
with
the
Layer Height
slider. Conversely, print
speed effects layer height.
The
Infill
slider is going to dictate how “solid” your part is. The density of the infill is
approximately shown by the indicator at the right end of the slider. As you change the infill
percentage, you’ll see that indicator change. Keep in mind that it’s not a precise indicator of the
infill – it just gives you a “categorical” idea of the infill. (empty, light, heavy, or full)
Enable Gradual
will gradually increase the infill percentage as the print nears the top of
the model you’re printing. This can help with supporting the top layers of a print.
Generate Support
can be checked if you are printing a model with severe overhangs.
This is a setting I’ll cover in more detail when we go over the
various settings available when
Custom
is active.
11
Print and Material Settings


