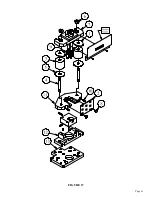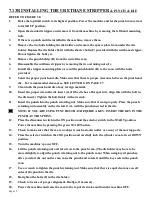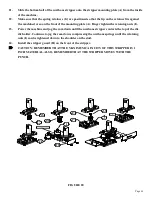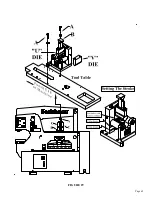
Page 70
THE MOST COMMON HYDRAULIC PROBLEMS ARE:
1.
Low level of hydraulic oil in the reservoir: The reservoir holds 13.5 U.S. gallons (51 liters). The level
should be 2 inches (50mm) below the top of the reservoir.
2.
Contamination in the hydraulic oil: The oil and the filter should be changed at least once a year
and any time that there is a possibility that contamination has gained access into the system. For
recommended hydraulic oil, SEE SECTION 5.2.
3.
Low pressure caused by worn or damaged parts in the cylinder or pump: There is a pressure port
for a pressure gauge provided on all machines. The port will be on the valve manifold or the
pressure line between the pump and the valve. A gauge with a minimum capacity of 3,000 PSI
(207 BAR) is required. With the machine’s power off, install the pressure gauge. Power the
machine and place a piece of steel in the shear section and clamp it down with the hold-down
device. As you attempt to shear the piece, watch the pressure gauge for a reading. The system
pressure of this machine is 2,650 PSI (183 BAR). The pressure is adjustable by adjusting the relief
valve on the control valve manifold. If the pressure cannot be increased, call your local dealer or
the factory.
8.4 HYDRAULICS
Use the following steps to replace the seals in the hydraulic cylinder.
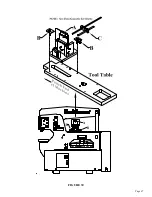
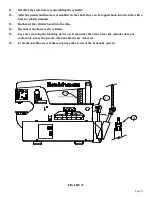
SEE FIGURE 31 ON THE FOLLOWING PAGE.
1.
With the selector switch in the SHEAR position and the arms up, turn the machine’s power off at
the disconnect switch and lock it.
2.
Block the arms up, either on the tool table or under the shear arm. SEE ITEM A.
3.
Remove the hydraulic hoses from the cylinder and allow the oil to drain from the cylinder.
4.
Remove the cylinder clevis pin (C) and swing the cylinder out away from the arm.
5.
The cylinder head (B) is threaded into the cylinder.
6.
Use a pin wrench to unscrew the cylinder head from the cylinder tube.
7.
Place a rod through the cylinder clevis and pull the cylinder apart, using a come-along or similar
device.
8.
Remove the locking nut from the end of the cylinder shaft and slide the piston and head off of the
shaft.
9.
Replace all of the seals. There will be extra seals in the kit. Match up the replacement seals with
the old ones and discard the rest.
10.
Clean all of the parts, including the inside of the cylinder tube, and check all parts for nicks and
scratches.
8.5 CYLINDER SEAL REPLACEMENT
Содержание 9012-24M
Страница 10: ...Page 9 FIGURE 1 ...
Страница 12: ...Page 11 FIGURE 2 ...
Страница 16: ...Page 15 FIGURE 4A ...
Страница 17: ...Page 16 FIGURE 4B ...
Страница 18: ...Page 17 FIGURE 4C ...
Страница 22: ...Page 21 FIGURE 6 ...
Страница 24: ...Page 23 FIGURE 7 ...
Страница 35: ...Page 34 THIS PAGE LEFT BLANK INTENTIONALLY ...
Страница 40: ...Page 39 FIGURE 15 ...
Страница 42: ...Page 41 FIGURE 16 ...
Страница 48: ...Page 47 FIGURE 20 ...
Страница 54: ...Page 53 FIGURE 24 ...
Страница 56: ...Page 55 FIGURE 25 ...
Страница 62: ...Page 61 FIGURE 27 ...
Страница 66: ...Page 65 FIGURE 29 ...
Страница 68: ...Page 67 FIGURE 30 ...
Страница 74: ...Page 73 FIGURE 32 ...
Страница 78: ...Page 77 FIGURE 34 ...
Страница 80: ...Page 79 FIGURE 35 ...
Страница 82: ...Page 81 FIGURE 36 ...
Страница 84: ...Page 83 FIGURE 37 ...
Страница 86: ...Page 85 FIGURE 38 ...
Страница 90: ...Page 89 FIGURE 41 ...
Страница 92: ...Page 91 FIGURE 42 ...
Страница 93: ...Page 92 FIGURE 43 ...
Страница 96: ...Page 95 THIS PAGE LEFT BLANK INTENTIONALLY ...
Страница 98: ...Page 97 FIGURE 46 ...
Страница 100: ...Page 99 FIGURE 47 ...

