


67
5.
Open the door.
CAUTION! The rack and chamber may be hot if the unit is in standby mode.
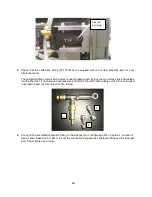
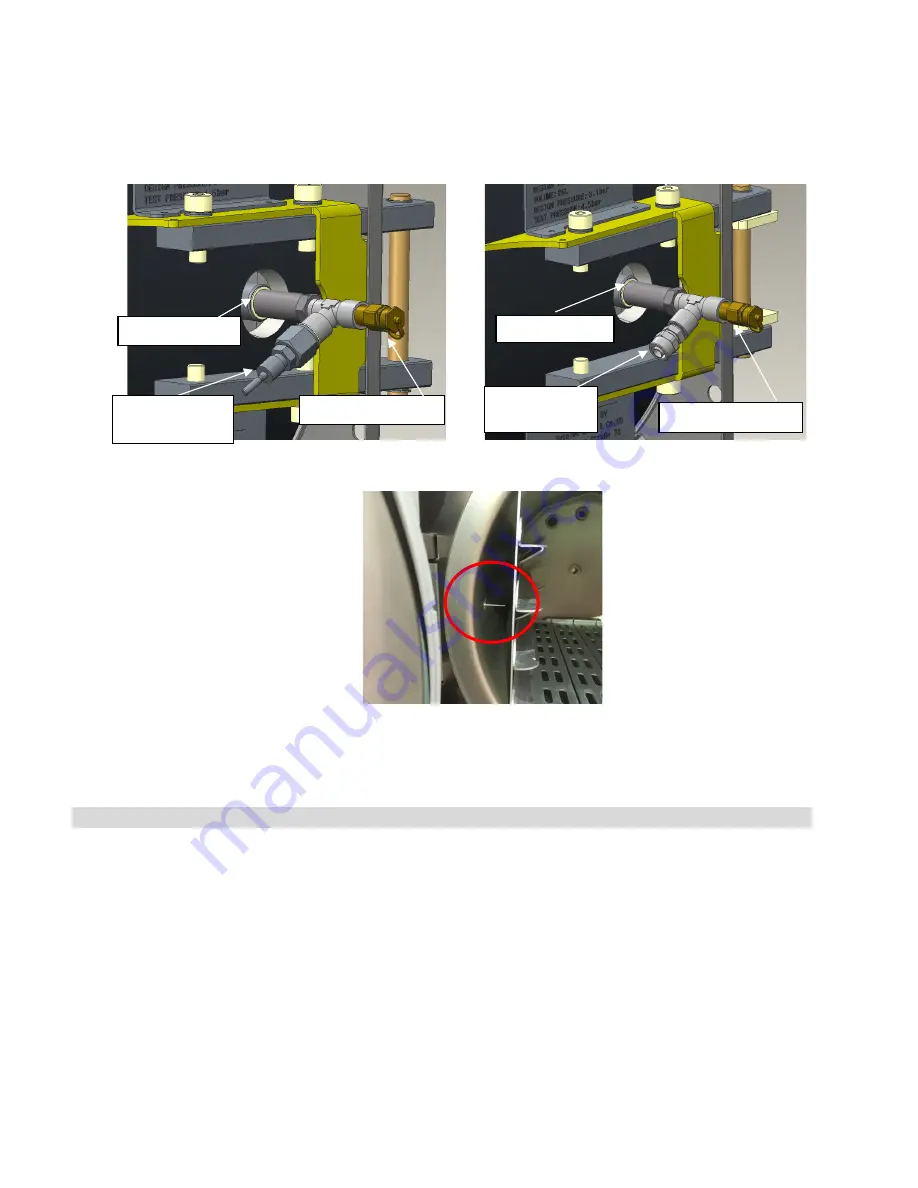
6.
Insert the temperature probe through the temperature port (TWINLOK001) on the calibration fitting
making sure the tip of the probe is well inside the chamber and not touching the rack.
7.
Switch on both the temperature and pressure reference meters. Ensure the pressure meter is set to
kPa
and the temperature meter is in
C°
.
8.
Close the chamber door.
9.
Connect one end of the pressure meter tube to your reference meter.
10.
Connect the other end of the pressure meter tube to the pressure port on the calibration fitting.
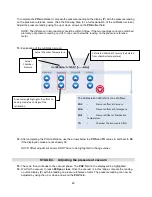
STAGE 2. Starting calibration
11.
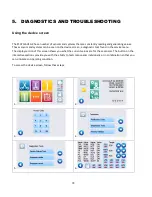
From the STATCLAVE G4 home screen, access the calibration function by following these steps:
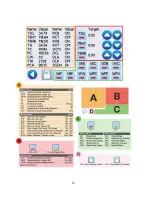
Option 1 (as provided)
Option 2 (assembly required)
Teflon washer
Knurled nut
pressure port
Temperature port
Quick connect
pressure port
Teflon washer
Temperature port
Содержание STATCLAVE G4
Страница 5: ...5 Diagram of key systems and components...
Страница 6: ...6...
Страница 17: ...17 Checking package contents...
Страница 18: ...18 Positioning a unit Unit dimensions and operating environment...
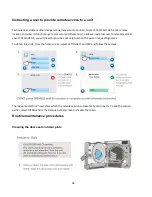
Страница 20: ...20 Direct to drain connection recommended...
Страница 21: ...21 Connecting to a waste bottle...
Страница 22: ...22 Connecting to the Internet Connecting to a wired network Connecting to a wireless network...
Страница 23: ...23...
Страница 25: ...25 Connecting an auxiliary pump...
Страница 28: ...28...
Страница 30: ...30 Starting and stopping a cycle...
Страница 50: ...50 Registering for online access...
Страница 51: ...51 First start up...
Страница 52: ...52...
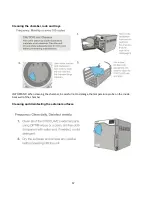
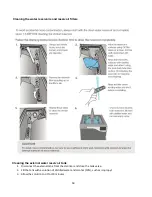
Страница 58: ...58 Draining the unit for cleaning and shipping...
Страница 61: ...61 Replacing the bacteriological filter Replacing the door seal...
Страница 75: ...75...
Страница 107: ...107 APPENDIX A STATCLAVE G4 plumbing diagram...
Страница 108: ...108 APPENDIX B STATCLAVE G4 electrical schematic...