background image

Page 18

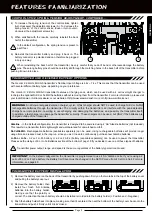
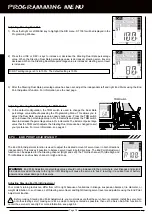
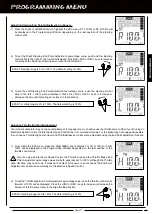
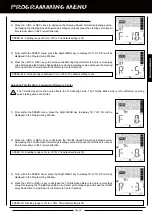
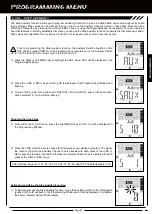
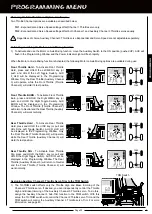
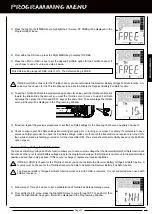
3)  To set the Throttle Brake End Point Adjustment percentage value, pull the throttle control stick 

back. B 100% will be displayed. Press the +/INC or DEC/- keys to increase or decrease the 

amount of throttle servo travel in the Brake direction.

EPA TH B setting range is 0% to 160%. The default setting is 100%.

Adjusting Auxiliary Channel 3 End Point Adjustment

Auxiliary Channel 3 can be used for a number of different uses. One of the more common uses would be for the reverse function 

in a glow-powered monster truck. Often, the transmission only requires a small amount of throw, but the servo binds because 

of too much travel. In such a case, Auxiliary High servo travel and Auxiliary Low servo travel are adjustable using the End Point 

Adjustment function.

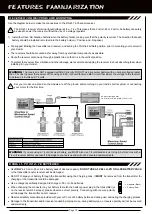
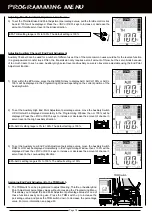
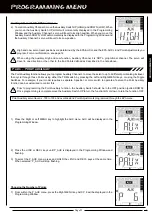
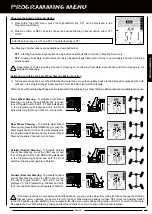
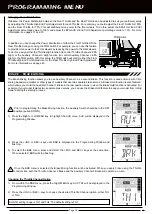
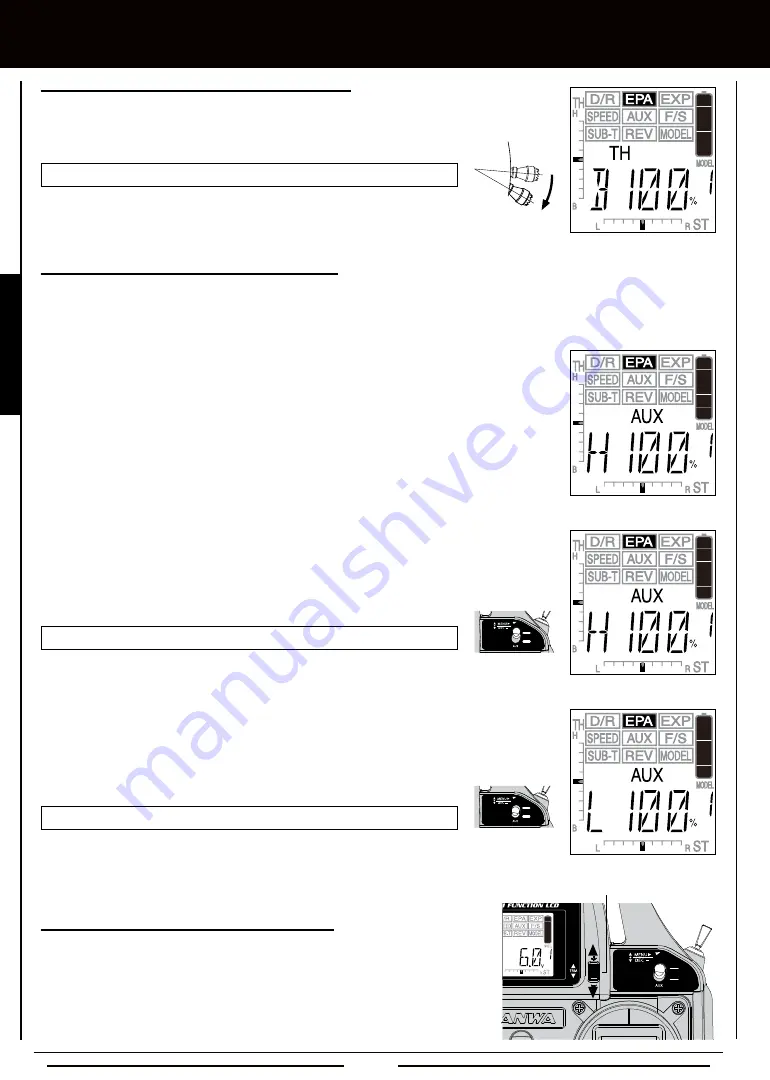
1)  From within the EPA menu, press the Right MENU key to display AUX. AUX H 100% or AUX L 

100% will be displayed in the Programming Window depending on the current position of the 

Auxiliary Switch.

[[PROgRaMMing MEnU

Adjusting Throttle End Point Adjustment, Continued....

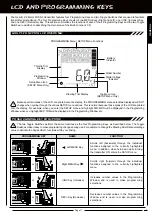
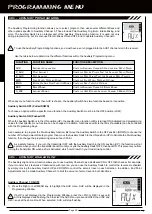
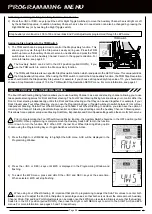
Assigning End Point Adjustment to the TRM Switch

1)  The TRM switch can be programmed to adjust Steering, Throttle, or Auxiliary End 

Point Adjustment percentage values without accessing the Programming Menu. 

This allows you to adjust the End Point Adjustment percentage values for one of 

these functions easily during use. Press the TRM switch up to increase the 

percentage value and press the TRM switch down to decrease the percentage 

value. For more information, see page 40.

EPA-AUX H setting range is 0% to 150%. The default setting is 100%.

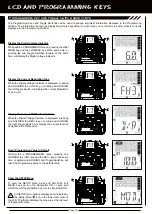
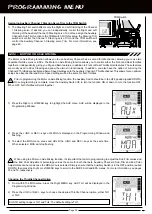
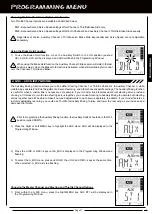
2)  To set the Auxiliary High End Point Adjustment percentage value, move the Auxiliary Switch 

UP. HIGH will be displayed momentarily in the Programming Window, then H 100% will be 

displayed. Press the +/INC or DEC/- keys to increase or decrease the amount of channel 3 

servo travel in the High auxiliary direction.

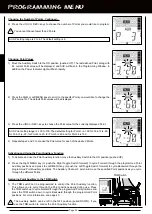
EPA-AUX L setting range is 0% to 150%. The default setting is 100%.

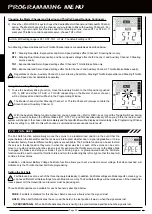
3)  To set the Auxiliary Low End Point Adjustment percentage value, move the Auxiliary Switch 

DOWN. LOW will be displayed momentarily in the Programming Window, then L 100% will be 

displayed. Press the +/INC or DEC/- keys to increase or decrease the amount of channel 3 

servo travel in the Low auxiliary direction.

TRM Switch

Содержание Gemini X

Страница 1: ...Page 1 ...

Страница 2: ...age 6 Receiver Features Diagram Page 7 Optional Items Page 7 Features Descriptions Page 7 Control Stick Spring Tension Adjustment Page 8 Transmitter and Receiver Battery Options Page 9 Transmitter Battery Installation Page 9 Receiver Connections and Mounting Page 10 Using Li Po or Li Fe Batteries Page 10 LCD and Programming Keys Page 11 Multi Function LCD Overview Page 12 Programming Key Functions...

Страница 3: ...ceived including interference that may cause undesired operation WARNING Changes or modifications made to this equipment not expressly approved by Airtronics may void the FCC authorization to operate this equipment RF Exposure Statement This transmitter has been tested and meets the FCC RF exposure guidelines when used with the Airtronics accessories supplied or designated for this product and pro...

Страница 4: ...to your model REcEivER PREcaUTiOnS 2 4gHz FREqUEncY BanD PREcaUTiOnS l The 2 4GHz frequency band may be used by other devices or other devices in the immediate area may cause interference on the same frequency band Always before use conduct a bench test to ensure that the servos operate properly Also conduct checks with the transmitter as distant as possible from your model l The response speed of...

Страница 5: ...ng w Dig Burn l Brake Mixing with Brake Hold l Auxiliary Channel 3 ON OFF l Step Auxiliary l Point Auxiliary l Auxiliary Mixing ST CH3 TH CH3 l Programmable Fail Safe l Receiver Battery Voltage Fail Safe l Digital Trims l Programmable Trim Switch l Adjustable Control Stick Tension Although most current brand servos will work with your Gemini X 2 4GHz FHSS 3 radio control system we recommend using ...

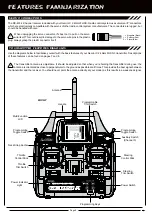
Страница 6: ... never point the antenna directly at your model as this results in a weakened signal Throttle Control Stick Steering Control Stick Throttle Trim Switch Steering Trim Switch Neck Strap Anchor Programmable Trim Switch Programming Keys Handle Programming Toggle Switch Programming Toggle Switch The RX 451 4 Channel receiver included with your Gemini X 2 4GHz FHSS 3 radio control system uses universal ...

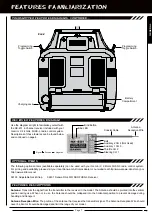
Страница 7: ...ase visit your local Sanwa or Airtronics dealer or our website at http www sanwa denshi co jp or http www airtronics net 99103 Adjustable Neck Strap 92451 Sanwa RX 451R SSR FHSS 3 Receiver TRanSMiTTER FEaTURES DiagRaMS cOnTinUED Battery Compartment Programming Toggle Switch Programming Toggle Switch Charging Jack Antenna Transmits the signal from the transmitter to the receiver in the model The An...

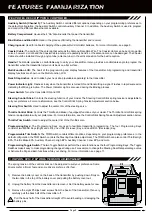
Страница 8: ...ntrol Stick Spring Tension Adjustment section below Steering Trim Switch Used to adjust the center trim of the steering servo Throttle Control Stick Controls the Throttle and Brake if equipped functions of your model The Throttle Control Stick spring tension is adjustable to suit your preference For more information see the Control Stick Spring Tension Adjustment section below Throttle Trim Switch...

Страница 9: ...de longer usage time and reduced cost in the long run since you won t need to continuously purchase new Alkaline batteries Li Po or Li Fe A 2 cell Li Po battery or a 2 cell Li Fe battery available separately can be used to power the transmitter Please see the Using Li Po or Li Fe Batteries section at the bottom of page 10 if you decide to use one of these types of batteries TRanSMiTTER anD REcEivE...

Страница 10: ...possible l Route the receiver antenna up through a plastic tube so that it is in the vertical position l To protect the receiver from vibration and other damage we recommend wrapping the receiver in shock absorbing foam when installing it in your model WARNING The receiver is NOT equipped with BEC circuitry DO NOT use a receiver battery with a nominal voltage greater than 7 4 volts to power the re...

Страница 11: ...ugh the individual functions assigned to the currently highlighted menu In addition when held down while turning the transmitter ON enters the SETUP menu Scrolls right forward through the individual functions assigned to the currently highlighted menu PROGRAMMING KEY NAME FuNCTION INC Key Increase Increases number values in the Programming Window and is used to make programming selections DEC Key ...

Страница 12: ...y or pulling and HOLDING the left Toggle Switch will display the current Modulation Type in use Display the Current TRM Switch Function While the Digital Voltage Indicator is displayed pressing and HOLDING the DEC key or pulling and HOLDING the right Toggle Switch will display the current function assigned to the TRM switch Reset Programming Value to Default While within a PROGRAMMING menu pressin...

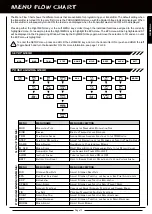
Страница 13: ...uStment exPonential Servo SPeeD auxiliary FunctionS Fail SaFe Servo Sub trim Servo reverSing moDel Select aDjuSt Steering Dual rate aDjuSt Steering throttle anD auxiliary enD Point aDjuStmentS aDjuSt Steering anD throttle exPonential aDjuSt Steering anD throttle Servo tranSit SPeeD change anD aDjuSt auxiliary FunctionS anD channel mixing Program tranSmitter Fail SaFe FunctionS aDjuSt Steering anD ...

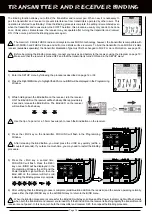
Страница 14: ...ht the EPA menu BIND will be displayed in the Programming Window 4 Press the INC key on the transmitter PUSH INC will flash in the Programming Window After releasing the Bind Button you must press the INC key quickly within a couple of seconds If you take too much time you may need to restart the Binding procedure The Gemini X 2 4GHz FHSS 3 radio control system uses FHSS 3 technology however the t...

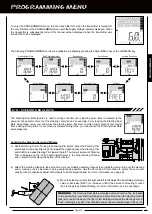
Страница 15: ... when the transmitter is turned ON the very first time is the PROGRAMMING menu with the Digital Voltage Indicator displayed When the transmitter is subsequently turned ON the last screen displayed when the transmitter was turned OFF will be displayed The following PROGRAMMING menus are available by repeatedly pressing the Right MENU key or the Left MENU key Steering Dual Rate End Point Adjustment ...

Страница 16: ... cases Left Steering servo travel and Right Steering servo travel are adjustable using the End Point Adjustment function PROgRaMMing MEnU Adjusting Steering Dual Rate 1 Press the Right or Left MENU key to highlight the D R menu ST 100 will be displayed in the Programming Window D R ST setting range is 0 to 100 The default setting is 100 2 Press the INC or DEC keys to increase or decrease the Steer...

Страница 17: ...rottle Brake servo travel are adjustable using the End Point Adjustment function Adjusting Steering End Point Adjustment Continued 1 Press the Right or Left MENU key to highlight the EPA menu ST L 100 or ST R 100 will be displayed in the Programming Window depending on the last position of the steering control stick EPA TH H setting range is 0 to 140 The default setting is 100 2 To set the Throttl...

Страница 18: ...ssigning End Point Adjustment to the TRM Switch 1 The TRM switch can be programmed to adjust Steering Throttle or Auxiliary End Point Adjustment percentage values without accessing the Programming Menu This allows you to adjust the End Point Adjustment percentage values for one of these functions easily during use Press the TRM switch up to increase the percentage value and press the TRM switch do...

Страница 19: ...e value will heighten the control feel around neutral Using a lower negative value allows for smoother control Using a higher positive value may result in more twitchy control response Adjusting Steering Exponential Steering Exponential can be variably adjusted from Mild through Linear to Quick to allow you to set the most effective steering response for your model Generally if your model over ste...

Страница 20: ...alue will make the throttle more sensitive around neutral Adjusting Throttle Brake Exponential Throttle Brake Exponential can be adjusted from Mild Linear and Quick In general reduce the Exponential percentage value on a slippery track or Increase the Exponential percentage value on a high grip track Decreasing the Exponential value can aid traction during braking helping to prevent your model fro...

Страница 21: ... and Return to Center Continued 2 Press the INC or DEC keys to decrease the Steering Speed Forward percentage value Decreasing the Steering Speed Forward percentage value will cause the steering servo transit time to slow down in the Forward direction SPEED TH F setting range is 0 to 100 The default setting is 0 2 Press the INC or DEC keys to decrease the Throttle Speed Forward percentage value De...

Страница 22: ... travel in each direction In addition End Point Adjustments can be made Auxiliary Channel 3 to limit the amount of servo travel in both directions aUX aUXiLiaRY HigH anD LOw When any menu function other than AUX is chosen the Auxiliary Switch has two functions based on its position Auxiliary Switch OFF Pulled DOWN To choose an option within a specific menu function the Auxiliary Switch must be in ...

Страница 23: ...layed in the Programming Window Prior to programming the Point Auxiliary function the Auxiliary Switch should be in the OFF position pulled DOWN Once programming is complete move the Auxiliary Switch UP to turn the function ON or down to turn the function OFF P_ aUX POinT aUXiLiaRY Choosing the Number of Points 1 From within the P_AUX menu press the Right MENU key AUX P 6 will be displayed in the ...

Страница 24: ...keys to scroll to the specific Point you would like to change the Point value for The default Point values will be displayed AUX P setting range is 2 to 6 The default setting is 6 Choosing the Number of Points Continued 2 Press the INC or DEC keys to choose the number of Points you would like to program You cannot choose fewer than 2 Points Choosing Point Values 1 Move the Auxiliary Switch to the ...

Страница 25: ...ion the Auxiliary Switch should be in the OFF position pulled DOWN Once programming is complete move the Auxiliary Switch UP to turn the function ON or down to turn the function OFF 1 Press the Right or Left MENU key to highlight the AUX menu AUX will be displayed in the Programming Window Choosing the Step Value 1 From within the S_AUX menu press the Right MENU key AUX S 10 will be displayed in t...

Страница 26: ...teering servo This allows for an optimum setup since Steering Dual Rate Exponential and Servo Speed settings will be the same for both servos Prior to programming the Four Wheel Steering Mixing function the Auxiliary Switch should be in the OFF position pulled DOWN Once programming is complete move the Auxiliary Switch UP to turn the function ON or down to turn the function OFF When OFF the last F...

Страница 27: ...ng only press the Right MENU key or push the Right Toggle Switch AUX R_ST will be displayed in the Programming Window and only the Rear Wheel Steering Auxiliary Channel 3 will operate Parallel Normal Steering To Activate Parallel Four Wheel Steering press the INC key or pull the Left Toggle Switch AUX NOR will be displayed in the Programming Window and both the Front and Rear Steering will operate...

Страница 28: ...gs will be the same for both throttles Prior to programming the Motor on Axle Mixing function the Auxiliary Switch should be in the OFF position pulled DOWN Once programming is complete move the Auxiliary Switch UP to turn the function ON or down to turn the function OFF When OFF both throttles will work together MOa MOTOR On aXLE MiXing 1 Press the Right or Left MENU key to highlight the AUX menu...

Страница 29: ...rottle servo Trim and the TRM switch will control the Auxiliary Channel 3 Throttle servo Trim For more information see page 40 PROGRAMMING or Front Throttle BuRN To Activate Front Throttle Burn press and HOLD the Right MENU key or push and HOLD the Right Toggle Switch AUX BURN will be displayed in the Programming Window The Front Throttle Throttle Channel 2 will return to Neutral and the Rear Thro...

Страница 30: ...annel 3 as a second Brake This function is used primarily with 1 5th scale gas powered models or other types of models that use two separate brake servos A Brake Hold function is also featured which allows you Hold the Auxiliary Channel 3 Brake in the last position it was in when the Brake Hold function is Activated For example if your model features two separate brake servos you can use the Brake...

Страница 31: ...vo Reversing and other channel specific settings The Auxiliary Mixing function is useful for when a custom Mix is necessary For example if your monster truck features dual Front steering servos instead of using a Y Harness to join the two steering servos together you can use Steering to Auxiliary Mixing to operate both steering servos together and still be able to make fine tuned adjustments to ea...

Страница 32: ...sen Mix immediately and that specific Mix will be displayed momentarily in the Programming Window before reverting to A_MIX Do this with caution as unintended consequences could result AUX A_MIX setting range is ST1 ST2 TH1 or TH2 The default setting is ST1 Choosing the Master Channel and Steering and Throttle Channel Options Continued 2 Press the INC or DEC keys to choose the desired Master Chann...

Страница 33: ...rly prior to running your model For safety it s preferable to have someone hold your model To check the Fail Safe settings make sure that both the transmitter and receiver are turned ON then while someone is holding your model turn the transmitter OFF The servos should react correctly based on the Fail Safe option chosen Receiver Battery Voltage Fail Safe Function The Receiver Battery Voltage Fail...

Страница 34: ...r Wheel Steering Mixing function is used SUB T SERvO SUB TRiM 3 Press the Right or Left MENU key to highlight the SUB T menu ST 0 will be displayed in the Programming Window Before adjusting the Sub Trim function you should set the Steering Trim to 0 and the Throttle Trim to 0 using the Steering and Throttle Trim switches 2 Install the servo horn or servo saver onto your steering servo making sure...

Страница 35: ...s 0 4 Press the INC or DEC keys to adjust the Throttle Sub Trim value to center the servo horn After adjusting the Throttle Sub Trim value use the End Point Adjustment function to reset the desired amount of servo travel in both directions For more information see page 17 Adjusting the Auxiliary Channel 3 Sub Trim 2 From within the SUB T menu press the Right MENU key to display AUX 0 1 Install the...

Страница 36: ...ll three channels REv SERvO REvERSing Changing Steering Servo Reversing 1 Press the Right or Left MENU key to highlight the REV menu ST NOR will be displayed in the Programming Window REV ST setting range is NOR and REV The default setting is NOR 2 Press the INC or DEC keys to change the direction of Steering servo travel When you change the direction of Steering servo travel the servo horn may no...

Страница 37: ...y be damaged REV AUX setting range is NOR and REV The default setting is NOR 2 Press the INC or DEC keys to change the direction of Auxiliary Channel 3 servo travel When you change the direction of Auxiliary Channel 3 servo travel the servo horn may no longer be centered except if the Auxiliary High and Low function is chosen in the AUX menu If this occurs use the Sub Trim function to center the s...

Страница 38: ...ll be displayed in the Programming Window 2 Press the INC or DEC keys to display the desired Modulation Type that matches the receiver that you re using The Modulation Type displayed that s not currently in use will begin to flash MOD setting range is FHS3 FH3F FH2 and DS2 The default setting is FH3 The following Modulation Type options are available FH2 Select this Modulation Type when using Sanw...

Страница 39: ...lding down the Bind Button on the receiver turn the receiver ON The Bind LED on the receiver will flash slowly After approximately 2 seconds release the Bind Button The Bind LED on the receiver will continue to flash slowly Use the tip of a pencil or a 1 5mm hex wrench to reach the Bind Button on the receiver Transmitter and Receiver Binding 1 Press the Right or Left MENU key to highlight the EPA ...

Страница 40: ...SwiTcH aSSign You can assign and control ONE of the following Auxiliary functions with the TRM switch FuNCTION FuNCTION NAME FuNCTION DESCRIPTION D R TH_HI TH_BR 3C_HI 3C_LO 3_SUB P_AUX S_AUX Steering Dual rate throttle high ePa throttle braKe ePa auxiliary channel 3 high ePa auxiliary channel 3 low ePa auxiliary channel 3 Sub trim Point auxiliary Program SteP auxiliary Program controlS Steering D...

Страница 41: ...splayed in the Programming Window The Trim Step Resolution function allows you to adjust how far the Steering and Throttle servos travel when the Steering and Throttle Trim switches are pressed You can increase the resolution by decreasing the Trim Step Resolution value so that the Steering and Throttle servos travel less when you press the trim switches This makes it possible to fine tune the set...

Страница 42: ...f the Throttle Trim switch and the lower the number the less the Throttle servo travels with each press of the Throttle Trim switch 4 From within the ST Trim Step Resolution menu press the Right MENU key TH S 5 will be displayed in the Programming Window The Model Naming function allows you to name the different models you have saved in the transmitter This makes it easier to keep track of the dif...

Страница 43: ...se letters symbols and numbers 5 Press the INC or DEC keys to scroll to the desired character then repeat the proceedures in steps 4 and 5 to enter the remaining two characters You can enter a total of four characters Erasing a Character 1 To erase a character press the Right or Left MENU keys to move to the character you would like to delete That character will begin to flash 2 Press the INC and ...

Страница 44: ...e to clear the Programming Data for For more information see page 37 2 Press the Right or Left MENU key to highlight the F S menu M_CLR will be displayed in the Programming Window 4 Press and HOLD the INC and DEC keys at the same time for approximately 1 second COMP will flash in the Programming Window then the default Model Name will be displayed The Audible Key Tone function allows you to turn A...

Страница 45: ...ll sound if the transmitter is left ON without any input for 10 minutes to alert you to turn the transmitter OFF When set to INH no Audible Alarm will sound if the transmitter is left ON without any input for 10 minutes ALRM setting range is ACT or INH The default setting is INH The Battery Cell Count function allows you to choose the voltage range of the transmitter battery that you re using base...

Страница 46: ...nd when your battery reaches a predetermined voltage level warning you to stop using the transmitter and either change the batteries with fresh batteries or recharge the batteries at 4 4v low voltage warning SounDS then StoPS at 4 3v low voltage warning SounDS again DiFFerent tone then StoPS at 4 2v low voltage warning SounDS again DiFFerent tone then StoPS at 4 1v low voltage warning SounDS anD n...

Страница 47: ...trol linkages binding Trim is outside of operational range Low transmitter or receiver battery voltage Receiver antenna not mounted correctly in your model Trim Step resolution requires adjustment Transmitter voltage not displayed when a menu is Active Receiver battery voltage has reached the programmed Battery Fail Safe voltage level Throttle channel Fail Safe set to FREE or HOLD Reinstall batter...

Страница 48: ...during the start up process Brake Mixing Used primarily with 1 5th scale gas powered models or other types of models that use two separate brake servos Allows you to control two separate brake servos using the throttle control stick Brake Side Refers to the throttle control stick stroke that engages the brakes on your model pulling the throttle control stick back Burn Used with the Motor on Axle f...

Страница 49: ...e turning the transmitter ON enters the SETUP menu Model Clear Used to reset the selected model s Programming Data to the default values All model specific Programming Data is reset Transmitter specific Programming Data such as Audible Key Tone Inactivity Alarm and Battery Cell Count are not reset Model Naming Used to name the different models you have saved in the transmitter This makes it easier...

Страница 50: ...l oversteers during turns you can reduce the amount of Steering Dual Rate Steering Trim Switch Used to adjust the center trim of the steering servo Steering Control Stick Controls the steering function of your model The Steering Control Stick spring tension is adjustable to suit your preference Step Auxiliary Used to program Auxiliary Channel 3 to move in defined Step amounts throughout its entire...

Страница 51: ...nition of 8 48 Battery Compartment Diagram of 6 Battery Indicator Definition of 48 Battery Indicator Diagram of 11 Battery Plug Transmitter Diagram of 10 Bind Button Receiver Definition of 8 48 Bind Button Receiver Diagram of 7 Bind Button Using 14 39 Binding See Also Transmitter and Receiver Binding Binding Definition of 48 Binding Overview 14 39 Bind LED 14 39 Bind LED Diagram of 7 Brake Hold Se...

Страница 52: ...heel Steering Mixing Choosing Channel Options 27 Four Wheel Steering Mixing Definition of 49 Four Wheel Steering Mixing Overview 26 Front Wheel Steering See Also Four Wheel Steering Mixing Activating and Using H Handle Definition of 8 49 Handle Diagram of 6 High Side Definition of 49 I Inactivity Alarm Clearing 45 Inactivity Alarm Definition of 49 Inactivity Alarm Programming 45 Increase Key See I...

Страница 53: ...Transmitter Precautions Programmable Trim Switch See Also Trim TRM Switch Programmable Trim Switch Definition of 8 50 Programmable Trim Switch Diagram of 6 Programming Keys Definition of 8 50 Programming Keys Diagram of 6 Programming Keys Overview 11 Programming Keys Shortcuts 12 Programming Menu Menu Options 13 Programming Toggle Switch Definition of 8 50 Programming Toggle Switch Diagram of 6 7 ...

Страница 54: ... Mixing Activating and Using Tandem Steering Definition of 50 Throttle Hold Front See Also Motor on Axle Mixing Activating and Using Throttle Hold Rear See Also Motor on Axle Mixing Activating and Using Throttle Control Stick Definition of 8 51 Throttle Control Stick Diagram of 6 Thottle Control Stick Adjusting Spring Tension 8 Throttle Trim Switch Definition of 8 50 Throttle Trim Switch Diagram o...

Страница 55: ...Page 55 NOTES ...
Страница 56: ...tp www airtronics net Features and Specifications are Subject to Change Without Notice All contents 2010 Sanwa Electronic Instrument Co LTD All Rights Reserved Revision 1 05 20 2010 670A14241A SANWA ELECTRONIC INSTRUMENT CO LTD 1 2 50 Yoshida Honmachi Higashiosaka Osaka 578 0982 Japan Telephone 81 729 62 1277 Facsimile 81 729 64 2831 Email general sanwa denshi co jp http www sanwa denshi co jp ...

Отзывы: