Operations & Installation
2-16
2-2-8 Adjusting Ring Volume
During calls, pressing the
or
keys on the side of the phone affects the ear piece volume.
You can adjust the volume from level 1 to 5, and it is preset to level 3. The voice volume is displayed as bars in
the LCD window. The more bars you see, the louder the volume is.
2-2-9 Adjusting Key Volume
In the Standby mode with the flip cover open, press
or
key on the side of the phone .
You can adjust the volume from level 0 to level 5, and it is preset to level 3. The key volume is displayed as
bars in the LCD window. The more bars you see, the louder the volume is. No bar, no key beep.
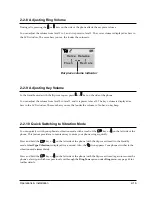
2-2-10 Quick Switching to Vibration Mode
You can quickly switch your phone to vibration mode with a touch of the
key or
on the left side of the
phone. This feature provides a convenient way to mute your phoneÕs ringer quickly.
Press and hold the
key or
on the left side of the phone (with the flip cover closed) in the Standby
mode.
Alert Type Vibration
is displayed for a second. Also, the
icon appears. Your phone switches to the
vibration mode immediately.
Press and hold the
key or
on the left side of the phone (with the flip cover closed) again to resume the
phoneÕs alert type which was previously set through the
Ring Tone
option under
Ring
menu; see page 43 for
further details.
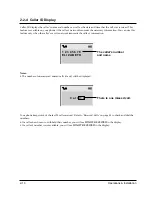
Ear piece volume indicator
Vo i c e Vo l u m e
[
_
]
F l a s h R e d i a l s
Содержание SP-R6100
Страница 3: ......
Страница 50: ...Exploded View Parts List 3 4 3 4 SP R6100 BASE Exploded View 1 7 8 9 10 13 14 15 16 2 3 11 9 12 4 5 6 ...
Страница 52: ...Exploded View Parts List 3 6 3 6 SP R6100 CHARGER Exploded View 6 8 7 1 2 3 4 5 9 ...
Страница 54: ...Exploded View Parts List 3 8 SP R6100 PACKING Exploded View 3 8 3 7 4 1 5 8 2 6 9 ...
Страница 67: ...6 1 6 PCB Diagrams 6 1 SP R6100 Base PCB I ...
Страница 68: ...PCD Diagrams ...
Страница 69: ...6 2 SP R6100 Base PCB II 6 2 ...
Страница 70: ...PCD Diagrams ...
Страница 71: ...6 3 SP R6100 Handy PCB I 6 3 ...
Страница 72: ...PCD Diagrams ...
Страница 73: ...6 4 SP R6100 Handy PCB II 6 4 ...
Страница 74: ...PCD Diagrams ...
Страница 75: ...6 5 SP R6100 Key PCB I PCD Diagrams 6 5 ...
Страница 76: ...6 6 SP R6100 Key PCB II PCB Diagrams 6 6 ...
Страница 77: ...6 7 SP R6100 Charger PCB I 6 7 PCD Diagrams ...
Страница 78: ...6 8 SP R6100 Charger PCB II PCB Diagrams 6 8 ...
Страница 79: ...Schematic Diagrams 7 1 7 Schematic Diagrams 7 1 SP R6100 Hand LOGIC ...
Страница 80: ...Schematic Diagrams 7 2 7 2 SP R6100 Hand RF SL18 9 SL55 SL18 9 SL19 SL7 SL9 5 SL18 9 SL18 9 SL5 5 SL7 5 SL5 ...
Страница 81: ...Schematic Diagrams 7 3 7 3 SP R6100 BASE LOGIC ...
Страница 82: ...Schematic Diagrams 7 4 7 4 SP R6100 Base CLIP ...
Страница 84: ...Schematic Diagrams 7 6 HAND KEY 7 6 ...
Страница 85: ...Schematic Diagrams 7 7 CHRGER 7 7 ...
Страница 88: ...Samsung Electronics Co Ltd ELECTRONICS ...


