Operations & Installation
2-24
2-4-5 Erasing All Numbers
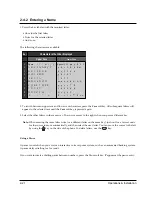
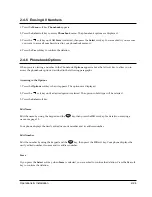
1. Press the
Menu
soft key.
Phonebook
appears.
2. Press the
Select
soft key to access
Phonebook
menu. The phonebook options are displayed.
3. Press the
soft key until
All Erase
is selected, then press the
Select
soft key. You are asked if you are sure
you want to erase all numbers stored in your phonebook memory.
4. Press the
Yes
soft key to confirm the deletion.
2-4-6 Phonebook Options
When you are viewing a number in the Phonebook,
Options
appears above the left soft key to allow you to
access the phonebook options, described in the following paragraphs.
Accessing to the Options
1. Press the
Options
soft key when it appears. The options are displayed.
2. Press the
soft key until a desired option is selected. The option in bold type will be selected.
3. Press the
Select
soft key.
Edit Name
Edit the name by using the keypad and the
key, then press the
OK
soft key. For details on entering a
name, see page 33.
Your phone displays the newly edited name, its number and its address number.
Edit Number
Edit the number by using the keypad and the
key, then press the
OK
soft key. Your phone displays the
newly edited number, its name and its address number.
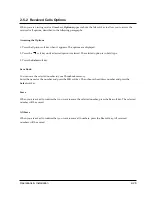
Erase
If you press the
Select
soft key when
Erase
is selected, you are asked to confirm the deletion. Press the
Yes
soft
key to confirm the deletion.
C
C
Содержание SP-R6100
Страница 3: ......
Страница 50: ...Exploded View Parts List 3 4 3 4 SP R6100 BASE Exploded View 1 7 8 9 10 13 14 15 16 2 3 11 9 12 4 5 6 ...
Страница 52: ...Exploded View Parts List 3 6 3 6 SP R6100 CHARGER Exploded View 6 8 7 1 2 3 4 5 9 ...
Страница 54: ...Exploded View Parts List 3 8 SP R6100 PACKING Exploded View 3 8 3 7 4 1 5 8 2 6 9 ...
Страница 67: ...6 1 6 PCB Diagrams 6 1 SP R6100 Base PCB I ...
Страница 68: ...PCD Diagrams ...
Страница 69: ...6 2 SP R6100 Base PCB II 6 2 ...
Страница 70: ...PCD Diagrams ...
Страница 71: ...6 3 SP R6100 Handy PCB I 6 3 ...
Страница 72: ...PCD Diagrams ...
Страница 73: ...6 4 SP R6100 Handy PCB II 6 4 ...
Страница 74: ...PCD Diagrams ...
Страница 75: ...6 5 SP R6100 Key PCB I PCD Diagrams 6 5 ...
Страница 76: ...6 6 SP R6100 Key PCB II PCB Diagrams 6 6 ...
Страница 77: ...6 7 SP R6100 Charger PCB I 6 7 PCD Diagrams ...
Страница 78: ...6 8 SP R6100 Charger PCB II PCB Diagrams 6 8 ...
Страница 79: ...Schematic Diagrams 7 1 7 Schematic Diagrams 7 1 SP R6100 Hand LOGIC ...
Страница 80: ...Schematic Diagrams 7 2 7 2 SP R6100 Hand RF SL18 9 SL55 SL18 9 SL19 SL7 SL9 5 SL18 9 SL18 9 SL5 5 SL7 5 SL5 ...
Страница 81: ...Schematic Diagrams 7 3 7 3 SP R6100 BASE LOGIC ...
Страница 82: ...Schematic Diagrams 7 4 7 4 SP R6100 Base CLIP ...
Страница 84: ...Schematic Diagrams 7 6 HAND KEY 7 6 ...
Страница 85: ...Schematic Diagrams 7 7 CHRGER 7 7 ...
Страница 88: ...Samsung Electronics Co Ltd ELECTRONICS ...


