Operations & Installation
2-28
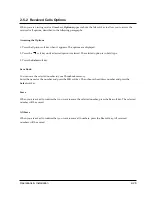
2-7 Ring
You can use the
Ring
menu to customize various sound settings such as ring volume, type and tone. Also you
can delay the ring for a specified time via the menu.
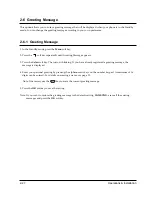
2-7-1 Choosing Ring Tone
You can define your own ring sound. Ten ring tones are available.The factory default setting is ÔTone 1Õ.
1. In the Standby mode, press the
Menu
soft key.
2. Press the
soft key repeatedly until
Ring
appears, then press the
Select
soft key.
Ring Tone
appears.
3. Press the
Select
soft key to access the option.
4. Press the
soft key repeatedly until you choose a desired ring tone. Each time you press the
soft key,
the handset sounds the ring you have chosen.
5. Press the
OK
soft key to confirm the setting.
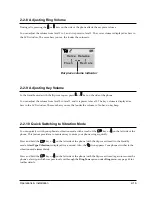
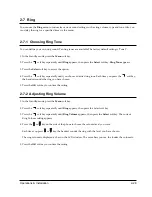
2-7-2 Adjusting Ring Volume
1. In the Standby mode, press the
Menu
soft key.
2. Press the
soft key repeatedly until
Ring
appears, then press the Select soft key.
3. Press the
soft key repeatedly until
Ring Volume
appears, then press the
Select
soft key. The current
Ring Volume setting appears.
4. Press the
or
key on the side of the phone to choose the volume level you want.
Each time you press
or
key, the handset sounds the ring with the level you have chosen.
The ring volume is displayed as bars in the LCD window. The more bars you see, the louder the volume is.
5. Press the
OK
soft key to confirm the setting.
Содержание SP-R6100
Страница 3: ......
Страница 50: ...Exploded View Parts List 3 4 3 4 SP R6100 BASE Exploded View 1 7 8 9 10 13 14 15 16 2 3 11 9 12 4 5 6 ...
Страница 52: ...Exploded View Parts List 3 6 3 6 SP R6100 CHARGER Exploded View 6 8 7 1 2 3 4 5 9 ...
Страница 54: ...Exploded View Parts List 3 8 SP R6100 PACKING Exploded View 3 8 3 7 4 1 5 8 2 6 9 ...
Страница 67: ...6 1 6 PCB Diagrams 6 1 SP R6100 Base PCB I ...
Страница 68: ...PCD Diagrams ...
Страница 69: ...6 2 SP R6100 Base PCB II 6 2 ...
Страница 70: ...PCD Diagrams ...
Страница 71: ...6 3 SP R6100 Handy PCB I 6 3 ...
Страница 72: ...PCD Diagrams ...
Страница 73: ...6 4 SP R6100 Handy PCB II 6 4 ...
Страница 74: ...PCD Diagrams ...
Страница 75: ...6 5 SP R6100 Key PCB I PCD Diagrams 6 5 ...
Страница 76: ...6 6 SP R6100 Key PCB II PCB Diagrams 6 6 ...
Страница 77: ...6 7 SP R6100 Charger PCB I 6 7 PCD Diagrams ...
Страница 78: ...6 8 SP R6100 Charger PCB II PCB Diagrams 6 8 ...
Страница 79: ...Schematic Diagrams 7 1 7 Schematic Diagrams 7 1 SP R6100 Hand LOGIC ...
Страница 80: ...Schematic Diagrams 7 2 7 2 SP R6100 Hand RF SL18 9 SL55 SL18 9 SL19 SL7 SL9 5 SL18 9 SL18 9 SL5 5 SL7 5 SL5 ...
Страница 81: ...Schematic Diagrams 7 3 7 3 SP R6100 BASE LOGIC ...
Страница 82: ...Schematic Diagrams 7 4 7 4 SP R6100 Base CLIP ...
Страница 84: ...Schematic Diagrams 7 6 HAND KEY 7 6 ...
Страница 85: ...Schematic Diagrams 7 7 CHRGER 7 7 ...
Страница 88: ...Samsung Electronics Co Ltd ELECTRONICS ...


