2-33
Operations & Installation
2-9 System
Up to six handsets can be registered and operated from your base unit. You can register and remove a handset
through the
System
menu. You can also reset the handset to its default configuration.
2-8-4 Active Flip
This feature allows you to automatically engage the telephone line by opening the flip cover. When this feature
is set to
ON
, there is no need to press the
key. This feature is preset to
OFF
at factory.
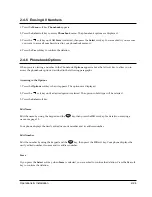
1. In the Standby mode, press the
Menu
soft key.
2. Press the
soft key repeatedly until
Settings
appears, then press the
Select
soft key.
3. Press the
soft key repeatedly until
Active Flip
appears, then press the
Select
soft key.
4. The Active Flip options are displayed:
OFF
or
ON
. Press the
soft key to turn the feature
OFF
or
ON
. The
selected option is in bold type.
5. Press the
OK
soft key to save the setting.
2-8-5 Language Selection
You can select a display language. 8 different languages are available.
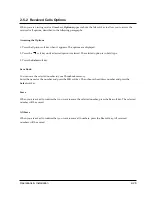
1. In the Standby mode, press the
Menu
soft key.
2. Press the
soft key repeatedly until
Settings
appears, then press the
Select
soft key.
3. Press the
soft key repeatedly until
Language
appears, then press the
Select
soft key.
4. The language options are displayed. The currently selected language is in bold type. Press the
soft key
to select a language.
5. Press the
OK
soft key to save the setting.
Содержание SP-R6100
Страница 3: ......
Страница 50: ...Exploded View Parts List 3 4 3 4 SP R6100 BASE Exploded View 1 7 8 9 10 13 14 15 16 2 3 11 9 12 4 5 6 ...
Страница 52: ...Exploded View Parts List 3 6 3 6 SP R6100 CHARGER Exploded View 6 8 7 1 2 3 4 5 9 ...
Страница 54: ...Exploded View Parts List 3 8 SP R6100 PACKING Exploded View 3 8 3 7 4 1 5 8 2 6 9 ...
Страница 67: ...6 1 6 PCB Diagrams 6 1 SP R6100 Base PCB I ...
Страница 68: ...PCD Diagrams ...
Страница 69: ...6 2 SP R6100 Base PCB II 6 2 ...
Страница 70: ...PCD Diagrams ...
Страница 71: ...6 3 SP R6100 Handy PCB I 6 3 ...
Страница 72: ...PCD Diagrams ...
Страница 73: ...6 4 SP R6100 Handy PCB II 6 4 ...
Страница 74: ...PCD Diagrams ...
Страница 75: ...6 5 SP R6100 Key PCB I PCD Diagrams 6 5 ...
Страница 76: ...6 6 SP R6100 Key PCB II PCB Diagrams 6 6 ...
Страница 77: ...6 7 SP R6100 Charger PCB I 6 7 PCD Diagrams ...
Страница 78: ...6 8 SP R6100 Charger PCB II PCB Diagrams 6 8 ...
Страница 79: ...Schematic Diagrams 7 1 7 Schematic Diagrams 7 1 SP R6100 Hand LOGIC ...
Страница 80: ...Schematic Diagrams 7 2 7 2 SP R6100 Hand RF SL18 9 SL55 SL18 9 SL19 SL7 SL9 5 SL18 9 SL18 9 SL5 5 SL7 5 SL5 ...
Страница 81: ...Schematic Diagrams 7 3 7 3 SP R6100 BASE LOGIC ...
Страница 82: ...Schematic Diagrams 7 4 7 4 SP R6100 Base CLIP ...
Страница 84: ...Schematic Diagrams 7 6 HAND KEY 7 6 ...
Страница 85: ...Schematic Diagrams 7 7 CHRGER 7 7 ...
Страница 88: ...Samsung Electronics Co Ltd ELECTRONICS ...

