Service · Calibrating the Scanner
57
EN
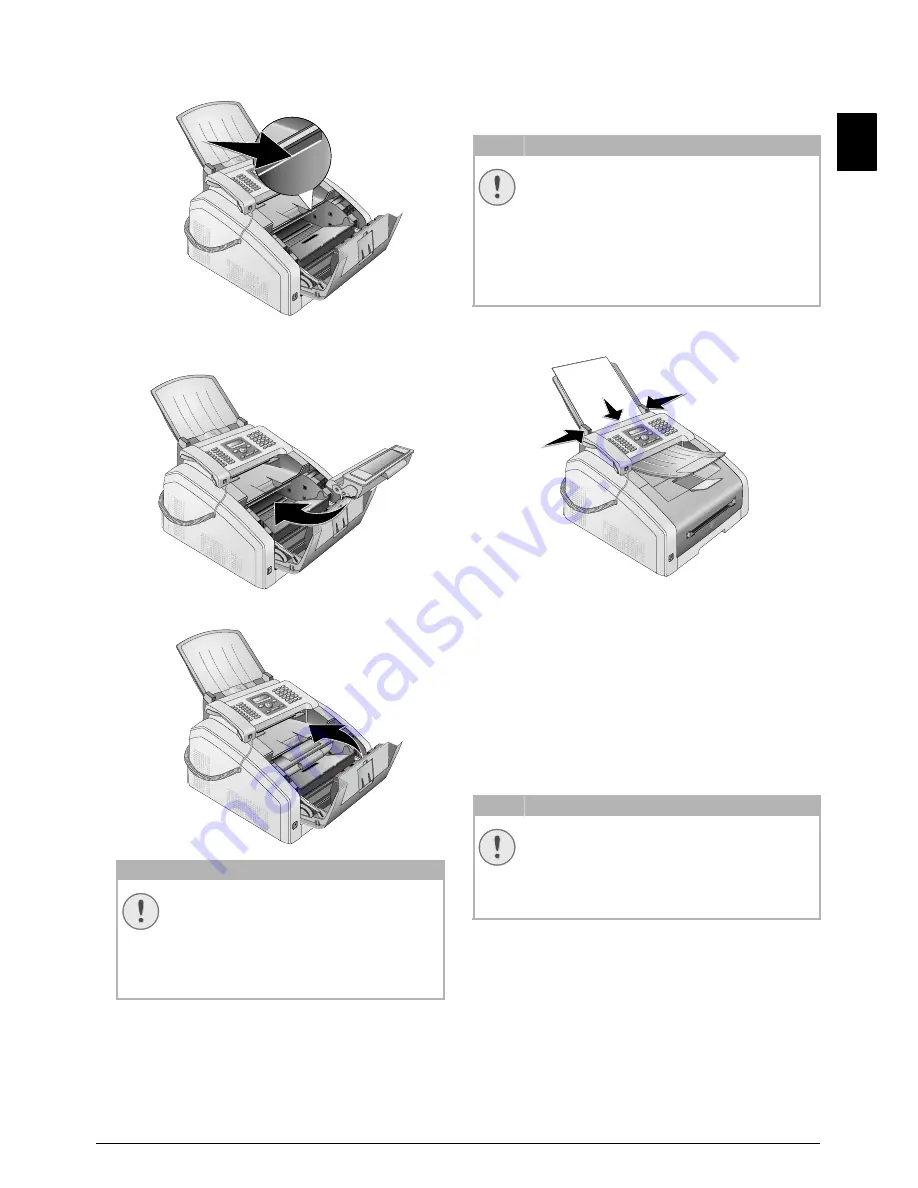
3 Wipe over the glass of the LED print head above
the toner cartridge with a soft, dry and lint-free
cloth.
4 Place the toner cartridge into your device. The
cartridge should snap securely into position.
5 Close the device.
CALIBRATING THE SCANNER
Calibrating the scanner
If vertical lines appear on the printed pages or on the
fax messages, it is possible the scanner needs to be
calibrated.
Instructions for Calibrating!
1 Insert a white piece of paper into the document
feeder.
2 Press
OK
,
931
and
OK
.
3 Confirm with
OK
.
4 Wait until calibration is completed and the device
returns to starting mode.
USING SERVICE CODES
Introduction
The service codes delete all the changed settings and
your device is reset to factory settings. It may be pos-
sible that the device with the changed settings reacts
differently than expected.
Using Service Codes
1 Press
OK
,
933
and
OK
.
2 Enter a service code:
70015
—Deletes all changed settings.
Saved data and telephone book entries remain
intact.
70026
—Deletes saved faxes, when
there are problems with printing.
3 Confirm with
OK
.
4 Using
[
select
YES
.
5 Confirm with
OK
.
CAUTION!
TONER CARTRIDGE NOT INSERTED
CORRECTLY!
If the device cover would not close, the
toner cartridge is not inserted correctly.
Take the toner cartridge out and insert it
again correctly.
CAUTION!
INSTRUCTIONS FOR CALIBRATING!
The scanner is calibrated in the factory and
normally no new calibration is needed. Do
not use this function frequently. Clean the
the scanner glass and the scanner film first
before calibrating the scanner (see also
chapter
Cleaning the Scanner and the Docu-
ment feeder
, page 55).
CAUTION!
SETTINGS WILL BE DELETED!
Only use the service codes if this is abso-
lutely necessary. Some service codes also
delete saved messages and telephone book
entries.


