5.
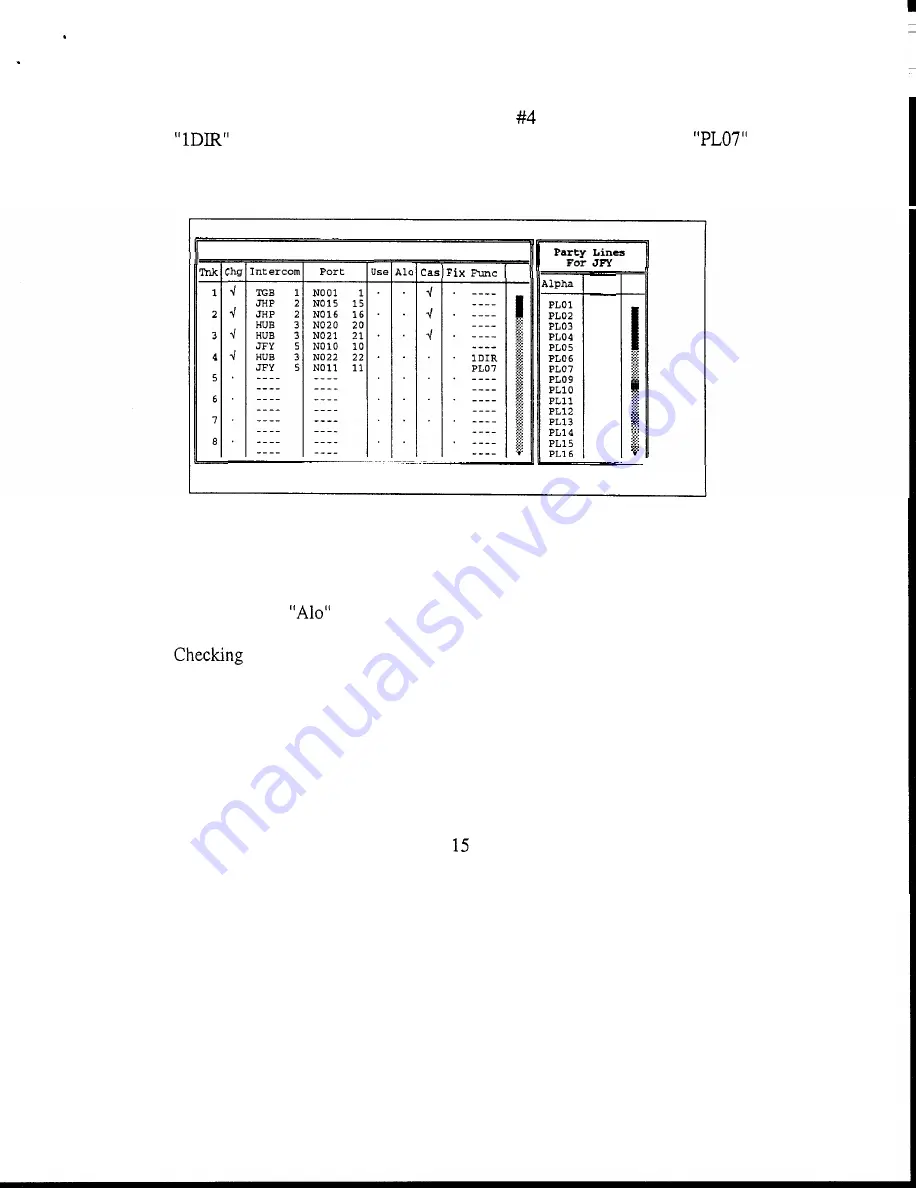
Specify whether you want an end of a trunk to be fixed to a port, party line etc. In
the example in
Figure 2-10, one end of trunk
has been fixed to
the port called
on matrix
"HUB";
the other end has been fixed to party line
on
matrix
"JFY".
Note that this trunk is not cascaded because
you
would not want
anyone else using
it.
Help File
Trunks
Intercoms Status Sort Screen Log Options Master
7
Trunk
Line Assignments
File: On-Line
PL
1
2
3
4
5
6
7
9
10
11
12
13
14
1 5
16
.....
d
Mode: On-Line
Figure
2-10.
An Example
of
a Trunk with Both Ends Fixed
Note
The "Use" and
columns are not assigned by you when setting up trunks.
These columns are used to provide trunk status information during operation. See
Trunk Status, page 2-9.
6.
Set the trunking timeout. Press ESCAPE as required to return to the menu bar.
Then, from the "Trunks" menu, select "Options". The "Trunk Allocation Timeout"
screen will appear (Figure 2-1 1). The number you enter here determines the
amount of time that a trunk will remain allocated to a user after that person stops
using the trunk. After the timeout period, the trunk becomes available for anyone
to use. The default timeout period is
seconds. This may be changed to any
period
from
0-99 seconds.
2-8
CStrunk
User
Manual


