Publication 2094-UM001A-EN-P — September 2006
Configure and Startup the Kinetix 6000 Drive System
127
The New Module dialog opens. Your new module appears under
the I/O Configuration folder in the explorer dialog.
4.
Configure the new module.
a. Name the module.
b. Select the slot where your module resides (leftmost slot = 0).
c. Select an Electronic Keying option (select Disable Keying if
unsure).
d. Check the box Open Module Properties.
5.
Click OK.
The Module Properties dialog opens.
6.
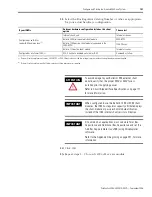
Select the SERCOS Interface tab and reference the table below.
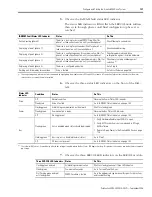
Logix SERCOS Module
Number of Axes
Data Rate
1756-M03SE or
1756-L60M03SE
Up to 3
4 or 8 Mbps
1756-M08SE
Up to 8
1756-M16SE or
1784-PM16SE
Up to 16
1768-M04SE
Up to 4
Содержание Allen-Bradley Kinetix 6000
Страница 8: ...Publication 2094 UM001A EN P September 2006 8 Table of Contents...
Страница 18: ...Publication 2094 UM001A EN P September 2006 18 Start...
Страница 118: ...Publication 2094 UM001A EN P September 2006 118 Connecting the Kinetix 6000 Drive System...
Страница 144: ...Publication 2094 UM001A EN P September 2006 144 Configure and Startup the Kinetix 6000 Drive System...
Страница 168: ...Publication 2094 UM001A EN P September 2006 168 Removing and Replacing the Kinetix 6000 Drive Modules...
Страница 190: ...Publication 2094 UM001A EN P September 2006 190 Specifications and Dimensions...
Страница 256: ...Publication 2094 UM001A EN P September 2006 256 Integrating Resistive Brake Modules with Kinetix 6000 Drives...
Страница 265: ...Publication 2094 UM001A EN P September 2006 265 Notes...
Страница 266: ...Publication 2094 UM001A EN P September 2006 266 Notes...
Страница 267: ...Publication 2094 UM001A EN P September 2006 267 Notes...


