background image


111 • Calibrating a Gas Tracer

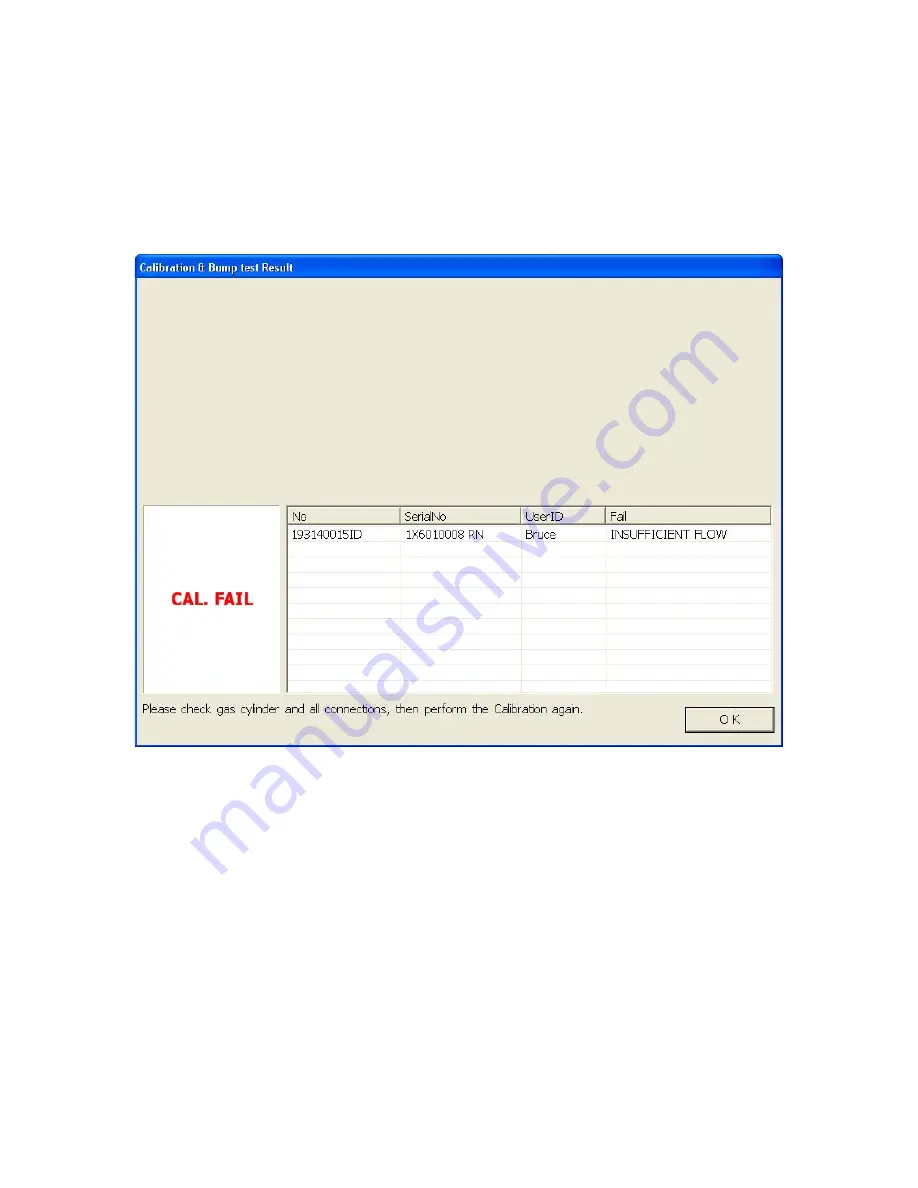
If at any point during the calibration the flow rate to the instrument becomes 
too low, the PC Controller Program will abort the calibration and display a 
failed calibration screen. The CAL 

S

 LED on the SDM-2012 control panel 

will be solid red. Click OK to return to the main program window or double 
click the instrument information line to view the calibration results in the 
Logs window. The CAL 

S

 LED on the SDM-2012 control panel will turn off. 

Confirm all tubing connections are correct and that all lines are clear.  

 Figure 89: Low Flow Calibration Failure

 23. For both calibration result outcomes, the instrument(s) will be displayed in the 

main program window in Details View. To return to Icons View, click the Icons 
radio button.

 24. When a calibration is performed, any bump test or calibration data that is being 

stored in the instrument will be downloaded to the PC Controller Program. This 
data can be viewed in the Logs window along with the results of the calibration 
just performed. See “Bump Test Data” on page 138 or “Calibration Data” on 
page 125 for instructions for viewing bump test or calibration data.


Содержание SDM-2012

Страница 1: ...www rkiinstruments com SDM 2012 Docking Station PC Controlled Configuration Operator s Manual Part Number 71 0256RK Revision C Released 8 12 13 ...

Страница 2: ...sts local repair costs transportation costs or contingent expenses incurred without our prior approval THIS WARRANTY IS EXPRESSLY IN LIEU OF ANY AND ALL OTHER WARRANTIES AND REPRESENTATIONS EXPRESSED OR IMPLIED AND ALL OTHER OBLIGATIONS OR LIABILITIES ON THE PART OF RKI INSTRUMENTS INC INCLUDING BUT NOT LIMITED TO THE WARRANTY OF MERCHANTABILITY OR FITNESS FOR A PARTICULAR PURPOSE IN NO EVENT SHAL...

Страница 3: ...8 Back Panel 10 Power Jack 10 Sample Fittings 10 PC Connection 10 Control Panel 11 Front Panel 12 USB Hub Requirements for Multiple Station Systems 12 Hardware Setup 13 Hardware Assembly 13 Assembling a Manifold for Multiple SDM 2012 Units 15 Exhaust Tubing 15 GAS 1 and GAS 2 Tubing 17 Connecting Calibration Gas 22 EAGLE 2 and GX Type Instrument Connection 23 Installing the SDM GX Docking Station ...

Страница 4: ...onnecting Instruments to the PC Controller Program 43 Icon View vs Details View 49 Exporting an Instrument List from the Main Program Window 50 Automatic Bump Testing and Calibration 51 Bump Testing a GX 2012 52 Calibrating a GX 2012 65 Bump Testing a Gas Tracer 77 Calibrating a Gas Tracer 95 Troubleshooting 112 Charging an Instrument in an SDM 2012 113 Recharging a Battery Pack After Performing a...

Страница 5: ...5 Station User Tab 167 Download Function 172 Clear Logs Function 172 Power Off Function 172 Config Window 173 Parameter Tab 173 Database Tab 173 Password Tab 175 Spare Parts List 176 Appendix A Multiple Instrument Configurations 178 Bump Testing GX 2012s and Gas Tracers 178 Calibrating GX 2012s and Gas Tracers 197 CAUTION Read and understand this manual before using the SDM 2012 Also read and unde...

Страница 6: ...d drive if the files have been transferred to the hard drive from the flash drive If you are using the PC Controller Program while operating in the PC controlled configuration you may retrieve instrument data bump test and calibrate up to 10 units at once Instrument information and data for each instrument can be viewed directly using the PC Controller Program and can be printed from the PC Contro...

Страница 7: ... is advised that if the equipment is used in a manner not specified in this manual the protection provided by the equipment may be impaired System Requirements To use the SDM GX Docking Station PC Controller Software your personal computer must meet the following requirements Operating Systems Windows XP Windows Vista Windows 7 Processor IBM compatible PC running Pentium 2 processor or equivalent ...

Страница 8: ...Size 256 bytes Standalone configuration only Maximum Number of Records Saved 200 Standalone configuration only Number of Calibration Gas Cylinders Up to two calibration gas cylinders per bump test or calibration at a time Standard Accessories AC Adapter USB Flash Drive Single Module Data Viewer Software SDM GX Docking Station PC Controller Software Inlet Air Filter Instruction Manual 10 Foot Long ...

Страница 9: ...n CAUTION Describes potential damage to equipment WARNING Describes potential danger that can result in injury or death Cautions Safety Information Use only polyurethane sample tubing with the SDM 2012 Consult RKI Instruments Inc for other materials Do not subject the SDM 2012 to infrared or intense light This may cause communication errors Do not expose the SDM 2012 to water Do not subject the SD...

Страница 10: ...plug style adapter with a 5 foot cable The end of the cable has a plug that connects to the power jack on the SDM 2012 s back panel The AC adapter is rated 100 240 VAC input 12 VDC 1 2 A output 3 Port AC Adapter The 3 port AC adapter is a wall plug style adapter with three 5 foot cables The end of each cable has a plug that connects to the power jack on the SDM 2012 s back panel The AC adapter is ...

Страница 11: ... back panel One 10 foot length of 3 16 inch ID polyurethane tubing is provided for GAS 1 and GAS 2 manifold construction if desired In addition a 10 foot length of 5 16 inch ID polyurethane tubing is provided for connection to the exhaust fitting on the back panel to allow routing of the exhaust to a location such as an open window where the exhaust can disperse WARNING Do not use an exhaust tube ...

Страница 12: ...e Assembling a Manifold for Multiple SDM 2012 Units on page 15 for manifolding instructions Three T fittings are included with the SDM 2012 The larger fitting is for the exhaust tubing manifold construction The two smaller fittings are for GAS 1 and GAS 2 tubing manifold construction Figure 5 Check Valve For Exhaust Tubing For GAS Tubing Figure 6 T Fittings ...

Страница 13: ...ge an instrument An infrared IR port in the front recess lines up with the instrument s IR port when it is inserted in either recess and is used to communicate with the instrument The exhaust line connection fitting is in the upper left corner of the instrument panel The exhaust line is not factory installed and must be installed by the user An exhaust line storage fitting is located along the rig...

Страница 14: ...ARGE POWER 1SEC ON 3SEC OFF Recess Cover Flap Figure 8 Instrument Panel with Alkaline Instrument Installed EDIT ENTER CAL SDM 2012 BUMP GX 2012 OFF COPY POWER 1SEC ON 3SEC OFF CHARGE Recess Cover Flap Figure 9 Instrument Panel with Lithium Ion Instrument Installed ...

Страница 15: ...cylinders The GAS 1 fitting is above the GAS 2 fitting All three fittings accept 3 16 inch ID tubing An exhaust fitting is located in the upper right corner It allows routing of the exhausted calibration gas to a convenient location This fitting accepts 5 16 inch ID tubing Even though the exhaust gas can be routed to an area to be safely dispersed the docking station should still be installed in a...

Страница 16: ...iguration of the SDM 2012 The BUMP T LED and CAL S LEDs indicate the results of bump tests and calibrations respectively The COPY LED does not indicate anything in the PC Controlled configuration but will be on if the SDM 2012 was used in the Standalone configuration and calibration and bump test records are still stored in the SDM 2012 s memory The CHARGE LED is located above the POWER button and...

Страница 17: ...docking stations than you have available USB ports you will need a USB hub RKI provides both a 4 port hub and a 7 port hub If you have more than 7 docking stations you will need to purchase one of each hub Do not connect one hub to the other Make sure that each USB hub has its own USB port on your computer You may also purchase your own USB hub of any port number from your local electronics store ...

Страница 18: ...so that the exhaust can be routed to the window 2 If you have more than one SDM 2012 arrange them side by side as shown in Figure 13 below Each docking station has three connection tabs on the left side near the bottom of the station and three connection recesses on the right side near the bottom of the station The tabs from one docking station can be pushed into the recesses on another station to...

Страница 19: ...tube to an area where the exhaust can be safely dispersed such as an open window Exhaust tubing from multiple units can be daisy chained together in a manifold for more convenient operation In this case the check valves that are provided with the docking stations need to be used See Assembling a Manifold for Multiple SDM 2012 Units below for instructions CAUTION The maximum recommended length for ...

Страница 20: ... lines can also be manifolded together and be routed away from the docking stations with only one 10 foot long 5 16 inch piece of tubing Each SDM 2012 is shipped with exhaust tubing GAS 1 and GAS 2 tubing T fittings in two different sizes and a check valve Exhaust Tubing Reference Figure 15 for the instructions below 1 Cut a 1 2 piece of 5 16 inch tubing for each SDM 2012 and connect it to each un...

Страница 21: ... Setup 16 7 inches T Fitting 10 Foot Max Exhaust Tube To Open Area Check Valve 9 inches Unit 1 GAS2 GAS1 AIR GAS2 GAS1 AIR AIR GAS1 GAS2 AIR GAS1 GAS2 Unit 10 Unit 9 Unit 2 Figure 15 Exhaust Tubing Connections ...

Страница 22: ...er T fittings into the tubing so that the remaining two ports on the T fitting are perpendicular to the GAS fitting 4 Cut 6 7 pieces of 3 16 inch tubing and connect the T fittings 5 Cut two more 6 7 pieces of 3 16 inch tubing and connect the GAS 1 and GAS 2 fittings of the last SDM 2012 to the appropriate T fittings from the second to last SDM 2012 6 Cut 2 pieces of 3 16 inch tubing long enough fo...

Страница 23: ...2 Insert the smaller T fittings into the open end of every humidifier tube except the last one so that the remaining two ports on the T fitting are perpendicular to the GAS fitting 3 Connect the last humidifier tube directly to the last T fitting 4 Cut 6 7 pieces of 3 16 inch tubing and connect the remaining T fittings 5 Cut a piece of 3 16 inch tubing long enough for easy access to the calibratio...

Страница 24: ... GAS2 GAS1 AIR AIR GAS1 GAS2 AIR GAS1 GAS2 GAS2 GAS1 AIR GAS2 GAS1 AIR GAS2 GAS1 AIR AIR GAS1 GAS2 AIR GAS1 GAS2 GAS2 GAS1 AIR GAS2 GAS1 AIR Unit 5 Unit 1 Unit 2 Unit 3 Unit 4 Unit 6 Unit 7 Unit 8 Figure 16 Gas 1 Manifold Connections ...

Страница 25: ...GAS2 GAS1 AIR AIR GAS1 GAS2 AIR GAS1 GAS2 GAS2 GAS1 AIR GAS2 GAS1 AIR AIR GAS1 GAS2 AIR GAS1 GAS2 Unit 10 Unit 9 Unit 8 Unit 7 Unit 6 Unit 4 Unit 3 Unit 2 Unit 1 Unit 5 GAS2 GAS1 AIR GAS2 GAS1 AIR Figure 17 Gas 2 Manifold Connections ...

Страница 26: ...21 Hardware Setup GAS2 GAS1 AIR Unit 2 Unit 1 AIR GAS1 GAS2 Unit 9 GAS2 GAS1 AIR Unit 10 AIR GAS1 GAS2 Figure 18 Gas Tracer Humidifier Manifold ...

Страница 27: ...e methane cylinder are needed The 1000 ppm methane cylinder should be connected to the GAS 2 fitting first The docking station will begin every bump test or calibration with the ppm sensor The user will need to change the GAS 2 cylinder to the 100 volume methane cylinder if volume sensor installed when prompted to do so by the PC Controller Program during bump testing and calibration Use Table 2 b...

Страница 28: ... be connected to tubing leading to the manifold inlet instead of connected directly to the GAS 1 or GAS 2 inlet fitting EAGLE 2 and GX Type Instrument Connection There are 2 different versions of the Docking Station PC Controller program The SDM E2 Docking Station PC Controller program is intended for use with SDM E2 docking stations and EAGLE 2 instruments The SDM GX Docking Station PC Controller...

Страница 29: ...he License Agreement window 5 Read the license agreement and click the agreement acceptance selection box then click Next to proceed to the Customer Information window 6 Enter a user name and organization and select if you want to install the program for all users on the computer or just for your user account then click Next to proceed to the Destination Folder window 7 The default installation fo...

Страница 30: ...annot continue the installation without installing the drivers Figure 19 Device Driver Installation 12 Click Next to install the drivers The Wizard will find the appropriate drivers 13 If this is the first time you are installing a PC Controller Program a window will appear saying that the file did not pass Windows logo testing Click Continue Anyway ...

Страница 31: ...inish Device Driver Installation The installation will continue 15 Follow the on screen instructions to complete software installation 16 To complete the driver installation ensure that all of your docking stations are connected to your computer 17 Turn on a docking station by pressing and holding the POWER button for at least 1 second ...

Страница 32: ... Found New Hardware window will appear NOTE The following instructions do not apply to computers running Windows Vista or Windows 7 The hardware driver will automatically install and you will be notified that the USB device is ready for use Figure 21 Found New Hardware Wizard 19 Select the Install the software automatically option and click Next ...

Страница 33: ...earching 21 Once the files have been found a window will appear saying that the file did not pass Windows logo testing Click Continue Anyway Figure 23 Windows Logo Error 22 The installation will continue Click Finish when the installation has completed 23 Repeat steps 17 through 22 for every docking station in your system ...

Страница 34: ... is launched and the main program window appears Figure 24 Main Program Window 2 If you are starting the software for the first time a message window appears informing you that a database has been created Click OK in that window When starting the software for the first time or if you wish to change the software setup proceed to the next section Overview of the SDM GX Docking Station PC Controller ...

Страница 35: ...een connected to the program which consists of calibration and bump test history logged data if a unit s data is downloaded and memos that record user entered information about an instrument at a particular time The GX 2012 and Gas Tracer are gas monitoring devices for combustible gas O2 H2S and CO They store logged data and calibration information in their internal memory See the GX 2012 Operator...

Страница 36: ...ht corner of the main program window Figure 25 Parts of the Main Program Window Control Buttons The Cylinders Config Logs and Exit control buttons are located along the top right of the window The Bump test and Calibration control buttons are located in the lower right of the window along with the Force Calibration selection box The use of these control buttons and the Force Calibration selection ...

Страница 37: ... It displays the current status of the program It can indicate if the software is in standby mode or if it is downloading data among other indications Fitting Indicators To the right of the status field are 3 round fitting indicators They correspond to the AIR and GAS fittings on the back of the SDM 2012 They indicate whether the corresponding solenoid is activated so it can allow gas to flow thro...

Страница 38: ...n program window 3 You will be prompted to enter a password The factory set password is ABCDE Enter the password and click OK keeping in mind that the password is case sensitive You may change the password using the Password Tab once you have entered the Configuration Window See Password Tab on page 175 for instructions to change the password 4 The Parameter Tab of the Configuration Window will be...

Страница 39: ...ata Logger selection allows you to have saved data automatically downloaded from the instrument once it is connected to the PC Controller program The data will automatically be downloaded based on the frequency set in the Down Load Interval option The factory setting is deselected Select or deselect the Down Load Data Logger box Clear After Down Load The Clear After Down Load selection allows you ...

Страница 40: ...ery instrument configuration except a Gas Tracer with a volume combustible gas sensor installed can be fully calibrated using Auto Calibration If you have a Gas Tracer with a volume combustible sensor installed only the standard 3 sensors catalytic LEL O2 and CO will be calibrated You must perform a manual calibration in order to perform a complete calibration that includes the ppm combustible sen...

Страница 41: ... only the standard 3 sensors catalytic LEL O2 and CO will be bump tested You must perform a manual bump test in order to perform a complete bump test that includes the ppm combustible sensor and the volume sensor If neither box is selected you will not be able to perform a bump test The factory setting is Manual Bump Test selected and Auto Bump Test deselected Select the box for the desired operat...

Страница 42: ... of the calibration gas concentration The amount that the instrument gas reading differs from the calibration gas concentration must be equal to or less than this percentage of the calibration gas concentration For example if the tolerance is set to 50 and the LEL calibration gas concentration is 50 LEL then the bump test gas reading for the LEL channel on the instrument must be 50 LEL 25 LEL To c...

Страница 43: ...e sure that you have performed the driver installations as described in Installing the SDM GX Docking Station PC Controller Software on page 24 1 Click the Config button along the top of the screen to access the Configuration Window 2 You will be prompted to enter a password The factory set password is ABCDE Enter the password and click OK keeping in mind that the password is case sensitive You ma...

Страница 44: ...M GX Docking Station PC Controller program again 11 Turn on your SDM 2012s in the order that you wish for them to appear on the main program window Typically the order in which the docking stations appear on the screen corresponds to their left to right arrangement on the tabletop 12 Your SDM 2012 docking stations should all appear on the screen in numerical order The program will remember each SD...

Страница 45: ...fined cylinders that are fairly common If a cylinder that you need to use is not on this list it can be added at the bottom of the cylinder list You may add as many custom cylinders as necessary Figure 28 Cylinders Window The Cylinders window has the cylinder list number the cylinder name the part number the expiration date and the status of the cylinder Selecting a Cylinder from the Predefined Li...

Страница 46: ...ach cylinder If the cylinder is active the PC Controller program will alert you at start up if the cylinder has passed its expiration date If it is not active the program will not alert you 5 To return to the main program window without saving any changes click Cancel in the Cylinders Window A window will appear notifying you that changes will not be saved To continue to the main program window cl...

Страница 47: ...p down menu to select a cylinder name that is close to the one you want and click the name to bring the cursor up Figure 30 New Cylinder 3 Type in the name of your new cylinder ie gas name and concentration 4 Click in the Part No field once to select it and once more to bring the cursor up Type in the part number for your new cylinder typically the RKI part number 5 Click in the Expiration field a...

Страница 48: ...asking if you want to save the changes you made To return to the main program window and save your changes click Yes To return to the main program window without saving changes click No To return to the Cylinders Window click Cancel Connecting Instruments to the PC Controller Program NOTE Be sure to set up the display order for the SDM 2012s as described in Setting Up the SDM 2012 Display Order on...

Страница 49: ...in use Flip the plastic flap over if it is covering the recess you need to use NOTE If you are only charging an instrument or viewing or editing parameters you do not need to connect the gas out to instrument line or the exhaust line to the instrument Figure 31 Inserting the Instrument GX 2012 or Gas Tracer with Alkaline Battery Pack GX 2012 or Gas Tracer with Li Ion Battery Pack ...

Страница 50: ... and bump test records are still stored in the SDM 2012 s memory see the SDM 2012 Docking Station Standalone Configuration Manual for more information The CHARGE LED will be blinking green if the SDM 2012 is operating properly or solid red if there is a system failure 6 When a connection has been established between the SDM GX Docking Station PC Controller Program and all of the SDM 2012s the main...

Страница 51: ...harge LED was amber it will begin to blink green and the battery charging will stop until the instrument is turned off 9 There are three exceptions to the sequence described above in step 8 above See the GX 2012 Operator s Manual or the Gas Tracer Operator s Manual for a description of the L B MODE CL RMNDR and CL EXPRD instrument parameters When L B MODE is set to anything but OFF the Normal Mode...

Страница 52: ...icating that calibration is due When the beeping and flashing stops press and release the RESET SILENCE button on the instrument to continue The instrument will now connect to the PC Controller program the home screen shown in step 8 above will be displayed and the CHARGE LED will begin to blink green If you do not press and release the RESET SILENCE button to continue the instrument will continue...

Страница 53: ...ontinues to run use the instrument s POWER ENTER button to turn it off and turn it back on again Figure 33 Instruments Connected and Downloaded If an instrument is due for calibration the docking station number and instrument serial number will be highlighted in red If an instrument is due for calibration in the next 10 days the docking station and instrument serial number will be highlighted in o...

Страница 54: ...hown as an instrument inserted in an SDM 2012 icon Previously connected instruments are shown as instrument icons Right clicking an instrument causes the Instrument Function Menu to appear Details View allows you to view connected instruments and previously connected instruments in a table format Scrolling to the right in Details View allows you to view existing instrument parameters For a descrip...

Страница 55: ...nt the list if it is viewed in Details format The list cannot be printed when viewed in Icon format To print the instrument list 1 Ensure that the main program window is being viewed in Details format Figure 35 Main Program Window Details View The print icon will not be active if the main program window is viewed in Icon format 2 Click the Print icon located just below the Exit button 3 A print co...

Страница 56: ...ata into it Automatic Bump Testing and Calibration The PC Controller Program will automatically perform a bump test or calibration on a connected instrument if Auto Bump Test or Auto Calibration is selected in the Configuration Window and if the bump test or calibration is due The use of these features allows the user to launch the PC Controller Program turn on the instrument s and walk away No ov...

Страница 57: ...est or calibration will begin 1 minute after the last connected instrument s instrument information download is complete 7 During an automatic bump test if the bump test fails a calibration is immediately performed 8 If Auto Bump Test and Auto Calibration are both selected the calibration will begin 1 minute after the bump test has finished Bump Testing a GX 2012 The following instructions apply t...

Страница 58: ...See Setting Up the Configuration on page 32 for instructions 3 Verify that the appropriate calibration gas cylinder or cylinders is connected to the appropriate SDM 2012 or manifold line 4 Ensure that the gas out to GX 2012 line is connected to the inlet of the GX 2012 and that the exhaust line is connected to the exhaust fitting of the GX 2012 5 Select the instrument or instruments you wish to bu...

Страница 59: ...uto calibration value for that channel See Sensor Tab on page 165 for instructions When using a 3 gas no H2S channel or a 4 gas H2S channel included cylinder to bump test a standard instrument select all channels If your instrument has fewer than 4 channels your screen will only display the active channels If your GX 2012 has a volume combustible gas sensor installed leave it deselected in this sc...

Страница 60: ...es match the values listed on the calibration cylinder The serial number and gas combination of all selected instruments will appear sequentially beneath the gas cylinder concentration If you are bump testing a standard 4 gas GX 2012 or GX 2012s the screen will appear as shown below All channels will be bump tested using GAS 1 Figure 38 Gas Order Confirmation Screen Standard 4 Gas GX 2012 ...

Страница 61: ... selection box is deselected by default You must select the GAS 2 box if you wish to bump test the volume sensor If you do not wish to bump test the volume sensor leave the GAS 2 box deselected Figure 39 Gas Order Confirmation Screen Standard 4 Gas Plus Volume GX 2012 10 Click OK You will be asked if you want to bump test the instrument s Click OK to proceed If you don t want to proceed with the b...

Страница 62: ...adjustment on all the channels The BUMP T LED on the SDM 2012 control panel will be flashing amber If at any point during the bump test you wish to cancel the bump test click the Cancel button in the lower right corner of the screen The bump test will be aborted and the BUMP T LED will turn solid amber Figure 40 Air Flowing The PC Controller Program will analyze the zero adjustment results If any ...

Страница 63: ...bration gas will be applied to the instrument s for the duration specified in the Gas Exposure Time parameter in the Configuration Window Figure 41 GAS 1 Calibration Gas Flowing The PC Controller Program will analyze the results If the bump test on the standard 4 sensors fails and Force Calibration is selected a calibration will automatically begin and GAS 1 calibration gas will continue to flow ...

Страница 64: ...l be applied to the instrument s for the duration specified in the Gas Exposure Time parameter in the Configuration Window Figure 42 GAS 2 Calibration Gas Flowing The PC Controller Program will analyze the results If the bump test on the volume sensor fails and Force Calibration is selected a calibration will automatically begin and GAS 2 calibration gas will continue to flow ...

Страница 65: ...Bump Testing a GX 2012 60 14 After calibration gas is applied the docking station will purge with fresh air for 45 seconds Figure 43 Fresh Air Purge ...

Страница 66: ... test passes the following window will open indicating that The BUMP T LED will be solid green Click OK to return to the main program window The BUMP T LED will turn off Figure 44 Bump Test Passed The GX 2012 will automatically be shut off 20 seconds after a successful bump test ...

Страница 67: ...ating which channels failed the bump test The BUMP T LED on the SDM 2012 control panel will be solid red Click OK to return to the main program window or double click the instrument information line to view the bump test results in the Logs window The BUMP T LED on the SDM 2012 control panel will turn off Figure 45 Bump Test Failed ...

Страница 68: ...d calibration The BUMP T LED on the SDM 2012 control panel will be solid red The CAL S LED will be solid green if the calibration passed or solid red if the calibration failed Click OK to return to the main program window or double click an instrument information line to view the bump test or calibration results in the Logs window The BUMP T LED and CAL S LED on the SDM 2012 control panel will tur...

Страница 69: ... to view the bump test or calibration results in the Logs window The BUMP T LED on the SDM 2012 control panel will turn off Confirm all tubing connections are correct and that all lines are clear Figure 47 Low Flow Bump Test Failure 16 For all bump test result outcomes the instruments will be displayed in the main program window in Details View To return the main program window to Icons View click...

Страница 70: ...hen a calibration is performed the PC Controller Program performs an air adjust operation on a GX 2012 and then applies calibration gas to the GX 2012 The PC Controller Program analyzes the calibration results and determines if the GX 2012 passed the calibration To manually calibrate an instrument or instruments 1 Establish a connection between the SDM 2012 GX 2012 and the PC Controller program as...

Страница 71: ...ate and click on them to highlight them as shown below To select more than one instrument for calibration hold down the Control button on the keyboard as you click them Figure 48 Instrument Selection 6 Click the Calibration button in the lower right corner of the main program window ...

Страница 72: ...65 for instructions When using a 3 gas no H2S channel or a 4 gas H2S channel included cylinder to calibrate a standard instrument select all channels If your instrument has fewer than 4 channels your screen will only display the active channels If your GX 2012 has a volume combustible gas sensor installed leave it deselected in this screen Figure 49 Gas Cylinder Confirmation Screen When all of the...

Страница 73: ...ues match the values listed on the calibration cylinder The serial number and gas combination of all selected instruments will appear sequentially beneath the gas cylinder concentration If you are calibrating a standard 4 gas GX 2012 or GX 2012s the screen will appear as shown below All channels will be calibrated using GAS 1 Figure 50 Gas Order Confirmation Screen Standard 4 Gas GX 2012 ...

Страница 74: ...election box is deselected by default You must select the GAS 2 box if you wish to calibrate the volume sensor If you do not wish to calibrate the volume sensor leave the GAS 2 box deselected Figure 51 Gas Order Confirmation Screen Standard 4 Gas Plus Volume GX 2012 9 Click OK You will be asked if you want to calibrate the instrument s Click OK to proceed If you don t want to proceed with the cali...

Страница 75: ...m will perform a zero adjustment on all the channels If at any point during the calibration you wish to cancel the calibration click the Cancel button in the lower right corner of the screen The calibration will be aborted and the CAL S LED will turn solid amber Figure 52 Air Flowing The PC Controller Program will analyze the zero adjustment results If any sensors failed the zero adjustment the ca...

Страница 76: ...s passed the zero adjustment calibration gas will be applied The GAS 1 indicator on the program screen will come on Calibration gas will be applied to the instrument s for 90 seconds Figure 53 GAS 1 Calibration Gas Flowing The PC Controller Program will analyze the results ...

Страница 77: ...sensor installed in your GX 2012 s continue with step 13 If you have a volume sensor installed GAS 2 calibration gas will be applied to the instrument s for 90 seconds Figure 54 GAS 2 Calibration Gas Flowing The PC Controller Program will analyze the results ...

Страница 78: ...73 Calibrating a GX 2012 13 After calibration gas is applied the docking station will purge with fresh air for 45 seconds Figure 55 Fresh Air Purge ...

Страница 79: ...e following window will open indicating that The CAL S LED on the SDM 2012 control panel will be solid green Click OK to return to the main program window The CAL S LED will turn off Figure 56 Calibration Passed The GX 2012 will automatically be shut off 20 seconds after a successful calibration ...

Страница 80: ...iled to calibrate The CAL S LED on the SDM 2012 control panel will be solid red Click OK to return to the main program window or double click the instrument information line to view the calibration results in the Logs window The CAL S LED on the SDM 2012 control panel will turn off Figure 57 Calibration Failed ...

Страница 81: ...n off Confirm all tubing connections are correct and that all lines are clear Figure 58 Low Flow Calibration Failure 15 For both calibration result outcomes the instrument s will be displayed in the main program window in Details View To return to Icons View click the Icons radio button 16 When a calibration is performed any bump test or calibration data that is being stored in the instrument will...

Страница 82: ...test on the ppm combustible sensor first Be sure that the 1000 ppm methane calibration cylinder is connected to the GAS 2 fitting on the back of the SDM 2012 using a 6 inch humidifier tube To manually bump test an instrument or instruments NOTE Do not use a 4 gas cylinder or any cylinder that includes H2S when bump testing a Gas Tracer H2S adversely affects the ppm combustible sensor 1 Establish a...

Страница 83: ...w To select multiple instruments for bump testing hold down the Control button on the keyboard as you click them Figure 59 Instrument Selection 6 If you would like an automatic calibration to occur after a failed bump test select the Force Calibration selection box 7 Click the Bump test button in the lower right corner of the main program window ...

Страница 84: ...nge the auto calibration value for that channel See Sensor Tab on page 165 for instructions If you are bump testing a standard Gas Tracer leave the first channel the ppm sensor deselected and select all other channels If you are bump testing a standard Gas Tracer plus a volume sensor leave the first and last channels the ppm and volume sensors deselected and select all other channels Figure 60 Gas...

Страница 85: ...ere are no other sensors installed in the instrument GAS 2 will still be used to bump test the ppm sensor The ppm sensor will be deselected in this screen and cannot be selected Figure 61 Gas Cylinder Confirmation Screen 0 10000 ppm Gas Tracer When all of the desired channels are selected click OK If you don t want to proceed click Cancel to abort the bump test ...

Страница 86: ...S 2 box if you wish to bump test the ppm combustible sensor If you do not wish to bump test the ppm combustible sensor leave the GAS 2 box deselected The SDM 2012 will bump test the ppm sensor using the Gas Tracer s WET setting for the fresh air adjustment and the gas application This is not user adjustable using the PC Controller Program If the SDM 2012 is not in a fresh air environment a zero ai...

Страница 87: ...hange the GAS 2 cylinder before the volume sensor can be bump tested The GAS 2 selection boxes are deselected by default You must select the GAS 2 boxes if you wish to bump test the ppm combustible sensor and or the volume sensor If you do not wish to bump test the ppm combustible sensor or the volume sensor leave the appropriate GAS 2 box deselected Be sure that the ppm calibration cylinder is co...

Страница 88: ...mbustible sensor If you do not select the GAS 2 box the bump test will not continue Be sure that the ppm calibration cylinder is connected to the GAS 2 fitting with a 6 inch humidifier at the start of the bump test Figure 64 Gas Order Confirmation Screen 0 10000 ppm Gas Tracer 10 Click OK You will be asked if you want to bump test the instrument s Click OK to proceed If you don t want to proceed w...

Страница 89: ...ings The screen will indicate that you need to remove the gas cylinder from the GAS 2 fitting on the back of the SDM 2012 If the previous instrument tested did not include a volume sensor the program will proceed as described in step 15 12 Remove any connected cylinder from the GAS 2 fitting and click the Purge button The SDM 2012 will purge for 30 seconds 13 At the end of the purge cycle you will...

Страница 90: ...conds then the PC Controller Program will perform a zero adjustment on the ppm channel If at any point during the bump test you wish to cancel the bump test click the Cancel button in the lower right corner of the screen The bump test will be aborted and the BUMP T LED will turn solid amber Figure 65 Air Flowing to PPM Sensor The PC Controller Program will analyze the zero adjustment results If th...

Страница 91: ...will come on and calibration gas will be applied to the ppm sensor for the duration specified in the Gas Exposure Time parameter in the Configuration Window Figure 66 GAS 2 PPM Gas Flowing The PC Controller program will analyze the results If the bump test on the ppm sensor fails and Force Calibration is selected a calibration will automatically begin on the ppm sensor and GAS 2 calibration gas wi...

Страница 92: ...EL O2 and CO and the volume sensor if installed for 45 seconds and the PC Controller program will perform a zero adjustment Figure 67 Air Flowing to Standard 3 Sensors The PC Controller Program will analyze the zero adjustment results If any of the standard 3 sensors or volume sensor if installed failed the zero adjustment the bump test will be aborted ...

Страница 93: ...m screen will come on and calibration gas will be applied to the instrument s for the duration specified in the Gas Exposure Time parameter in the Configuration Window Figure 68 GAS 1 Flowing The PC Controller Program will analyze the results If the bump test on the standard 3 sensors fails and Force Calibration is selected a calibration will automatically begin on the standard 3 sensors and GAS 1...

Страница 94: ...p 20 Change the cylinder connected to the GAS 2 fitting to the volume calibration cylinder 21 When you have changed the GAS 2 cylinder click OK The bump test will continue and the second GAS 2 calibration gas will be applied to the volume sensor for the duration specified in the Gas Exposure Time parameter in the Configuration Window Figure 69 Volume GAS 2 Flowing The PC Controller Program will an...

Страница 95: ...Gas Tracer 90 automatically begin and GAS 2 calibration gas will continue to flow 22 After GAS 2 calibration gas has been applied the docking station will purge with fresh air for 45 seconds Figure 70 Fresh Air Purge ...

Страница 96: ... test passes the following window will open indicating that The BUMP T LED will be solid green Click OK to return to the main program window The BUMP T LED will turn off Figure 71 Bump Test Passed The Gas Tracer will automatically be shut off 20 seconds after a successful bump test ...

Страница 97: ...icating which channels failed the bump test The BUMP T LED on the SDM 2012 control panel will be solid red Click OK to return to the main program window or double click the instrument information line to view the bump test results in the Logs window The BUMP T LED on the SDM 2012 control panel will turn off Figure 72 Bump Test Failed ...

Страница 98: ...and calibration The BUMP T LED on the SDM 2012 control panel will be solid red The CAL S LED will be solid green if the calibration passed or solid red if the calibration failed Click OK to return to the main program window or double click an instrument information line to view the bump test or calibration results in the Logs window The BUMP T LED and CAL S LED on the SDM 2012 control panel will t...

Страница 99: ...to view the bump test or calibration results in the Logs window The BUMP T LED on the SDM 2012 control panel will turn off Confirm that all tubing connections are correct and that all lines are clear Figure 74 Low Flow Bump Test Failure 24 For all bump test result outcomes the instruments will be displayed in the main program window in Details View To return the main program window to Icons View c...

Страница 100: ...struments NOTE Do not use a 4 gas cylinder or any cylinder that includes H2S when calibrating a Gas Tracer H2S adversely affects the ppm combustible sensor 1 Establish a connection between the SDM 2012 Gas Tracer and the PC Controller program as described in Connecting Instruments to the PC Controller Program on page 43 2 Verify that all of the calibration parameters are set correctly See Setting ...

Страница 101: ...brate and click on them to highlight them as shown below To select multiple instruments for calibration hold down the Control button on the keyboard as you click them Figure 75 Instrument Selection 6 Click the Calibration button in the lower right corner of the computer program screen ...

Страница 102: ...ange the auto calibration value for that channel See Sensor Tab on page 165 for instructions If you are calibrating a standard Gas Tracer leave the first channel the ppm sensor deselected and select all other channels If you are calibrating a standard Gas Tracer plus a volume sensor leave the first and last channels the ppm and volume sensors deselected and select all other channels Figure 76 Gas ...

Страница 103: ...libration values and the instruments that the calibration cylinder will be used for Be sure the auto calibration values match the values listed on the calibration cylinder The serial number and gas combination of all selected instruments will appear sequentially beneath the gas cylinder concentrations If you are calibrating a standard Gas Tracer or Gas Tracers catalytic LEL ppm combustible O2 and ...

Страница 104: ...nnecting the cylinder to the AIR fitting Another 6 inch humidifier tube must always be used to connect the calibration gas cylinder to the GAS 2 fitting See the Gas Tracer Operator s Manual for a description of the DRY and WET settings for bump testing and calibration NOTE If you are performing a biannual calibration of the ppm sensor perform a DRY zero adjustment with the instrument alone as desc...

Страница 105: ... user must change the GAS 2 cylinder before the volume sensor can be calibrated The GAS 2 selection boxes are deselected by default You must select the GAS 2 boxes if you wish to calibrate the ppm combustible sensor and or the volume sensor If you do not wish to calibrate the ppm combustible sensor or the volume sensor leave the appropriate GAS 2 box deselected Be sure that the ppm calibration cyl...

Страница 106: ...tible sensor If you do not select the GAS 2 box the calibration will not continue Be sure that the ppm calibration cylinder is connected to the GAS 2 fitting with a 6 inch humidifier at the start of the calibration Figure 80 Gas Order Confirmation Screen 0 10000 ppm Gas Tracer 9 Click OK You will be asked if you want to calibrate the instrument s Click OK to proceed If you don t want to proceed wi...

Страница 107: ...ings The screen will indicate that you need to remove the gas cylinder from the GAS 2 fitting on the back of the SDM 2012 If the previous instrument tested did not include a volume sensor the program will proceed as described in step 14 11 Remove any connected cylinder from the GAS 2 fitting and click the Purge button The SDM 2012 will purge for 30 seconds 12 At the end of the purge cycle you will...

Страница 108: ...PC Controller Program will perform a zero adjustment on the ppm sensor If at any point during the calibration you wish to cancel the calibration click the Cancel button in the lower right corner of the screen The calibration will be aborted and the CAL S LED will turn solid amber Figure 81 Air Flowing PPM Sensor The PC Controller Program will analyze the zero adjustment results If the ppm sensor f...

Страница 109: ... adjustment calibration gas from the GAS 2 cylinder will be applied to the ppm sensor The GAS 2 indicator on the program screen will come on and calibration gas will be applied to the ppm sensor for 90 seconds Figure 82 GAS 2 PPM Gas Flowing The PC Controller program will analyze the results ...

Страница 110: ...O2 and CO and the volume sensor if installed for 45 seconds and the PC Controller program will perform a zero adjustment Figure 83 Air Flowing to Standard 3 Sensors The PC Controller Program will analyze the zero adjustment results If any of the standard 3 sensors or the volume sensor if installed failed the zero adjustment the calibration will be aborted ...

Страница 111: ...ed to the instrument s for 90 seconds Figure 84 GAS 1 Flowing The PC Controller Program will analyze the results 18 If you are not calibrating an instrument or instruments with a volume sensor installed continue to step 22 If you are calibrating an instrument or instruments with a volume sensor installed you will be prompted to change the GAS 2 cylinder The pump s on the instrument s will stop 19 ...

Страница 112: ... have changed the GAS 2 cylinder click OK The calibration will continue and the second GAS 2 calibration gas will be applied to the volume sensor for 90 seconds Figure 85 Volume GAS 2 Flowing The PC Controller Program will analyze the results ...

Страница 113: ...Calibrating a Gas Tracer 108 21 After calibration gas is applied the docking stations will purge with fresh air for 45 seconds Figure 86 Fresh Air Purge ...

Страница 114: ...e following window will open indicating that The CAL S LED on the SDM 2012 control panel will be solid green Click OK to return to the main program window The CAL S LED will turn off Figure 87 Calibration Passed The Gas Tracer will automatically be shut off 20 seconds after a successful calibration ...

Страница 115: ...failed to calibrate The CAL S LED on the SDM 2012 control panel will be solid red Click OK to return to the main program window or double click the instrument information line to view the calibration results in the Logs window The CAL S LED on the SDM 2012 control panel will turn off Figure 88 Calibration Failed ...

Страница 116: ...urn off Confirm all tubing connections are correct and that all lines are clear Figure 89 Low Flow Calibration Failure 23 For both calibration result outcomes the instrument s will be displayed in the main program window in Details View To return to Icons View click the Icons radio button 24 When a calibration is performed any bump test or calibration data that is being stored in the instrument wi...

Страница 117: ...for leaks or for any bad connections 5 If the fail condition continues replace the sensor s in the instrument 6 If the difficulties continue contact RKI Instruments Inc for further instruction Calibration fails The auto calibration values do not match the cylinder gas concentrations The calibration cylinder is out of gas or is outdated The calibration cylinder is not connected to the appropriate G...

Страница 118: ...o the instrument cradle The IR window is dirty The USB cable is not properly plugged into the SDM 2012 or the PC 1 Turn on the SDM 2012 If it does not turn on check that the AC adapter is plugged into an AC socket and to the jack on the back of the SDM 2012 2 Check to make sure the instrument is inserted properly 3 Clean the IR window on the SDM 2012 4 Check to make sure the USB cable is plugged i...

Страница 119: ... result of the previous bump test or calibration If the bump test or calibration was cancelled the BUMP T or CAL S LED will be solid amber NOTE The SDM 2012 does not start charging the batteries until the instrument is off While the instrument is on the CHARGE LED will blink green Once the instrument is shut off the CHARGE LED will begin to blink amber 5 If the battery pack is fully charged then t...

Страница 120: ...the POWER button 5 The CHARGE LED will be blinking amber 6 If the battery pack is fully charged then the blinking amber LED will turn solid green in a few minutes If the battery pack is drained enough for the SDM 2012 to charge it the CHARGE LED will continue to blink amber while charging is taking place The SDM 2012 will take approximately 4 hours to charge a fully discharged battery pack If the ...

Страница 121: ...clicking Download the Logs Window will contain alarm trend data calibration data event data interval trend data memo data bump test data barhole data normal operation snap log data and leak check snap log data Gas Tracer only If you do not perform a complete download or select Down Load Data Logger in the Configuration Window but perform a calibration the Logs Window will contain instrument bump t...

Страница 122: ... saved data Figure 91 Logs Window in Base View Format Date To view data in the Date Base View Format a Select Date in the Base view box b Click the expanded view symbol next to a date folder in the Data frame of the Logs window or double click the folder to view the contents below it c Single click on the data type folder Alarm Calibration etc All of the files in that data type folder will appear ...

Страница 123: ...indow or double click the folder to view the contents below it c Single click on a date folder The dates are displayed in year month format All of the files in that date folder will appear in the upper right frame of the Logs window d If an item is expanded and you want to close it click the symbol next to the item or double click it 2 ID View Format The data may be organized by one or more of the...

Страница 124: ...type folder Alarm Calibration etc you wish to view or double click the folder to view the contents below it d Single click on a date folder The dates are displayed in year month format All of the files in that date folder will appear in the upper right frame of the Logs window e If an item is expanded and you want to close it click the symbol next to the item or double click it When viewing data b...

Страница 125: ...r an alarm event occurs the data file will only have logged data until the unit was turned off NOTE If you are operating your instrument in Inert Mode with the oxygen alarm pattern set to H HH the maximum reading for the oxygen channel will be saved every 5 seconds instead of the minimum The instrument saves up to 8 alarm trend files When an alarm event triggers an alarm trend file to be saved sub...

Страница 126: ...rm trend data files for that instrument in that particular year month will appear in the upper right frame The file number serial number station ID user ID model date time and sample count of the alarm trend file appear in the same line Figure 94 Viewing Alarm Trend Files ...

Страница 127: ...Logs Button 122 4 Click a file to see the instrument information gas readings at the time of the event and the alarm setpoints in the lower right frame Figure 95 Alarm Trend Data ...

Страница 128: ...elation to each other click any of the four layout control buttons in the upper left corner of the screen To change the proportions of the table to the graph click the divider between the two and move it To display instrument information along with the data table and graph click the i control button in the upper left corner 6 In the table part of the screen The gas readings at the time of the alar...

Страница 129: ...hat data point in the table Clicking a data point in the table will move the red line in the graph to that data point 8 To print the data select either List or Graph in the upper right corner of the window and then click the Print control button in the upper right corner of the window The Print control button has a printer icon on it A dialog box will appear confirming if you want to print Click O...

Страница 130: ...ment is capable of saving calibration information for up to the 124 most recent calibrations and bump tests combined When the maximum number of calibration files is reached the oldest calibration file is overwritten when a new one is saved When an instrument is connected to the PC Controller Program and a calibration is performed or a complete download occurs the calibration files are retrieved an...

Страница 131: ...t frame The file number serial number station ID user ID model date time and result of the calibration appear in the same line If calibrations were performed prior to connecting the instrument with the SDM GX Docking Station PC Controller software data for those calibrations will not appear until a complete download is performed Figure 98 Viewing Calibration Log Files ...

Страница 132: ... For example a calibration performed on a GX 2012 that contained the standard 4 sensors plus a volume sensor would result in one calibration file for the standard 4 sensors if a 4 gas mix was used and one calibration file for the volume sensor 7 To print the calibration data everything in the lower right frame of the screen click the Print control button located just above the calibration judge co...

Страница 133: ...s highlighted and click the Save control button in the upper left corner of the Logs window A Save As dialog box will appear for you to specify the file name and file location Figure 100 Save As Dialog Box Specify the file name and location and click Save 12 To copy calibration data in a date folder to the clipboard be sure the desired date folder is selected and click the Save to Clipboard contro...

Страница 134: ...ument by serial number then click the expanded view symbol of or double click the serial number folder to view the contents 2 Click the expanded view symbol of or double click the Event folder to view the contents Event data folders are arranged by year month 3 Click the year month folder you wish to view All event data files for that instrument in that particular year month will appear in the upp...

Страница 135: ...he Data Log Interval menu item in the Edit Function Screen or in the GX 2012 Gas Tracer Setup Mode See Edit Function on page 155 or the GX 2012 Operator s Manual or Gas Tracer Operator s Manual for instructions to set the interval trend time Events such as gas alarms or sensor failures are saved in the interval trend data file when they occur An interval trend data file is created and saved in the...

Страница 136: ... the interval trend files 1 While in the Logs window find your instrument by serial number then click the expanded view symbol of or double click the serial number folder to view the contents 2 Click the expanded view symbol of or double click the Interval folder to view the contents Interval data folders are arranged by year month 3 Click the year month folder you wish to view All interval trend ...

Страница 137: ...tom right frame will fill in The instrument information will be displayed along with the average minimum and maximum gas readings for the operating session Also displayed are the minimum date the maximum date and the warning alarm STEL and TWA setpoints Figure 104 Interval Trend Data ...

Страница 138: ...ng or Alarm it will be indicated A graph of the data will appear on the right half of the screen Events are displayed on the screen under the channel in which they occur and with the time of the event Events are displayed whether they occurred at scheduled log times or in between them Events include gas alarms such as a warning condition trouble conditions such as a sensor failure and an indicatio...

Страница 139: ...area so that it is highlighted in gray The graph will zoom in To return to a previous zoom click the Previous control button in the upper right corner of the graph section To return to the original zoom click the Restore control button in the upper right corner of the graph section Clicking anywhere on the graph will cause a vertical red line to appear and the corresponding data point will be high...

Страница 140: ...ht corner of the window and then click the Copy to Clipboard control button The Copy to Clipboard control button has a clipboard icon on it The table or graph will be saved to the clipboard It can then be pasted into a document by using the Paste command in an application 11 To go back and view other data click Close to return to the Logs window Memo Data Any information entered into the Memo fiel...

Страница 141: ... to view the contents Memo data folders are arranged by year month 3 Click the year month folder you wish to view All memo files for that instrument in that particular year month will appear in the upper right frame The file number serial number station ID user ID model date time and the first few words of the memo appear in the same line Figure 107 Viewing Memo Files ...

Страница 142: ...n will fill in The instrument information will be displayed along with the memo information Figure 108 Viewing Memo File Data 5 To print memo data click the Print control button in the upper left corner of the Logs window A dialog box will appear confirming if you want to print Click OK ...

Страница 143: ...p test information for up to the 124 most recent calibrations and bump tests combined When an instrument is connected to the PC Controller Program and a calibration is performed or a complete download occurs the bump test files are retrieved and stored by the program In addition all bump tests performed by the PC Controller Program are stored by the program To view and perform desired operations w...

Страница 144: ...bump test data files for that instrument in that particular year month will appear in the upper right frame The file number serial number station ID user ID model date time of the bump test and the results appear in the same line Figure 110 Viewing Bump Test Log Files ...

Страница 145: ...example a bump test performed on a GX 2012 that contained the standard 4 sensors plus a volume sensor would result in one bump test file for the standard 4 sensors if a 4 gas mix was used and one bump test file for the volume sensor 7 To print the bump test data everything in the lower right frame of the screen click the Print control button located just above the bump test judge column A dialog b...

Страница 146: ...te folder is highlighted and click the Save control button in the upper left corner of the Logs window A Save As dialog box will appear for you to specify the file name and file location Figure 112 Save As Dialog Box Specify the file name and location and click Save 12 To copy bump test data in a date folder to the clipboard be sure the desired date folder is selected and click the Save to Clipboa...

Страница 147: ...data folders are arranged by year month 3 Click the year month folder you wish to view All barhole files for that instrument in that particular year month will appear in the upper right frame The file number serial number station ID user ID model and date time appear in the same line Figure 113 Viewing Barhole Files ...

Страница 148: ...lue maximum value minimum date maximum date warning setting and alarm setting for the combustible gas and oxygen channels Figure 114 Viewing Barhole File Data 5 To print barhole file information from a date folder everything shown in the upper right frame be sure that the desired date folder is selected and click the Print control button in the upper right corner of the Logs window A dialog box wi...

Страница 149: ...he desired date folder is selected and click the Save to Clipboard control button The data will be saved to the clipboard It can then be pasted into a document by using the Paste command in an application Normal Operation Snap Log Data Normal Operation Snap Log Data can be taken on GX 2012 and Gas Tracer instruments To view and perform desired operations with the normal operation snap log files 1 ...

Страница 150: ...you turn the instrument off and turn it back on a new snap log file will be created The file number serial number model start date time and end date time appear in the same line for each snap log data file The start date time corresponds to the date and time that the instrument was turned on The end date time corresponds to the date and time that the instrument was turned off Figure 116 Viewing No...

Страница 151: ...eration snap log files A summary will appear in the bottom right frame with instrument information It will also show the gas readings that were saved for the first snap log in the snap log file Figure 117 Viewing Normal Operation Snap Log File Data ...

Страница 152: ...will be displayed at the top of the screen The file number user ID station ID date time and channel readings will be displayed in one line for each snap log Any channel events will appear below that channel s reading 6 To print normal operation snap log data click the Print control button in the upper right corner of the window A dialog box will appear confirming if you want to print Click OK ...

Страница 153: ...be saved to the clipboard It can then be pasted into a document by using the Paste command in an application Leak Check Mode Snap Log Data Leak Check Snap Log data can be taken on GX 2012s and Gas Tracers To view and perform desired operations with the leak check snap log files 1 While in the Logs window find your instrument by serial number then click the expanded view symbol of or double click t...

Страница 154: ... If you turn the instrument off and turn it back on a new snap log file will be created The file number serial number model start date time and end date time appear in the same line for each snap log file The start date time correspond to the date and time that the instrument was turned on The end date time correspond to the date and time that the instrument was turned off Figure 120 Viewing Leak ...

Страница 155: ...ion will be displayed along with the recorded Base gas concentration for the first snap log NOTE One complete leak check snap log consists of a Base reading and a Peak reading Simply selecting a leak check snap log file does not allow you to view the complete data for a leak check snap log Figure 121 Viewing Leak Check Snap Log File Data ...

Страница 156: ... ID station ID type of reading date time and methane reading are shown The methane reading is based on a 5000 ppm scale It does not matter what the display range was set to when the gas reading was taken The actual gas reading will be displayed up to 5000 ppm If the concentration was over 5000 ppm OVER will replace the gas reading 6 To print leak check snap log data click the Print control button ...

Страница 157: ...ear for you to specify the file name and file location Figure 123 Save As Dialog Box Specify the file name and location and click Save 8 To copy leak check snap log data to the clipboard click the Save to Clipboard control button The data will be saved to the clipboard It can then be pasted into a document by using the Paste command in an application ...

Страница 158: ...e deleted Figure 124 Deleting Data in the Logs Window 1 Right click on the folder or file you wish to delete and click Delete 2 You will be prompted for a password The factory set password is ABCDE It is case sensitive After you have entered the password click OK 3 To delete the folder or file click OK in the confirmation window that comes up If you do not want to delete the data click Cancel ...

Страница 159: ...5 If you right click on an instrument that is not currently connected to the SDM GX PC Controller Program only the Open function is selectable The other functions will be grayed out If you right click on an SDM 2012 that is connected to the SDM GX PC Controller Program but does not have an instrument in it no functions will be selectable Open Function This function can be activated by either right...

Страница 160: ...ing an instrument and then using the alt E key combination NOTE The Edit function is not active and cannot be selected if the Change Parameter selection box in the Instrument Information section of the Parameter Tab in the Configuration Window is not selected Parameter Tab The Parameter Tab is selected when the Edit function is opened This tab allows you to view and change various instrument param...

Страница 161: ...re always selectable and do not depend on which sub tab is selected Serial No To change the current instrument serial number place the cursor in the Serial No field and enter the desired serial number If you change the serial number once you upload the changes to the instrument and return to the main program window the PC Controller Program will indicate that the instrument with the old serial num...

Страница 162: ...nt anything of interest such as maintenance records noting when a sensor or a battery pack was changed The Memo section is empty until the user enters information The first time information is entered a Memo file is created in the Logs window If the Memo is changed in the same operating session that Memo file is updated When the instrument is disconnected from the PC Controller Program and connect...

Страница 163: ... the instrument will react to a needed calibration during the start up sequence If Cal Past Due Act is set to Confirm to Cal factory setting the instrument will sound an alarm and the user will have to press and release the POWER ENTER button to continue If set to Must Calibrate the instrument cannot be used until a calibration has been performed If set to Notification Only the instrument will dis...

Страница 164: ...not display during start up and the Select User ID Screen and Select Station ID Screen do not appear in Display Mode Cal Reminder With Cal Reminder selected factory setting the instrument will give an indication at start up if it is due for calibration The type of indication will depend on the Cal Past Due Act setting Auto Fresh Air Adj With Auto Fresh Air Adj selected the instrument will perform ...

Страница 165: ...mp in order to conserve battery power With Pump OFF Display not selected factory setting the Pump Off Screen does not appear in Display Mode and the user cannot turn the pump off WARNING The GX 2012 and Gas Tracer are not gas monitoring devices if the pump is turned off Password Protection With Password Protection selected the instrument prompts you for a password when you enter Calibration Mode W...

Страница 166: ...LY the combustible channel will only read in volume Backlight Delay The Backlight Delay setting is how long the backlight stays on after the last button push It can be set anywhere from 0 to 255 seconds The factory setting is 30 seconds Use the arrows to the right of the value to make your selection or highlight the existing value and enter the desired value LB Mode The LB Mode selection allows yo...

Страница 167: ...tory setting the peak bar will not appear during Normal Operation or in the Peak Screen in Display Mode Confirmation Beep If Confirmation Beep is selected the instrument confirms it is still operating by beeping every 5 minutes If Confirmation Beep is not selected factory setting the instrument will not beep Leak Check Buzzer If selected factory setting the buzzer will operate in Leak Check Mode T...

Страница 168: ...in the instrument s Maintenance Mode is set to OFF and these settings are not displayed or used at the instrument Bump Test Time Remaining With Bump Test Time Remaining selected the instrument will give an indication at start up if it is due for bump testing The type of indication depends on the Bump Test Past Due Act setting With Bump Test Time Remaining deselected factory setting the instrument ...

Страница 169: ...ithout the SDM 2012 fails the unit will automatically begin a calibration With Calibration After Bump Test Failed deselected if a bump test performed without the SDM 2012 fails nothing will happen See the GX 2012 Operator s Manual or Gas Tracer Operator s Manual for a description of bump testing a GX 2012 or Gas Tracer away from the SDM 2012 Bump Test Threshold The Bump Test Threshold setting defi...

Страница 170: ...12 plus a volume sensor the information for the volume sensor will appear directly below the H2S sensor s information If you are viewing a standard Gas Tracer plus a volume sensor the ppm sensor s information appears directly below the H2S sensor s information and the volume sensor s information is directly below the ppm sensor If a volume sensor is not installed in the instrument the volume infor...

Страница 171: ...steps 1 through 3 for any other values you wish to change and then click OK 5 You will be asked if you want to save the changes that you made Select Yes if you wish to save the changes The PC Controller program will update the instrument and then return you to the main program window Select No is you do not want to save the changes The PC Controller program will return you to the main program wind...

Страница 172: ...eparated values file into the program A Station csv file and a User csv file are provided with the SDM 2012 product CD In addition you can generate csv files for editing from the PC Controller Program Creating ID Files 1 To create a csv file for editing click the Export csv file button for either the Station or User ID list Figure 133 Station and User Tab Click to generate Station csv file Click t...

Страница 173: ...Instrument Function Menu 168 2 Navigate to the location you want to save the file type in a file name and click Save You can save multiple station and user ID files if desired Figure 134 Save As ...

Страница 174: ... name Below is an example of the Station csv file opened in WordPad Any existing Station or User IDs will be displayed Undefined Station or User IDs will appear as dashes To edit a Station or User ID delete either the existing name or the dashes and replace them with the desired name The name may consist of any letter number or character 4 Save the changes you made to the csv file Figure 135 Stati...

Страница 175: ...on Menu 170 Loading ID Files 1 In the Station User Tab click Import csv file for either the Station ID list or User ID list Figure 136 Station and User Tab Press to import Station csv file Press to import User csv file ...

Страница 176: ...gate to the file you wish to import and click Open 3 Once you have imported the Station ID and or User ID csv files the new list will be reflected in the Station User Tab Figure 137 Open Station ID CSV File Figure 138 New Station ID List ...

Страница 177: ...down menu appears or by selecting an instrument and then using the alt D key combination The Download function downloads all logged data and calibration information from the instrument If you select Download D a confirmation box appears Click the OK button to proceed with downloading from the instrument Clear Logs Function This function can be activated by either right clicking an instrument and s...

Страница 178: ... See Setting Up the Configuration on page 32 for a description of the Parameter tab Database Tab The Database Tab allows you to view or change where the data from your SDM 2012 docking stations is saved It also allows you to create a brand new database import data from another database or export saved data Figure 139 Config Window Database Tab To change the database location 1 Click the button to ...

Страница 179: ...computer s files the location for the default mdb file is in the Program Files folder ie MannyPC Program Files SDM GX It is named SDMLog mdb If you wish to import a different mdb file it will have a different name and may be in a different location 3 Once you have selected a mdb file click Open The program will indicate that the file is being imported Once the import is finished the data from the ...

Страница 180: ...ny letter number or symbol It is case sensitive Figure 140 Config Window Password Tab To change the password 1 Enter the new password in the top box and confirm it in the bottom Click OK A window will pop up asking you to confirm the change To confirm click Yes To exit out of Configuration Window without saving the changes click No To stay in the Password Tab and enter a new password click Cancel ...

Страница 181: ...4RK T fitting for assembling GAS 1 and GAS 2 manifolds 17 0611RK T fitting for assembling exhaust manifold 32 0504RK Check valve for exhaust fitting when manifolded 33 0167RK Particle air filter replacement CF 8369 33 2001RK 01 6 inch humidifier tube for connecting zero air cylinder and ppm calibration cylinder to docking station 47 5073RK USB cable Type A to Type B 49 0115RK Single port AC adapte...

Страница 182: ... ppm CH4 in air 103 liter 81 0090RK 01 Three gas calibration cylinder 50 LEL CH4 12 O2 50 ppm CO 34 liter steel 81 0090RK 03 Three gas calibration cylinder 50 LEL CH4 12 O2 50 ppm CO 103 liter steel 81 0154RK 02 Four gas calibration cylinder 50 LEL CH4 12 O2 50 ppm CO 25 ppm H2S 58 liter aluminum 81 0154RK 04 Four gas calibration cylinder 50 LEL CH4 12 O2 50 ppm CO 25 ppm H2S 34 liter aluminum 81 ...

Страница 183: ... instructions to bump test a GX 2012 or Gas Tracer respectively The PC Controller Program is capable of performing a bump test both manually and automatically when an instrument is connected to it When a bump test is performed the PC Controller Program performs an air adjust operation on an instrument and then applies calibration gas to the instrument The program analyzes the response results base...

Страница 184: ...nits on page 15 be sure the ppm calibration cylinder is connected to the inlet of the manifold If you are using a zero air cylinder for the fresh air adjustment install a 6 inch humidifier tube between the regulator and the AIR fitting on the back of the SDM 2012 NOTE Do not use a 4 gas cylinder or any cylinder that includes H2S when bump testing a Gas Tracer H2S adversely affects the ppm combusti...

Страница 185: ... select multiple instruments for bump testing hold down the Control button on the keyboard as you click them Figure 141 Instrument Selection 6 If you would like an automatic calibration to occur after a failed bump test select the Force Calibration selection box 7 Click the Bump test button in the lower right corner of the main program window ...

Страница 186: ...the auto calibration value for that channel See Sensor Tab on page 165 for instructions If you are bump testing standard GX 2012s and standard Gas Tracers leave the first channel the ppm sensor deselected and select all other channels If any of the instruments you are testing includes a volume sensor leave the first and last channels the ppm and volume sensors deselected and select all other chann...

Страница 187: ...onfirm the auto calibration values and the instruments that the calibration cylinder will be used for Be sure the auto calibration values match the values listed on the calibration cylinder The serial number and gas combination of all selected instruments will appear sequentially beneath the gas cylinder concentrations If you are bump testing standard GX 2012s catalytic LEL O2 H2S and CO and stand...

Страница 188: ...environment a zero air cylinder must be used with a 6 inch humidifier tube connecting the cylinder to the AIR fitting Another 6 inch humidifier tube or a humidifier tube manifold must always be used to connect the calibration gas cylinder to the GAS 2 fitting If you need to perform a DRY bump test for any reason it must be done away from the SDM 2012 See the Gas Tracer Operator s Manual for a desc...

Страница 189: ...r must change the GAS 2 cylinder before the volume sensor can be bump tested The GAS 2 selection boxes are deselected by default You must select the GAS 2 boxes if you wish to bump test the ppm combustible sensor and or the volume sensor If you do not wish to bump test the ppm combustible sensor or the volume sensor leave the appropriate GAS 2 box deselected Be sure that the ppm calibration cylind...

Страница 190: ...ppm combustible sensor If you do not select the GAS 2 box the bump test will not continue Be sure that the ppm calibration cylinder is connected to the GAS 2 fitting with a 6 inch humidifier at the start of the bump test Figure 146 Gas Order Confirmation Screen 0 10000 ppm Gas Tracer 10 Click OK You will be asked if you want to bump test the instruments Click OK to proceed If you don t want to pro...

Страница 191: ...ts readings The screen will indicate that you need to remove the gas cylinder from the GAS 2 fitting on the back of the SDM 2012 If the previous instrument tested did not include a volume sensor the program will proceed as described in step 15 12 Remove any connected cylinder from the GAS 2 fitting and click the Purge button The SDM 2012 will purge for 30 seconds 13 At the end of the purge cycle y...

Страница 192: ...e PC Controller Program will perform a zero adjustment on the ppm channel If at any point during the bump test you wish to cancel the bump test click the Cancel button in the lower right corner of the screen The bump test will be aborted and the BUMP T LED will turn solid amber Figure 147 Air Flowing to PPM Sensor The PC Controller Program will analyze the zero adjustment results If the ppm sensor...

Страница 193: ...creen will come on and calibration gas will be applied to the ppm sensor for the duration specified in the Gas Exposure Time parameter in the Configuration Window Figure 148 GAS 2 PPM Gas Flowing The PC Controller program will analyze the results If the bump test on the ppm sensor fails and Force Calibration is selected a calibration will automatically begin on the ppm sensor and GAS 2 calibration...

Страница 194: ...012 only and CO and the volume sensor if installed for 45 seconds and the PC Controller program will perform a zero adjustment Figure 149 Air Flowing to Standard Sensors The PC Controller Program will analyze the zero adjustment results If any of the standard sensors or the volume sensor if installed failed the zero adjustment the bump test will be aborted for that instrument ...

Страница 195: ...come on and calibration gas will be applied to the instrument s for the duration specified in the Gas Exposure Time parameter in the Configuration Window Figure 150 GAS 1 Flowing The PC Controller Program will analyze the results If the bump test on the standard sensors of any instruments fails and Force Calibration is selected a calibration will automatically begin on the standard sensors for tho...

Страница 196: ...l stop 20 Change the cylinder connected to the GAS 2 fitting to the volume calibration cylinder 21 When you have changed the GAS 2 cylinder click OK The bump test will continue and the second GAS 2 calibration gas will be applied to the volume sensor for the duration specified in the Gas Exposure Time parameter in the Configuration Window Figure 151 Volume GAS 2 Flowing The PC Controller Program w...

Страница 197: ...n will automatically begin on the volume sensors for those instruments and GAS 2 calibration gas will continue to flow 22 After GAS 2 calibration gas has been applied the docking station will purge with fresh air for 45 seconds Figure 152 Fresh Air Purge ...

Страница 198: ...e bump test passes the following window will open indicating that The BUMP T LED will be solid green Click OK to return to the main program window The BUMP T LED will turn off Figure 153 Bump Test Passed The instrument will automatically be shut off 20 seconds after a successful bump test ...

Страница 199: ...en indicating which channels failed the bump test The BUMP T LED on the SDM 2012 control panel will be solid red Click OK to return to the main program window or double click the instrument information line to view the bump test results in the Logs window The BUMP T LED on the SDM 2012 control panel will turn off Figure 154 Bump Test Failed ...

Страница 200: ... test and calibration The BUMP T LED on the SDM 2012 control panel will be solid red The CAL S LED will be solid green if the calibration passed or solid red if the calibration failed Click OK to return to the main program window or double click an instrument information line to view the bump test or calibration results in the Logs window The BUMP T LED and CAL S LED on the SDM 2012 control panel ...

Страница 201: ... line to view the bump test or calibration results in the Logs window The BUMP T LED on the SDM 2012 control panel will turn off Confirm that all tubing connections are correct and that all lines are clear Figure 156 Low Flow Bump Test Failure 24 For all bump test result outcomes the instruments will be displayed in the main program window in Details View To return the main program window to Icons...

Страница 202: ...or instruments 1 Establish a connection between the SDM 2012 the instrument and the PC Controller program as described in Connecting Instruments to the PC Controller Program on page 43 2 Verify that all of the calibration parameters are set correctly See Setting Up the Configuration on page 32 for instructions 3 Verify that the appropriate calibration gas cylinder s are connected to the appropriat...

Страница 203: ... to the exhaust fitting of each instrument 5 Select the instruments you wish to calibrate and click on them to highlight them as shown below To select multiple instruments for calibration hold down the Control button on the keyboard as you click them Figure 157 Instrument Selection 6 Click the Calibration button in the lower right corner of the computer program screen ...

Страница 204: ... the auto calibration value for that channel See Sensor Tab on page 165 for instructions If you are calibrating standard GX 2012s and standard Gas Tracers leave the first channel the ppm sensor deselected and select all other channels If any of the instruments you are testing includes a volume sensor leave the first and last channels the ppm and volume sensors deselected and select all other chann...

Страница 205: ...m the auto calibration values and the instruments that the calibration cylinder will be used for Be sure that the auto calibration values match the values listed on the calibration cylinder The serial number and gas combination of all selected instruments will appear sequentially beneath the gas cylinder concentrations If you are calibrating standard GX 2012s catalytic LEL O2 H2S and CO and standa...

Страница 206: ...he cylinder to the AIR fitting Another 6 inch humidifier tube must always be used to connect the calibration gas cylinder to the GAS 2 fitting See the Gas Tracer Operator s Manual for a description of the DRY and WET settings for bump testing and calibration NOTE If you are performing a biannual calibration of the ppm sensor perform a DRY zero adjustment with the instrument alone as described in t...

Страница 207: ... 2 The user must change the GAS 2 cylinder before the volume sensor can be calibrated The GAS 2 selection boxes are deselected by default You must select the GAS 2 boxes if you wish to calibrate the ppm combustible sensor and or the volume sensor If you do not wish to calibrate the ppm combustible sensor or the volume sensor leave the appropriate GAS 2 box deselected Be sure that the ppm calibrati...

Страница 208: ... combustible sensor If you do not select the GAS 2 box the bump test will not continue Be sure that the ppm calibration cylinder is connected to the GAS 2 fitting with a 6 inch humidifier at the start of the calibration Figure 162 Gas Order Confirmation Screen 0 10000 ppm Gas Tracer 9 Click OK You will be asked if you want to calibrate the instrument s Click OK to proceed If you don t want to proc...

Страница 209: ...s readings The screen will indicate that you need to remove the gas cylinder from the GAS 2 fitting on the back of the SDM 2012 If the previous instrument tested did not include a volume sensor the program will proceed as described in step 14 11 Remove any connected cylinder from the GAS 2 fitting and click the Purge button The SDM 2012 will purge for 30 seconds 12 At the end of the purge cycle yo...

Страница 210: ...s then the PC Controller Program will perform a zero adjustment on the ppm sensor If at any point during the calibration you wish to cancel the calibration click the Cancel button in the lower right corner of the screen The calibration will be aborted and the CAL S LED will turn solid amber Figure 163 Air Flowing PPM Sensor The PC Controller Program will analyze the zero adjustment results If the ...

Страница 211: ... zero adjustment calibration gas from the GAS 2 cylinder will be applied to the ppm sensor The GAS 2 indicator on the program screen will come on and calibration gas will be applied to the ppm sensor for 90 seconds Figure 164 GAS 2 PPM Gas Flowing The PC Controller program will analyze the results ...

Страница 212: ...12 only and CO and the volume sensor if installed for 45 seconds and the PC Controller program will perform a zero adjustment Figure 165 Air Flowing to Standard Sensors The PC Controller Program will analyze the zero adjustment results If any of the standard sensors or the volume sensor if installed failed the zero adjustment the calibration will be aborted for that instrument ...

Страница 213: ... be applied to the instrument s for 90 seconds Figure 166 GAS 1 Flowing The PC Controller Program will analyze the results 18 If you are not calibrating an instrument or instruments with a volume sensor installed continue to step 22 If you are calibrating an instrument or instruments with a volume sensor installed you will be prompted to change the GAS 2 cylinder The pump s on the instrument s wil...

Страница 214: ...12s and Gas Tracers 20 When you have changed the GAS 2 cylinder click OK The calibration will continue and the second GAS 2 calibration gas will be applied to the volume sensor for 90 seconds Figure 167 Volume GAS 2 Flowing ...

Страница 215: ...ng GX 2012s and Gas Tracers 210 21 The PC Controller Program will analyze the results 22 After calibration gas is applied the docking stations will purge with fresh air for 45 seconds Figure 168 Fresh Air Purge ...

Страница 216: ...ses the following window will open indicating that The CAL S LED on the SDM 2012 control panel will be solid green Click OK to return to the main program window The CAL S LED will turn off Figure 169 Calibration Passed The instrument will automatically be shut off 20 seconds after a successful calibration ...

Страница 217: ...nels failed to calibrate The CAL S LED on the SDM 2012 control panel will be solid red Click OK to return to the main program window or double click the instrument information line to view the calibration results in the Logs window The CAL S LED on the SDM 2012 control panel will turn off Figure 170 Calibration Failed ...

Страница 218: ...will turn off Confirm all tubing connections are correct and that all lines are clear Figure 171 Low Flow Calibration Failure 24 For both calibration result outcomes the instrument s will be displayed in the main program window in Details View To return to Icons View click the Icons radio button 25 When a calibration is performed any bump test or calibration data that is being stored in the instru...

Отзывы: