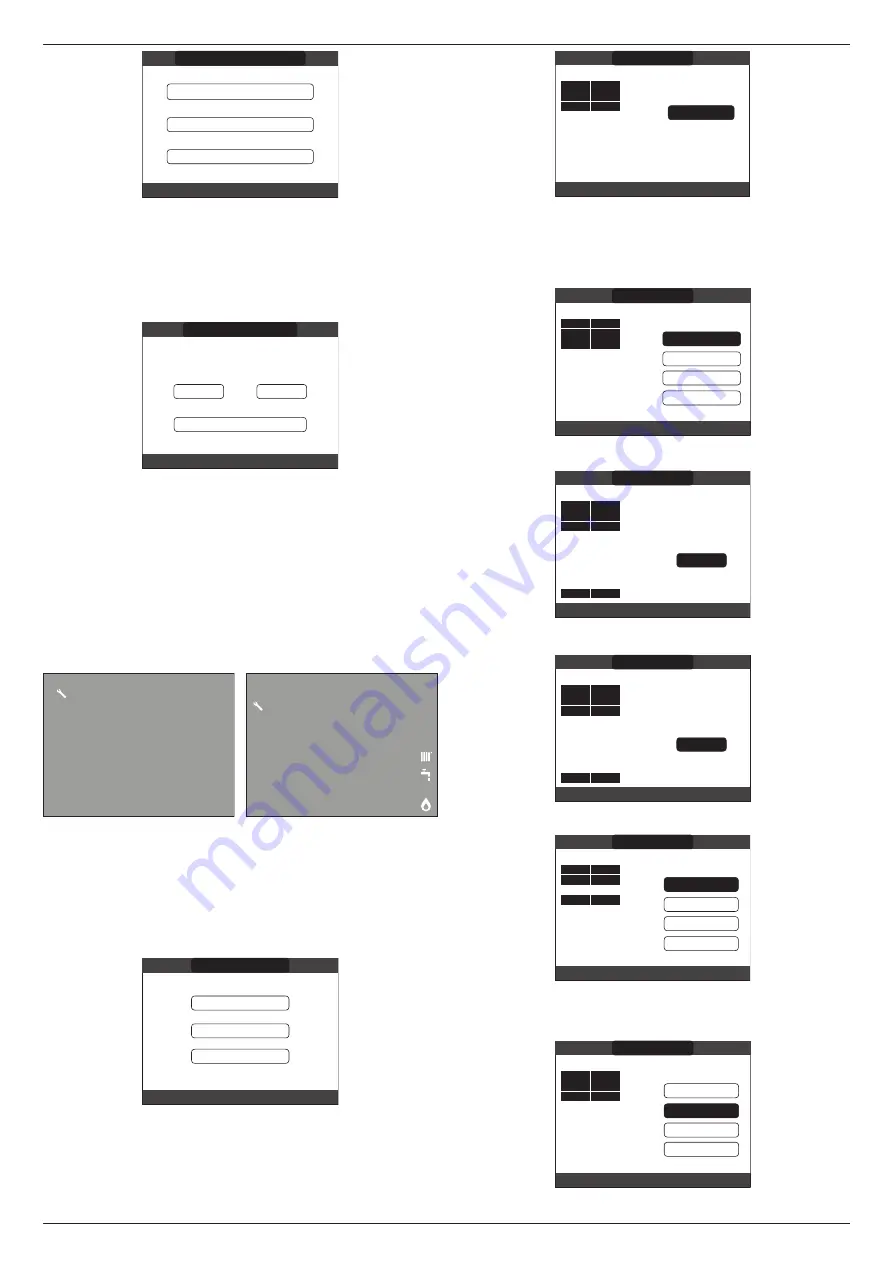
FAMILY
30
TIME & DATE
LANGUAGE
BACKLIGHT
SELECT OPTION
SETTINGS
12.1.1 Time&date
Press “
ENTER
” to highlight in sequence HOURS, MINUTES, DAY, MONTH, YEAR and
press the “
UP
” and “
DOWN
”
keys to change the desired values.
Once the sequence has finished by pressing “
ENTER
”, the settings will be saved and the
display will return to the initial screen.
By pressing “
BACK
” at any time the system will return to the
SETTINGS
cancelling the
changes that were made.
ENTER TIME AND DATE
USE THE ARROWS TO MODIFY
12
17
18/11/2013
:
TIME & DATE
12.1.2 Language
Press the “
UP
” and “
DOWN
” keys to select the desired language. Pressing “
ENTER
” the
language selection is confirmed and the display returns to the initial screen. Pressing “
BACK
”
the system returns to the
SETTINGS
screen without changing the system’s language.
12.1.3 Backlight
The screen saver display (backlight off) is automatically activated when the time, that has
been set in parameter \ MENU \ SETUP \ BACKLIGHT, elapsed without having pressed any
buttons. In the screen saver the current time is normally displayed. When there is a heat
request, the current time is replaced with the boiler flow temperature and turns on the icon
concerning the type of request in progress.
A message for the system efficiency level can be displayed in the top of the screen:
-
HIGH EFFICIENCY (if the average value of the return probe > 55°C)
-
OPTIMUM EFFICIENCY (if 25°C < average value of the return probe < 55°C).
05:11
: 20 days
42
°C
OPTIMAL EFFICIENCY
: 30 days
12.1.4 Time schedule
Selecting this function, only if the time schedule is enabled (POR=1), it is possible to change
the following:
-
MAIN - ZONE 1 - ZONE 2.
To access the desired timer programme, it is necessary to highlight it using the “
UP
” and
“
DOWN
” keys and then pressing “
ENTER
” to confirm the selection.
Press “
BACK
” to return to the start screen without making any selection.
For a detailed description of the scheduled programming timer, please refer to the section
MAIN
ZONE 1
ZONE 2
MON
18/05/2013
12:17
SCHEDULE
13 PROGRAMMING TIMING
Select the desired day using the “
UP
” and “
DOWN
” keys.
A table will be displayed indicating the day and the time frames already present. Press
“
ENTER
” to access the programming for the selected day.
Pressing “
BACK
” takes you back to the initial screen without making any selection.
START
END
THURSDAY
ZONE SCHEDULE
MON
SELECT A DAY
07:30
08:30
11:30
13:30
18:30
22:30
18/05/2013
12:17
PLANT
Once the selection has been made, the user can choose from among the following options:
-
ADD - MODIFY - DELETE - COPY.
13.1 Add
This function serves to add a new time frame to the selected day. Press “
ENTER
” to select
the function, after having highlighted it (if necessary) using the “
UP
” and “
DOWN
” keys.
07:30
08:30
11:30
13:30
18:30
22:30
THURSDAY
ADD
MODIFY
DELETE
COPY
SELECT OPTION
START
END
MAIN
Press the “
UP
” and “
DOWN
” keys to increase or decrease by 30 minutes the
start
time and
press “
ENTER
” to confirm the selection.
07:30
14:00
08:30
11:30
13:30
18:30
22:30
START
THURSDAY
USE THE ARROWS TO MODIFY
ENTER
START TIME
ADD
PERIOD
END
MAIN
Press the “
UP
” and “
DOWN
” keys to increase or decrease by 30 minutes the
end
time and
press “
ENTER
” to confirm the selection.
07:30
15:00
08:30
11:30
13:30
18:30
14:00
22:30
START
THURSDAY
USE THE ARROWS TO MODIFY
ENTER
ADD
END TIME
PERIOD
END
MAIN
In order to confirm that the operation has been completed successfully, the display will show
the table with the new time frame flashing.
07:30
08:30
11:30
14:00
13:30
15:00
18:00
22:30
START
THURSDAY
ADD
MODIFY
DELETE
COPY
USE THE ARROWS TO MODIFY
END
MAIN
13.2 Modify
This function serves to edit a time frame already present for the selected day. Press
“
ENTER
” to select the function, after having highlighted it (if necessary) using the “
UP
” and
“
DOWN
” keys.
07:30
08:30
11:30
13:30
18:30
22:30
START
THURSDAY
ADD
MODIFY
DELETE
COPY
SELECT OPTION
END
MAIN


