33
Getting Started
1
Setting the Date and Time
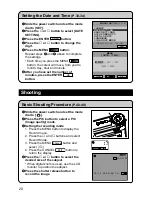
The date and time are recorded when you shoot a picture. You will need to adjust
these settings when you first use the camera and each time you change time zones on
trips.
Note
• Use the yyyy/mm/dd format to set the date.
• Time is displayed in the 24-hour clock format. Midnight is expressed as
00:00 and noon as 12:00.
• Setting is possible from [ 2000/01/01 00:00 ] to [ 2099/12/31 ].
q
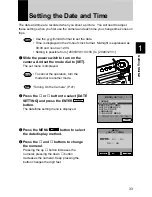
Slide the power switch to turn on the
camera. And set the mode dial to [SET].
The set menu is displayed.
Note
• To cancel the operation, turn the
mode dial to another mode.
See
“Turning On the Camera” (P.41)
w
Press the
▼
or
▲
button to select [DATE
SETTING] and press the ENTER
Select
button.
The date/time setting menu is displayed.
e
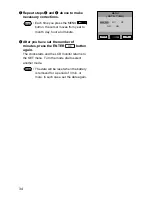
Press the MENU
button to select
the date display method.
r
Press the
▼
and
▲
buttons to change
the numeral.
Pressing the up
▲
button increases the
numeral; pressing the down
▼
button
decreases the numeral. Keep pressing the
button changes the digit fast.
1/2
2000/01/01 16:35
Select
FORMAT
DATE SETTING
KEEP SETTINGS
AUTO POWER OFF
AUTO LCD OFF
LANGUAGE
VIDEO OUT MODE
MENU[SET UP]
2000
/ 01 / 01
00 : 00
MENU
[DATE/TIME]
OK
Cancel
Содержание RDC-6000
Страница 40: ...38 ...
Страница 72: ...70 ...
Страница 87: ...Chapter ERASING 4 Erasing a File Image 86 Erase 86 Erase All Images 87 Erase Selected Files Images 88 ...
Страница 108: ...106 ...
Страница 125: ...RICOH CO LTD Ohmori NM Building 1 1 Ohmori kita 2 chome Ota ku Tokyo 143 0016 Japan L 2152547 ...


