background image

Configuring Settings Using a Web Browser

99

3

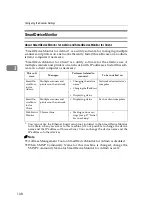
Default Printer

Click 

[

Yes

]

 to set the printer as the default printer.

Only one printer can be set as the default printer at a time.

Note

When only one printer is registered, that printer is set as the default auto-
matically.

If 

[

Yes

]

 is selected for this printer, the previous default printer will no long-

er be the default. 

If the setting for the current default printer is changed to 

[

No

]

, the error

message appears. Set another printer as the default. 

Locked Print

Select 

[

On

]

 to print the scanned images only after a password is entered on the

control panel of this machine. This prevents other people from seeing the
prints. 

Paper Source Tray

Select a paper tray.
Click 

[

Obtain Printer Information

]

 to update the list of available paper trays.

For a network printer, be sure to enter the IP address in the box of 

[

Attachment

Type

]

 first, and then click 

[

Obtain Printer Information

]

.

Change Order

This item is displayed only when you perform 

[

Change

]

 in the “Printer” oper-

ation. Normally, the printers you have registered using 

[

Add

]

 in the “Printer”

are displayed by the order of registration. If you wish to change the order of
the registered printers, select “On” for 

[

Change Order

]

, and then enter the num-

ber of the new order (that applies when you select “All” in a title list screen of
the machine) into 

[

Move to

]

 box.

Note

If you enter “5” into 

[

Move to

]

 box and perform 

[

Change Order

]

 operation for

a printer that is currently displayed in the 15th place when you select “All”
in a title list screen of this machine, the printer moves to the 5th place. At
this time, the printers that are formerly displayed in the 5th through 14th
places move to the 6th through 15th places, respectively.

Содержание Network Scanning Unit A

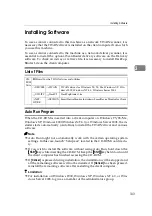
Страница 1: ...fety Information in this manual before using the machine What You Can Do With This Machine Setting Up the Machine Configuring the Scanner Settings Setting Originals on a Scanner Sending Scan File by E mail Sending Scan File by Scan to Folder Sending Scan File by Scan to FTP Printing Scanned Image Files Sending Scan Files Using Delivery Server Using the Network TWAIN Scanner Function Appendix ...

Страница 2: ...ine Trademarks Adobe PostScript and Acrobat are trademarks of Adobe Systems Incorporated Pentium is a registered trademark of Intel Corporation MS Microsoft and Windows are registered trademarks of Microsoft Corporation Other product names used herein are for identification purposes only and might be trademarks of their respective companies We disclaim any and all rights to those marks The Proper ...

Страница 3: ...low 10 Network TWAIN Scanner 10 Process Flow 11 Guide to This Machine 12 Using Keys Displayed on the Screen 13 Network Interface Indicators 14 Scanner Features Menu 14 Function Settings and Standby Screens 14 Function Priority 15 Select Method 16 Standby screens 17 When using Send Function Permission 19 2 Setting Up the Machine Checking the Location of This Machine 21 Connecting to a Scanner via S...

Страница 4: ...ormation to Set in Print Scan Settings 67 Configuring Print Scan Settings 68 Scan Settings 70 Information to Register in Scan Settings 70 Registering Scan Settings 74 Print Settings 79 Information to Register in Print Settings 79 Registering Print Settings 81 Configuring Settings Using a Web Browser 84 Accessing This Machine 84 System requirements of a client computer 84 To access this machine fro...

Страница 5: ...t Location To Set Originals 112 When Using Send Scan Function 112 Settings for Print Scan in Simplex Scanning 113 Settings for Print Scan in Duplex Scanning 114 5 Sending Scan File by E mail Procedure Breakdown 115 E mail Content 116 Sender 116 Subject 116 File name and file type of an e mail attachment 116 Related information 117 Before Sending Scan Data 118 Original Location 118 Original Orienta...

Страница 6: ...eakdown 141 Selecting an FTP Server 142 Scanned Image Files Sent to FTP Servers 144 File Locations 144 File Names 144 8 Printing Scanned Image Files Procedure Breakdown 147 Before Printing Scan Data 148 Original Locations 148 About Paper Tray Settings 148 About Print Scan Ready screen 148 Printing Scan Data 150 Specifying the Number of Copies 151 Configuring Print Settings 151 Confirming Print Set...

Страница 7: ...er Problems 172 E mail Address Book Data Format and Device Tag Information 174 Entered Program Information 174 About the e mail address information 175 Device Tag Information 176 Using Wireless LAN 177 Outline to Use Wireless LAN 177 Configuring Wireless LAN Settings 178 Option 183 Specifications 184 Software Information 185 GPL LGPL Application Software 185 BSD License Application Software 185 Th...

Страница 8: ...vi ...

Страница 9: ...owed may result in minor or moderate injury or damage to property Connect the Power Cord directly into a wall outlet and never use an ex tension cord Disconnect the power plug by pulling the plug not the cable if the power cable or plug becomes frayed or otherwise damaged Turn off the power and disconnect the power plug by pulling the plug not the cable if any of the following conditions exists Yo...

Страница 10: ...the parts with a label indicating the hot surface Otherwise it could cause a personal burn Our products are engineered to meet high standards of quality and function ality and we recommend that you only use the expendable supplies avail able at an authorized dealer Do not try to replace the lithium batteries by yourself A battery of this type can explode if incorrectly replaced If the lithium batt...

Страница 11: ...operation of this machine all users should read and follow the instructions carefully Quick Installation Guide Describes how to install this machine Operating Instructions this manual Provides all of the information how to install set up and use this machine This manual is provided as a PDF file Note There is a CD ROM that comes with this machine ...

Страница 12: ...e to read the instructions all of which are described in the Safety Information section The statements above are notes for your safety Important If this instruction is not followed paper might be misfed originals might be damaged or data might be lost Be sure to read this Preparation This symbol indicates information or preparations required prior to operating Note This symbol indicates precaution...

Страница 13: ...using a 100BASE TX or 10BASE T cable It is possible to connect using an optional wireless LAN card 2 Scanner Connect this machine to a scanner by the SCSI cable 3 SMTP server You need to have an access to an e mail server that supports SMTP Simple Mail Transfer Protocol to use Scan to E mail function However it is not essential to have an e mail server inside the LAN where this machine belongs to ...

Страница 14: ...gistered to this machine Note This function is displayed as SMB on the display panel of this machine The SMB Server Message Block standard to which various operating systems including Windows adhere is a popular protocol for sharing files folders printers and so on 1 This machine Connect this machine to a network TCP IP using a 100BASE TX or 10BASE T cable It is possible to connect using an option...

Страница 15: ...ve scanned files to an FTP server that is registered to this machine 1 This machine Connect this machine to a network TCP IP using a 100BASE TX or 10BASE T cable It is possible to connect using an optional wireless LAN card 2 Scanner Connect this machine to a scanner by the SCSI cable 3 FTP server You can specify an FTP server to save scanned files Note however that it is es sential to have the FT...

Страница 16: ... send a scanned file directly to a printer so it is possible to use a printer connected to this machine like a copier 1 This machine Connect this machine to a network TCP IP using a 100BASE TX or 10BASE T cable It is possible to connect using an optional wireless LAN card 2 Scanner Connect this machine to a scanner by the SCSI cable 3 Network printer Printers connected to a network TCP IP using a ...

Страница 17: ...ery scanner function an optional ScanRouter delivery soft ware is required 1 This machine Connect this machine to a network TCP IP using a 100BASE TX or 10BASE T cable It is possible to connect using an optional wireless LAN card You can con nect up to two units of this machine to a network where you have a computer with a ScanRouter delivery software 2 Scanner Connect this machine to a scanner by...

Страница 18: ...ard disk etc E E E E You can use a scanned data from 4 Client computer by using DeskTop Binder Lite Network TWAIN Scanner You can use a scanner connected to this machine as a network TWAIN scanner by operating this machine from a client computer on the network 1 This machine Connect this machine to a network TCP IP using a 100BASE TX or 10BASE T cable It is possible to connect using an optional wi...

Страница 19: ...nt application on 3 Client computer to send a command for scanning via the TWAIN driver B B B B Originals are scanned by 2 Scanner via 1 This machine C C C C A scanned data can be edited and stored using a TWAIN compliant appli cation on 3 Client computer ...

Страница 20: ...ption 6 User Tools key Press this key to configure various set tings such as Send Scan Print Scan Net work etc 7 Clear Modes key Press this key to return to the initial screen that is displayed when you turn on the power of this machine 8 Number keys Used to select a menu item displayed on the screen or enter numeric values 9 Title key Press this key to display a list of titles 10 key Used to ente...

Страница 21: ...slots 4 SD card slot Used for the authorized customer engi neer s maintenance purposes only 5 Power connector For connection of the bundled AC power cord Using Keys Displayed on the Screen You can use the function keys located under the display panel to operate keys that appear on the display panel Example To execute a key operation on the display panel press the relevant function key Press A to s...

Страница 22: ...onditions to meet your requirements Function Settings and Standby Screens You cannot use the following functions at the same time E mail See p 5 Scan to E mail Send File SMB See p 6 Scan to Folder Send File FTP See p 7 Scan to FTP Print Scan See p 8 Scan to Print Delivery Server See p 9 Delivery Server TWAIN See p 10 Network TWAIN Scanner To select a function you use you must configure the followi...

Страница 23: ...you use Print Scan as well as Delivery Server Send File On the Select Method screen which is initially displayed when you select this option pressing the 1 key displays the same screen as one of the Send Scan initial screens and pressing the 2 key displays the same screen as the Print Scan initial screen Note Instead of pressing the Number keys you can also use the 0 0 0 0 or 1 1 1 1 key to highli...

Страница 24: ...achine The following three options are available Delivery Server TWAIN Select this option if you wish to use Delivery Server and TWAIN With this option E mail Send File SMB and Send File FTP are not available Send File TWAIN Select this option if you wish to use E mail Send File SMB Send File FTP and TWAIN With this option Delivery Server is not available TWAIN Select this option if you wish to us...

Страница 25: ... using a Web browser on a client computer however you cannot send an e mail or a file by SMB FTP using the control panel of this machine When you start the TWAIN driver from a TWAIN compliant application on a client computer the TWAIN standby screen is displayed Press Exit to re turn to the Delivery Server standby screen E mail Send File standby screen While this screen is displayed pressing E mai...

Страница 26: ...y starting the TWAIN driver from a TWAIN compliant application on a client computer You can also configure various settings using the control panel of this machine or using a Web browser on a client computer However you cannot use the following functions Print Scan Delivery Serv er E mail Send File SMB Send File FTP sending a custom file by using a Web browser on a client computer Print Scan stand...

Страница 27: ...om the User Tools key you can select a Send File function among the available send menus at 13 Send Function Permission in System Set tings All Send Functions E mail Only SMB Only File Name Changeable SMB Only File Name Unchangeable FTP Only File Name Changeable FTP Only File Name Unchangeable This example screen shows that the E mail Only is config ured ...

Страница 28: ...What You Can Do With This Machine 20 1 ...

Страница 29: ...l stable vibrating free surface Allowable incli nation of the surface for installation is within 5 mm 0 2 when measuring difference of heights between an end and the other end of this machine com pared to a level surface Make sure the wall outlet is near the machine and easily accessible so that in event of an emergency it can be unplugged easily Keep the machine away from humidity and dust A fire...

Страница 30: ...a radio or television set In a location subject to extreme temperatures or humidity Near a humidifier Set up this machine in a location where the temperature and humidity will fall within the ranges shown below Important Save the box and cushioning material in which this machine has been packed so that they can be used if it is necessary to transport this machine in the fu ture When this machine i...

Страница 31: ...d SCSI 2 cable to this ma chine Note that some combina tions of cables and the devices may not work together properly so check this carefully Only one scanner can be connected to this machine A A A A Assign a SCSI ID to one of the numbers from 0 to 6 Note The SCSI ID of this machine is fixed to 7 and cannot be changed Follow the instructions of the manual of your scanner to con nect to this machin...

Страница 32: ... T network cable when you connect this machine to a net work Reference See p 177 Using Wireless LAN when using an optional wireless LAN card A A A A Insert the network cable s end to the network interface connector of this machine B B B B Insert the other end of the net work cable to an appropriate con nector of a network device such as an Ethernet hub ZKJH060J ...

Страница 33: ...scanner A A A A Turn on the power of a scanner connected to this machine B B B B Turn on the power of this machine Do not use with a power source with a voltage different from the specified voltage Do not use a power outlet with multiple devices plugged in These could create the risk of fire or electric shock Avoid the use of an extension cord Do not damage break twist or modify the Power Cord Pla...

Страница 34: ... standby screen is displayed on the display panel If you turn off the power while the Scanner Features menu is displayed all the settings that you have config ured will be discarded and this ma chine will return to its factory default status You should also confirm that the B is not displayed on the display panel when you turn off the power Otherwise loss of a scanned data or failure will occur in...

Страница 35: ...ar panel of this machine Note Only a single side of the wire less LAN card has three hori zontal lines which is located on the black end of the card When you insert the card make sure that the side with the three lines is facing up Inserting in the wrong direction creates the risk of damage to the card and the card slot Make sure that the card is se curely inserted until you feel the card click in...

Страница 36: ...Setting Up the Machine 28 2 ...

Страница 37: ...Monitor Help For infor mation about how to view the Web Status Monitor see p 84 Accessing This Machine Reference For the configuration items see p 37 Initial Scanner Setup and for operation of the configuration see p 115 Sending Scan File by E mail Configure 1 System Settings on this machine See p 46 System Settings Configure General Settings on the Web Status Monitor See the Web Status Monitor He...

Страница 38: ...tus Monitor see p 84 Accessing This Machine 1 This setting becomes essential if you wish to perform the Scan to Folder SMB oper ation from this machine When you perform the Enter Custom Send File operation us ing the Web Status Monitor it is not necessary to register the Send File Path in advance Createa shared folder ona Windows computer See Windows Help Configure 1 System Settings on this machin...

Страница 39: ...Outline to Use Scan to Folder 31 3 Reference For the configuration items see p 37 Initial Scanner Setup and for operation of the configuration see p 131 Sending Scan File by Scan to Folder ...

Страница 40: ...ee the Web Status Monitor Help For information about how to view the Web Status Monitor See p 84 Accessing This Machine Reference For the configuration items see p 37 Initial Scanner Setup and for operation of the configuration see p 141 Sending Scan File by Scan to FTP Configure 1 System Settings on this machine See p 46 System Settings Configure General Settings on the Web Status Monitor See the...

Страница 41: ...rm using the control panel of this machine For details about the settings that this man ual does not cover see the Web Status Monitor Help For information about how to view the Web Status Monitor see p 84 Accessing This Machine Reference For the configuration items see p 37 Initial Scanner Setup and for operation of the configuration see p 147 Printing Scanned Image Files Configure 1 System Settin...

Страница 42: ...on about how to view the Web Status Monitor see p 84 Accessing This Machine 1 Enter an IP address directly using Set I O Device Install ScanRouter delivery software on a computer used as a network delivery server and make necessary settings See the manuals for ScanRouter deliv ery software or ScanRouter delivery software Help DeskTopBinder Lite on a client computer and make necessary settings See ...

Страница 43: ...Outline to Use the Network Delivery 35 3 Reference For the configuration items see p 37 Initial Scanner Setup and for operation of the configuration see p 157 Sending Scan Files Using Delivery Server ...

Страница 44: ...anner The following overview diagram shows the preparation steps for using a scan ner connected to this machine as a network TWAIN scanner Configure 1 System Settings on this machine See p 46 System Settings Install the TWAIN driver on a client computer See p 104 Software for Us ing for a Network TWAIN Scanner ...

Страница 45: ... Purpose Row Under Purpose in the table on the next page there is a column for each of the functions listed below A in a column means that the setup item to the left is essential to use the function Be sure to configure these settings before using this machine A b in a column means that the setup item to the left is related to the func tion but is not essential Configure these settings as necessar...

Страница 46: ...o the left cannot be changed for the display information purpose only A null in the Default column means that the setup item to the left has no factory default value Function Table Basic Settings Column name Means if This machine Each of the setup items to the left can be configured using the control panel of this machine Web Each of the setup items to the left can be configured using the Web Stat...

Страница 47: ...nsmission Speed Auto b b b b b b b b LAN Type Ethernet b 4 b 4 b 4 b 4 b 4 b 4 b 5 b Wireless LAN Signal b 4 b 4 b 4 b 4 b 4 b 4 5 Communication Mode 802 11 Ad hoc mode b 4 b 4 b 4 b 4 b 4 b 4 b SSID Null b 4 b 4 b 4 b 4 b 4 b 4 b Channel Null b 4 b 4 b 4 b 4 b 4 b 4 b WEP Setting Disable b 4 b 4 b 4 b 4 b 4 b 4 b WEP Key Null b 4 b 4 b 4 b 4 b 4 b 4 b Confirm WEP Key Null b 4 b 4 b 4 b 4 b 4 b 4 ...

Страница 48: ...ction Off b b b b b b Edge Smoothing Off b b b b b b Filter None b b b b b b Inversion Off b b b b b b Erase Color None b b b b b b File Type Single Page b b b b b b Original Setting Orien tation 1 Sided b b b b b b Print Settings WSM Print Settings 8 Image Density 4 b b b Original Size Scan Size depending on a scanner b b b Reduce Enlarge 100 b b b Duplex 1 Sided Orig 1 Sided Print b b b Create M...

Страница 49: ... b b b Language Select English b b b b b b b WaitTimeforAdditional Scanning 3 second s b b b b b b Function Options Send File TWAIN b b b b b b b b Send Function Permission All Send Functions b b b b b b Title Priority All b b b b b b Select Title Alphabets b b b b b b Time Zone GMT b b b b b b Double Feed Detect Off b b b b b b b Length Difference 10 mm b b b b b b b Custom Title Custom Title 1 t...

Страница 50: ...reless LAN card is installed 6 Available up to 10 registrations 7 The default value applied to the Community Name 1 and Access Type 1 8 Available up to 4 registrations including Default Send File Settings Time Server WSM Date Time Time Server IP Address 0 0 0 0 b b b b b b b Polling Interval 30 b b b b b b Setup Item Default Purpose Method Delivery E mail SMB FTP Print TWAIN This machine Web Send ...

Страница 51: ...ll b Login Password null b Sender s Password On b Protected Password null b FTP Server 1 Program No Automatically assigned b FTP Server Name null b Key Display null b Assign Title ABC 1 On b Server Name Path Name null b Login User Name null b Login Password null b PASV Mode Configuration Off b Sender s Password On b Protected Password null b File Name 2 No 1 to 30 null b b b Setup Item Default Pur...

Страница 52: ...on Method Off b b Authentication User Name null b Authentication Password null b Sender s Name Default Administrator s Address b b Administrator s Name null b b Administrator s E mail Address null b b IntervalTimeforResending E mails 30 b b No of Times to Resend E mails 1 b b Max E mail Size Off b b E mail Address 1 Program No Automatically assigned b b Name null b b Key Display null b b Assign Ti...

Страница 53: ...ther printers Setup Item Default Purpose Method Delivery E mail SMB FTP Print TWAIN This machine Web Delivery Delivery Server IP Address 0 0 0 0 1 2 Interval Time for Redelivery Off b b No of Times to Redeliver Off b b Job Delivery Data Max Setting 1 b b 3 b Setup Item Default Purpose Method Delivery E mail SMB FTP Print TWAIN This machine Web Print Scan Max Number of Copies 999 b b b Color Black ...

Страница 54: ...rked with WSM on the titles signify that they are configured on the Website at the Web Status Monitor Information to Set in System Settings Note You can configure the settings that are mentioned in this section using the Web Status Monitor However you must configure the IP address setting first using the control panel of this machine And then you can change the settings on the Web Status Monitor F...

Страница 55: ...ess is automatically assigned to this machine by select ing DHCP for Network Boot Subnet Mask When a static IP address is assigned to this machine on the network you use enter the subnet mask to this item in the form of xxx xxx xxx xxx xxx 0 through 255 Do not specify this item manually when you use this machine on a DHCP en vironment because this item is automatically assigned to this machine by ...

Страница 56: ...uters that can use a scanner connected to this machine as a network TWAIN scanner Specify both the access control and the access mask in the form of xxx xxx xxx xxx xxx 0 through 255 Note When you wish to set no limitation of access to this machine leave these settings as their default values When an IP address of a client computer falls within the logical products of the access control entry and ...

Страница 57: ...work you use this machine in the form of xxx xxx xxx xxx xxx 0 through 255 Note This setting can only be configured using the Web Status Monitor DNS Server 2 IP Address WSM When a secondary DNS server runs on the network you use this machine specify the IP address of the secondary DNS server in the form of xxx xxx xxx xxx xxx 0 through 255 Note This setting can only be configured using the Web Sta...

Страница 58: ...s LAN Signal in 1 System Settings under the Scanner Features menu on this machine Note You can set this item only when a wireless LAN card has been installed Send Function Permission Use this item to limit the function that the users can use with this machine With this mode this machine can be used with All Send Functions or limited to use either E mail Only SMB Only File Name Changeable SMB Only ...

Страница 59: ...returns to the parent menu screen D D D D Select the option you wish among Select Send Print Send Scan and Print Scan The option currently selected is displayed first The mark appears along with the option currently select ed Use or to display the op tion you wish to select E E E E While the option you wish to se lect is displayed press OK This saves the setting you have configured and returns to ...

Страница 60: ...eci fied and returns to the previ ous screen E Press Next 3 Subnet Mask appears as the setup item currently selected F Specify the respective values for 3 Subnet Mask 4 De fault Gateway Address 5 Access Control and 6 Access Mask in the same way you have done in the steps B B B B through E E E E 7 Network Boot appears as the setup item currently selected Note When you wish to set no lim itation of ...

Страница 61: ... the setup item current ly selected Note When you wish to set no lim itation of access to this ma chine it is not necessary to specify 5 Access Control while you need to confirm that 6 Access Mask is set to 000 000 000 000 C Press Settings The setting screen for 7 Net work Boot appears D Use or to display DH CP Note The mark appears along with the option currently se lected E While DHCP is display...

Страница 62: ... is fixed to Ethernet for this machine when a wireless LAN card is not installed K K K K Press Next 12 Wireless LAN Signal appears in gray tone when a wireless LAN card is not configured L L L L Press Next 13 Send Function Permission appears To specify the Send Function Permission A Press Settings You can specify a type of Send Functions to be available by se lecting among All Send Func tions E ma...

Страница 63: ...S ec D Press OK twice Reference For configuration of the Time Server set by referring to Configuration Basic Set tings Scanner Time Zone on the Web Status Monitor N N N N Press Next 15 Select Language appears Press Settings and select a lan guage you wish to use with or Press OK to return to the menu Note Press Cancel if you do not wish to change O O O O Press Next 16 Firmware Version appears Pres...

Страница 64: ...all the settings you have configured and return this machine to its factory default status Note Instead of pressing Exit you can press a Number key to enter another setting menu R R R R If you have changed the settings of 7 Network Boot and 11 LAN Type turn off the power of this machine and then back on The changes to the above settings are activated ...

Страница 65: ...nd File TWAIN Priority This item lets you select which of the functions of this machine has priority when you use this machine You can select one from the following two op tions TWAIN With this option the TWAIN standby screen is displayed as the Send Scan initial screen This means that the machine stands by for receiving a scan ning command from a client computer While the TWAIN standby screen is ...

Страница 66: ...d for a specified period of time When you set this item to Off the screen currently displayed remains as it is until an other operation is performed or until the power is turned off When you set this item to On you can set the time within the range of 10 to 999 seconds in 1 second increments Compression Black and White This item determines whether to compress a scanned data that is created un der ...

Страница 67: ...rison with the normal compression Low Compression Lower compression is performed with the scanned data so that the image quality becomes relatively higher while the file size gets larger in com parison with the normal compression Off A scanned data is not compressed Quality is not lost but the file size and memory usage increase A file size is determined by the scanning size and resolution regardl...

Страница 68: ...k ly when you press E mail Unit of Measure This item lets you select a unit of measurement that is used when you specify the values for Custom Size of Original Size setting You can select between mm and inch sRGB This item lets you select whether to scan originals with the sRGB color match ing function enabled This function is available only when you select Col or Full Color in Scan Type under Sca...

Страница 69: ...ou press Finish after scanning the original on the exposure glass of a scanner Pressing New Job finishes the current scanning job and sends the scanned data You can start a new job with the current settings after the scanned data is sent Pressing OK finishes the current scanning job sends the scanned data and then returns to the initial screen when the power of this machine is turned on Note You c...

Страница 70: ...ry Server or E mail Send File operation Note This item is disabled with IS760 series when the originals has a edge smaller than 20mm 0 8 the image is saved in full colored JPEG See p 70 Scan Type and p 73 File Type for details ADF Thin Paper This item lets you select how the ADF works On Select this option when you scan originals that are 52g m2 45kg or thin ner or A5 size or smaller using the ADF...

Страница 71: ... Pad Counter This item is disabled in this machine ADF Pick Roller Counter This item is disabled in this machine Select Title WSM This item lets you select the titles that are displayed when you press the Title key You can select between Alphabet and Custom Title Note This setting can only be configured using the Web Status Monitor Before using Custom Title it is necessary to register custom title...

Страница 72: ...s played B B B B Press the 2 key The Send Scan Settings menu is d i s p l a y e d a n d 1 S e n d File TWAIN Priority appears as the setup item currently selected C C C C Press Settings The setting screen for 1 Send File TWAIN Priority appears D D D D Select the function that you main ly use from Send File or TWAIN The option currently selected is displayed first The mark appears along with the op...

Страница 73: ...uto Reset Timer appears as the setup item currently selected Note Pressing Prev displays the previous setup item K K K K Set the Auto Reset Timer in the same way you have done in the steps G G G G through I I I I L L L L By pressing Next to display 4 Compression Black and White through 12 ADF Thin Paper as the setup items select the options for each of them in the same way you have done in the ste...

Страница 74: ...enu and returns to the standby screen that is displayed when you turn on the power of this machine Important Never turn off the power of this machine before the standby screen is displayed Doing so will discard all the settings you have configured and return this machine to its factory default status Reboot this machine after con figuring Send File TWAIN Priority and 6 Select Method to activate yo...

Страница 75: ...ault Scan Settings for Print Scan between Color and Black and White Color Text Scans standard originals containing mainly text as the color images Color Text Photo Scans originals containing graphs photos and text as the color images Color Photo Scans originals containing mainly color photos and graphs as the color images Black and White Text Scans standard originals containing mainly text as the ...

Страница 76: ...mber of Copies appears as the setup item currently selected C C C C Press Settings The setting screen for 1 Max Number of Copies appears Note Pressing Exit returns to the parent menu screen D D D D Input the maximum number of copies you wish to set using the Number keys Note To correct the number press Clear Stop key to clear the number you have entered E E E E Press OK This saves the setting you ...

Страница 77: ...rds the selected option and returns to the previous screen J J J J Press Exit This returns to the Scanner Fea tures menu K K K K Press Exit This exits the Scanner Features menu and returns to the standby screen that is displayed when you turn on the power of this machine Important Never turn off the power of this machine before the standby screen is displayed Doing so will discard all the settings...

Страница 78: ...see p 51 Configuring System Settings Important Some of the items may not be able to set according to a type of a connected scanner When such a scanner is connected to this machine these items are displayed in gray tone Information to Register in Scan Settings Scan Type This item lets you select a scan type by a scanner The number of colors and gradation levels are automatically selected according ...

Страница 79: ...nected to this machine Scan Size This item lets you select the size of the area to be scanned Note Sizes to be scanned are different according to a scanner connected to this machine Select a size among those displayed on the screen of this ma chine When Custom Area Setting is selected specify the scanning area of a scan ner you use for Start Positn and Scanning Area Start Positn Specify the positi...

Страница 80: ...he instruction manual of the correspond ing scanner Image Density This item lets you select the scanning density of a scanner you use in one of the seven steps The larger the value is set the darker the scanned image becomes Erase Color This setting is available only when Black and White Text Black and White Text Photo Black and White Photo or Black and White Gray Scale is selected in the Scan Typ...

Страница 81: ...item lets you select the format for saving the scanned images by a scan ner you use The option you select for this setup item affects the Send File op erations including sending a file as an e mail attachment sending a file to a Windows shared folder and sending a file to an FTP server Note When a Send File operation is performed using the Delivery Server func tion the file type is determined in a...

Страница 82: ...egister Scan Settings using the control panel of this machine Important Be sure to connect a scanner to this machine before configuration and turn on the power of the scanner before turning on this machine You cannot make any settings without the connection Note You can also configure these set tings using the Web Status Moni tor Reference See p 13 Using Keys Displayed on the Screen for informatio...

Страница 83: ...is saves the setting you have se lected and returns to the Default Scan Settings menu Note Pressing Cancel discards the selected option and returns to the Default Scan Settings menu G G G G Press Next 2 Resolution appears as the set up item currently selected Note Press Exit to return to the par ent menu screen H H H H Press Settings The setting screen for 2 Resolu tion appears I I I I Select the ...

Страница 84: ...J J J Press Next 3 Scan Size appears as the setup item currently selected K K K K Press Settings The setting screen for 3 Scan Size appears L L L L Select a Scan Size The option currently selected is displayed first The mark appears along with the option currently select ed Use or to display the op tion you wish to select To select a scan size from preset sizes A While the preset scan size you wis...

Страница 85: ...tting you wish P P P P Press OK This saves the setting you have se lected and returns to the Default Scan Settings menu Note Pressing Cancel discards the selected setting and returns to the Default Scan Settings menu Q Q Q Q By pressing Next to display 5 Erase Color through 11 Origi nal Settings as the setup items select options for each of them in the same way you have done in the steps D D D D t...

Страница 86: ...at is displayed when you turn on the power Important Never turn off the power of this machine before the standby screen is displayed Doing so will discard all the settings you have configured and return this machine to its factory default status Note Instead of pressing Exit you can press a Number key to enter another setting menu ...

Страница 87: ... System Settings Information to Register in Print Settings Image Density Use this item to adjust density of the image for scanning by a scanner You can select one of the seven steps from 1 lightest to 7 darkest Original Size Use this item to select the size of an original to be scanned by a scanner The available sizes of an original vary according to a scanner connected to this machine When you se...

Страница 88: ...s option you can change the reproduction ratio in 1 increments within the range of 25 to 400 Note This setup item appears as Zoom on the Web Status Monitor Create Margin Use this item to reduce the image to 93 of an original size Note This setup item is included under Reduce Enlarge on the Web Status Mon itor When Create Margin is set to On the image is reduced to 93 regardless of the settings in ...

Страница 89: ...emory area Default User 1 User 2 or User 3 for register ing the Print Settings configura tion C C C C Press the 1 key The Default Print Settings menu is displayed and 1 Image Density appears as the setup item currently selected Note Pressing Exit returns to the parent menu screen D D D D Press Settings The setting screen for 1 Image Density appears E E E E Use the 1 1 1 1 or 0 0 0 0 key to high li...

Страница 90: ...n and returns to the Default Print Settings menu To set a custom size A While the option Custom Size is displayed press Settings The setting screen for Custom Size appears B Use the 1 1 1 1 or 0 0 0 0 key to highlight the item you wish to enter and then use the Num ber keys to enter the value Note To correct the number you have entered use the 1 1 1 1 or 0 0 0 0 key to highlight it and then press ...

Страница 91: ...emory area and returns to the Print Settings menu N N N N While the Print Settings menu is displayed press 2 3 or 4 key to display the corresponding User Print Settings menu For example press the 2 key to display the User 1 Print Settings menu O O O O Repeat the steps H H H H through M M M M for each of User 1 User 2 and User 3 memory areas P P P P When you are finished press Exit This returns to ...

Страница 92: ...and turn on the power of the scanner before turning on this machine You cannot make any configuration without the connection Accessing This Machine System requirements of a client computer OS Microsoft Windows 95 98 98SE Me 2000 XP Microsoft Windows Server 2003 Microsoft Windows NT 4 0 Web browser Microsoft Internet Explorer 4 0 5 0 5 5 6 0 When you use a proxy server set the Web browser not to us...

Страница 93: ...is not necessary to install it to a client computer You can use the Web Status Monitor to make settings or administering the statuses of this machine General guide to the Web Status Monitor There are five main menus on the Web Status Monitor namely Status Admin Info Config Reference Configuration and Enter Custom Send File In Configuration particularly there are the sub menus that you can configur...

Страница 94: ...ightmost leftmost part of its con tent is out of sight 5 Work Area Displays the contents such as the setup items options and status information in accordance with the sub menu item cur rently selected 6 Scroll bars for the Work Area Use these scroll bars to scroll through the work area when the lower upper or rightmost leftmost part of its content is out of sight Important It may not be possible t...

Страница 95: ...n the Select User area F F F F Make settings to each of the setup items on the screen Note Register the scanning conditions for a scanner you use that are most frequently used in De fault If scanning conditions are not specified for a Send Scan op eration the conditions set to Default applies G G G G Click OK Note Be sure to click OK to save the settings you have made on the currently displayed sc...

Страница 96: ...OK all the settings that you have made on the previous page will be cleared The entered information will be cleared when you click Cancel To change an existing e mail address A Display the item that you wish to change within the list on the screen Note You can select the number of items to be displayed at a time by selecting a number in the Display Items box Click Next or Prev to dis play the next...

Страница 97: ...le to disk and then click OK Note The above dialog box varies depending on the version of the operating system Win dows When a save dialog box appears here click Save here The Save As dialog box ap pears D Specify a file name and the lo cation to save the file and then click Save Note The default name that is auto matically assigned to the file is device name_addr csv For device name the name spec...

Страница 98: ...74 E mail Address Book Data Format and Device Tag Infor mation A Prepare a CSV file that you wish to use for importing the address data and save it on a local disk or in a shared folder on your network B Click Import The Import Data page appears C Click Browse select the CSV file that you have prepared and then click Open D On the Import Data page click OK A confirmation dialog box for a batch reg...

Страница 99: ... This assigns the IP address of the time server using numeric from 0 to 9 If you do not use the time server specify 225 225 225 225 is prohibited to use Polling Interval Configure the poling interval by selecting either When Scanner On or Con stant Intervals with the radio button If you have selected Constant Intervals enter a numeral within a range of 15 to 10080 Note You can view all the informa...

Страница 100: ...Alphabet ABC DEF GHI JKL MNO PQRS TUV WXYZ Custom Title 1 2 3 4 5 Frequently Used Title s Select On if you wish the Send File Path record to be included in the Freq page which is displayed as the first title for both the alphabetical and custom title lists Select Off if you do not wish the item in the Freq page Important Before assigning a custom title it is necessary to register the custom titles...

Страница 101: ...d box Sender s Password Select whether to set a password for the destination folder When On is selected a password is required when this folder is specified as the destination Protected Password and Confirm Protected Password Enter the password when On is selected for Sender s Password using four to eight digits Each password digit appears as Change Order This item is displayed only when you perfo...

Страница 102: ...anel of this machine using up to 16 characters The first 16 characters of the FTP server name are automatically used if you skip registering a key display name Assign Title You can assign an FTP server record under the following three types of titles for recalling the key display name quickly on the control panel of this ma chine Alphabet ABC DEF GHI JKL MNO PQRS TUV WXYZ Custom Title 1 2 3 4 5 Fr...

Страница 103: ...sword and Confirm Login Password Enter the password for the user name displayed in the Login User Name box Note A login password is registered using up to 14 characters on the Web Sta tus Monitor Specify a login password within 14 characters on the FTP server to which you wish to send scanned files from this machine Test Click this button to confirm the availability of the entries to the Server Na...

Страница 104: ... Register a key display name within 16 characters The first 16 characters of the name that you have registered to Name s are auto matically used if you skip registering a key display name Assign Title You can assign an item under the following three types of titles for recalling the destination s or a sender s key display name quickly on the control panel of this machine Alphabet ABC DEF GHI JKL M...

Страница 105: ... using Configuration Print Scan Settings Printer Add on the Web Status Monitor Reference See the Web Status Monitor Help for information about how to register a printer Program No Assign a program number to each of the printer registrations within the range of 01 through 99 The smallest unused program number is automatically as signed when you register a new printer You can also change the program...

Страница 106: ...and restart this machine You cannot config ure Printer and Custom Title settings at the same time Note Under each of the titles the assigned printers are listed by the order of reg istration Attachment Type A type of connection method between a printer and this machine is fixed to Network Printer Network Printer Enter the IP address of the printer in the form of xxx xxx xxx xxx xxx 0 through 255 N...

Страница 107: ...e list of available paper trays For a network printer be sure to enter the IP address in the box of Attachment Type first and then click Obtain Printer Information Change Order This item is displayed only when you perform Change in the Printer oper ation Normally the printers you have registered using Add in the Printer are displayed by the order of registration If you wish to change the order of ...

Страница 108: ...that have been con figured by using the control panel of this machine are backed up as long as the settings are included under the Configuration main menu of the Web Status Monitor Note however that there are setup items that can only be configured by using the control panel of this machine These setup items are not included in the backup file Note You cannot specify the items to be backed up or r...

Страница 109: ... enabled when data is entered in the Send File Path Login User Name and Login Password box Backup File Name Enter a file name for the backup file Enter a name using up to 20 characters F F F F When everything is done in the way you wish click Backup Note Click Cancel to restore the former settings on the screen After a backup file is created the message Backup has succeed ed appears G G G G Confir...

Страница 110: ...assword for the user name displayed in the Login User Name box Each password character ap pears as Note If you are running Windows 98 Me and a shared folder password is required enter it Test Click to check whether connec tion to the specified shared fold er is enabled when data is entered in the Send File Path Login User Name and Login Password boxes Backup File Name Enter the backup file name fr...

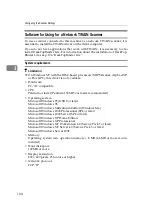
Страница 111: ...ht not automatically work with the certain operating system settings In this case launch Setup exe located in the CD ROM root directo ry If you wish to install the software without using Auto Run hold down the Shift key while inserting the CD ROM Keep the Shift key held down until the client computer has finished accessing the CD ROM If Cancel is pressed during installation the installation will b...

Страница 112: ...this driver is not available Hardware PC AT compatible CPU Pentium or faster Pentium 150 MHz or faster recommended Operating system Microsoft Windows 95 OSR 2 or later Microsoft Windows 98 Microsoft Windows Millennium Edition Windows Me Microsoft Windows 2000 Professional SP4 or later Microsoft Windows 2000 Server SP4 or later Microsoft Windows XP Home Edition Microsoft Windows XP Professional Mic...

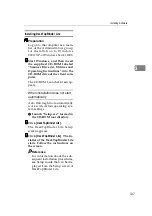
Страница 113: ...all ac cording to the instruction on the screen The client computer installed with the TWAIN driver can get the scanning data from a scan ner connected to this machine using a TWAIN compliant ap plication C C C C The installer of the TWAIN driv er starts Follow the instructions on the screen Note When the installation is com plete a message to prompt you to restart the client computer may appear I...

Страница 114: ...indows 2000 Server Service Pack 1 or later Microsoft Windows 2000 Professional Service Pack 1 or later Microsoft Windows XP Professional Microsoft Windows XP Home Edition Microsoft Windows Server 2003 Standard Edition Microsoft Windows Server 2003 Enterprise Edition CPU Pentium 133 MHz or faster Pentium II 266 MHz or faster recommended RAM 48 MB or more 128 MB or more recommended Hard Drive Space ...

Страница 115: ...CD ROM Launcher screen ap pears When installation does not start automatically Auto Run might not automatically work with certain operating sys tem settings A Launch Setup exe located in the CD ROM root directory B B B B Click DeskTopBinder Lite The DeskTopBinder Lite Setup screen appears C C C C Click DeskTopBinder Lite The In staller of the DeskTopBinder Lite starts Follow the instructions on th...

Страница 116: ...to this machine it s not possible to change the device name and the IP address of this machine You can change the device name and the IP address of other devices Note Address Management Tool on SmartDeviceMonitor for Admin is disabled When SMNP Community Name for this machine is changed change the SMNP Community Name for SmartDeviceMonitor for Admin as well This soft ware Manages Performs related ...

Страница 117: ...Click SmartDeviceMonitor for Ad min and then the SmartDevice Monitor for Admin Setup screen appears Click SmartDeviceMonitor for Cli ent and then the SmartDevice Monitor for Client Setup screen appears C C C C Follow the instructions on the screen Note After the installation is com plete the SmartDeviceMonitor for Admin or SmartDevice Monitor for Client folder is in the Program folder on the Start...

Страница 118: ...Configuring the Scanner Settings 110 3 ...

Страница 119: ... mail Send File function and Print function will not be available when a scanner is used as a network TWAIN scanner or used for Enter Custom Send File of the Main Menu Area on the Web Status Monitor Make sure that the E mail Send File Ready screen in E mail Send File mode or Print Ready screen in Print mode is displayed on this machine s display panel and then set an original s on the scanner conn...

Страница 120: ... of this machine other than the network TWAIN scan you do not need to specify a location to set the original s even in case of a scanner equipped with both the ADF Automatic Document Feeder and the exposure glass In this case when an original s is set on the ADF it is scanned on the ADF when an original is set on the exposure glass it is scanned on the exposure glass However when originals are set...

Страница 121: ...perform a Print Scan operation while scanning one side of an orig inal set the original in the ADF as illustrated below regardless of the width of the originals Select 1 Sided Orig 1 Sided Print or 1 Sided Orig 2 Sided Print to per form simplex scanning by using Duplex under 5 Print Settings on this ma chine See p 79 Duplex for details Limitation When you select 2 sided print the printout orientat...

Страница 122: ...er form duplex scanning by using Duplex under 5 Print Settings on this ma chine See p 79 Duplex for details Limitation When you select duplex scanning in a Print Scan operation scanning of the originals is fixed to top to top This means that the originals must be bound on either side When you select 2 sided print the printout orientation is fixed to top to top When the originals are bound at the t...

Страница 123: ...e exposure glass of a scanner See p 118 Before Sending Scan Data Select a destination by this machine See p 120 Selecting Destina tions Select a Cc destination See p 122 Selecting Cc Destina tions Select a subject See p 122 Selecting a Subject Make scan settings See p 123 Making Scan Set tings Select a sender See p 126 Selecting a Sender Press the Start key of this machine See p 127 Starting a Sca...

Страница 124: ...on the Web Status Monitor Note It is essential to specify a sender of an e mail when Sender s Name Default is set to No Subject You can select a subject of an e mail from the Subject list displayed on this ma chine Note No subject appears on your e mail message when you do not specify a sub ject Depending on the e mail client software on the side of the receiver such string like No subject appears...

Страница 125: ...and time information is inserted to the second line of an e mail body in the following format Date Time Yr Month Day Hr Min Sec Note You can set the time and date using Date Time Yr Month Day Hr Min Sec in 2 Send Scan Settings under the Scanner Features menu Offset from GMT shows the time offset from Greenwich Mean Time You can specify this setting by using Configuration Basic Settings Scanner Tim...

Страница 126: ...ry Serv er operation you can specify the original orientation and scanning sides on a scanner manually by pressing Scan on the E mail Send File standby screen of this machine and then selecting Manual Instead of manually specifying these settings you can also use the settings you have registered to Default User 1 User 2 or User 3 See p 123 Making Scan Settings for details E mail Send File Ready sc...

Страница 127: ...n the display panel of this machine a scanner connected to this machine is standing by for the net work TWAIN scanner Press Exit If there is no Exit the TWAIN exclusive standby screen is displayed on the dis play panel of this machine Set 6 Select Method in 2 Send Scan Settings under the Scanner Features menu to Send File TWAIN and then restart this ma chine When a Send File Path name is displayed...

Страница 128: ...ted when you press E mail See p 60 Auto Update Destination List for details The destination search is effec tive only when To or Cc is selected C C C C Press List or the Title key according to your operation while To is highlighted Note If To appears with its check box selected there is a destina tion that is already set To clear the previous settings press Clear in the functions you used to set t...

Страница 129: ...onfiguration E mail Set tings E mail Address Assign Title on the Web Sta tus Monitor C Highlight the destination you wish to select and then press Select Note While highlighting a destina tion with its check box select ed press Clear to clear the check box this deselects the destination If you wish to select from an other title press the Ti tle key This displays a list of titles again D Press OK T...

Страница 130: ... you have specified for To in Selecting Destinations You can confirm all the specified destinations by using the 1 1 1 1 and 0 0 0 0 keys when you have selected the multiple destina tions You cannot confirm the Cc carbon copies destinations on the E mail Send File standby screen Selecting a Subject A A A A Use the 1 1 1 1 or 0 0 0 0 key to high light Subject B B B B Press List The list of the subj...

Страница 131: ...ault You cannot edit and save the settings that you have regis tered to User 1 User 2 and Us er 3 here If you wish to use one of the user settings while chang ing some of them recall the user setting you wish to use by high lighting it and press OK first And then change the settings by selecting Settings To recall the registered scan settings A Use the 1 1 1 1 or 0 0 0 0 key to highlight User 1 Us...

Страница 132: ... returns to the E mail Send File standby screen and the cur rent Scan Setting is displayed on the third line of the screen Confirming the Scan Settings You can confirm the current Scan Set tings or the Scan Settings that you have registered to Default User 1 User 2 or User 3 Note You can confirm the Default set tings by selecting Manual in the step B below unless you configure the Scan Settings ma...

Страница 133: ...E Press Cancel or OK Note If you wish to apply the Scan Settings you have selected in the step B press OK If you wish to exit the status screen without changing anything press Cancel This returns to the E mail Send File standby screen ...

Страница 134: ...you wish to select and then press Select This selects the check box in front of the sender s name Note Selecting another sender auto matically deselects the sender currently selected so that the check mark in front of the send er s name is cleared While highlighting a sender with its check box selected press Clear to clear the check box this deselects the sender When you select a user whose Sender...

Страница 135: ...e scan ning by adding the scanned data to the current image file Press New Job to finish the current scanning job and send the scanned data You can start a new job with the current settings after the scanned data is sent Press OK to finish the cur rent scanning job send the scanned data and then re turn to the initial screen at the time when the power has been turned on If you do not press any key...

Страница 136: ...n the ex posure glass of the scanner and then press the Start key of this machine D D D D Repeat the step C C C C as necessary E E E E Press Finish when all the origi nals are scanned Note When Show Options after Each Scan Job is selected for End of Scan Option under 2 Send Scan Settings a screen for selecting the next operation appears after you press Finish When scanning finishes properly the e ...

Страница 137: ...u click Admin In fo C C C C On the sub menu click Send In fo D D D D Check the transmission result Note Up to 20 transmission results are displayed in the Send Info list at a time Each time you per form a Send Scan operation the list is updated and only the lat est 20 transmission results are displayed The transmission results are cleared when the power of this machine is turned off In the Status ...

Страница 138: ...Sending Scan File by E mail 130 5 ...

Страница 139: ...Send File Sending a Scanned File to a Registered Shared Folder By using the control panel of this machine you can send a scanned file to a Win dows shared folder that is registered to this machine Procedure Breakdown The following overview diagram shows the flow of the steps for sending a scanned file to a Windows shared folder that is registered to this machine Note that the underlined steps are ...

Страница 140: ... 0 0 0 key to high light SMB and then press List The list of the shared folders regis tered to this machine appears Place originals on the ADF or on the exposure glass of a scanner See p 118 Before Sending Scan Data Select a destination folder See p 132 Selecting a Shared Folder Select a file name See p 134 Selecting a File Name You can skip this process if you do not specify a file name Make scan...

Страница 141: ... ing to the settings in Configu ration Basic Settings Scanner Select Title on the Web Status Monitor B Use the 1 1 1 1 or 0 0 0 0 key to highlight the title you wish to select and then press OK The shared folders assigned to the selected title are displayed Note You can select the title under which each of the registered destinations is assigned in Configuration Send File Settings Send File Path A...

Страница 142: ...yed press SMB FTP Note If this screen is already dis played you can skip this step If you do not specify a file name you can skip this step B B B B Use the 1 1 1 1 or 0 0 0 0 key to high light File Name and then press List The list of the file names that are registered to this machine appears C C C C Use Next or Prev to scroll through the pages and display the file name you wish to select D D D D ...

Страница 143: ...he underlined steps are essential Note Some of the steps such as Making Scan Settings are identical to those ex plained under Sending Scan Files by E mail See the relevant pages shown to the right of the following overview diagram Display the Web Status Monitor on a Web browser See p 85 To access this machine from a Web browser Displaythe EnterCustomSendFile pageandmakenecessarysettings See p 136 ...

Страница 144: ...12 Original Orienta tion for information about Original Setting Orientation See below for information about the settings included under Send File group Send File Path Enter the path to the shared folder where you are sending the file in the format of host name folder name or IP address folder name You can also specify a shared folder that is not specified on the Configuration Send File Set tings S...

Страница 145: ...y of this ma chine Scanning starts with the scanner Note To interrupt scanning press the Clear Stop key Reference When you place the original on the exposure glass of the scan ner see p 128 To start with an original on the exposure glass When scanning finishes properly the file is sent to the shared folder The B appears at the upper right of the screen while the file is sent Note You cannot perfor...

Страница 146: ... You can specify the device name of this machine using Configuration Basic Settings General Settings Device Name File Names Files created by the Scan to Folder operation are named as described below in accordance with the file name you specified In case you have not specified a file name the default file name DOC is as signed Note It is essential to specify a file name when you use the Enter Custo...

Страница 147: ...ext Pages 2 two sided Time when scanned 2003 9 16 13 07 21 The following files are generated image 0001 TIF image 0002 TIF image 0003 TIF image 0004 TIF Example 5 Specified file name none File format multi page TIFF Original type color full color Original page count 2 two sided Time when scanned 2003 9 16 13 07 21 The following files are generated DOC 0001 PDF Reference For details about file form...

Страница 148: ...Sending Scan File by Scan to Folder 140 6 ...

Страница 149: ...tical to those ex plained under Sending Scan Files by E mail See the relevant pages shown to the right of the following overview diagram Place originals onthe ADFor onthe exposure glass of ascanner See p 118 Before Sending Scan Data Select an FTP server on this machine See p 142 Selecting an FTP Server Select a file name See p 134 Selecting a File Name Make scan settings See p 123 Making Scan Sett...

Страница 150: ...nd display the FTP server name you wish to select To recall FTP servers using a title A Press the Title key A list of titles appears on the screen Note Titles are displayed accord ing to the settings in Configu ration Basic Settings Scanner Select Title on the Web Status Monitor B Use the 1 1 1 1 or 0 0 0 0 key to highlight the title you wish to select and then press OK The FTP servers assigned to...

Страница 151: ...ted so that the check mark next to the FTP server name is cleared F F F F Press OK If Protected Password is set the message Enter protection code for destination ap pears G G G G Enter the protection code using the Number keys Note Enter the four through eight digit number that is specified in Configuration Send File Set tings FTP Server Protect ed Password on the Web Status Monitor H H H H Press ...

Страница 152: ...l Settings Device Name If the specified directory does not exist in the FTP server a directory is au tomatically created File Names Files created by a Scan to FTP operation are named as described below in accor dance with the file name you have specified In case you have not specified a file name the default file name DOC is as signed File names with time When File Name Time included under Configu...

Страница 153: ...7 21 The following files are generated image 0001 TIF image 0002 TIF image 0003 TIF image 0004 TIF Example 5 Specified file name none File format multi page TIFF Original type color full color Original page count 2 two sided Time when scanned 2003 9 16 13 07 21 The following file is generated DOC 0001 PDF Reference For details about the file formats and extensions see p 73 File Type Note All the f...

Страница 154: ...Sending Scan File by Scan to FTP 146 7 ...

Страница 155: ...ned steps are essential Place the original s on the Exposure glass or on the ADF of a scanner See p 148 Before Print ing Scan Data Specify the number of copies on this machine See p 151 Specifying the Number of Copies Configure print settings See p 151 Configuring Print Settings Select a printer See p 154 Selecting a Printer Select color or black and white for scanning See p 155 Selecting Col or B...

Страница 156: ...n is performed Note however that the originals on the ADF are scanned when the originals are placed on both of the ADF and the exposure glass About Paper Tray Settings You can specify a certain paper tray of a printer by selecting Configuration Print Scan Settings Printer Paper Source Tray on the Web Status Monitor By using the control panel of this machine you can select a specific printer but yo...

Страница 157: ...d select the set tings from the PC is displayed on the display panel of this machine a scan ner connected to the machine is standing by for the network TWAIN scanner Press Exit If there are no Exit the TWAIN exclusive standby screen is displayed on the display panel of this machine In this case restart the machine When a Send File Path name is displayed on the second line of the screen on the disp...

Страница 158: ...tor For details see Web Status Monitor Help Color Black and White The default setting selected us ing Color Black and White in 3 Print Scan Settings under the Scanner Features menu of this machine is displayed at the left end of the third line of the screen See p 155 Selecting Col or Black and White for infor mation about changing this setting Other print settings The default settings configured u...

Страница 159: ...he Scanner Features menu A A A A While the Print Scan standby screen is displayed press Set tings The Print Settings screen is dis played B B B B Select whether you configure the print settings manually or use one of the user settings you have registered Reference You can confirm the print set tings you have registered See p 153 Confirming Print Set tings Note Press Exit if you wish to use the set...

Страница 160: ...tom Size use the Number keys to enter the dimensions of the scan area width and height D Repeat the steps B B B B and C C C C with other items as necessary When you are finished make sure that the first page of the Print Settings screen Print Set tings 1 2 is displayed E Press Next The second page of the Print Settings screen Print Settings 2 2 is displayed F Use the 1 1 1 1 or 0 0 0 0 key to high...

Страница 161: ...d line of the screen Confirming Print Settings You can confirm the current Print Set tings or the Print Settings that you have registered to Default User 1 User 2 or User 3 Note You can confirm the Default set tings by selecting Manual in the step B below unless you configure the Print Settings manually After you have manually configured the Print Settings selecting Manual displays the current set...

Страница 162: ...ey A list of titles appears on the screen Note Titles are displayed accord ing to the settings in Configu ration Basic Settings Scanner Select Title on the Web Status Monitor B Use the 1 1 1 1 or 0 0 0 0 key to highlight the title you wish to select and then press OK The printers assigned to the se lected title are displayed Note You can select the title under which each of the registered printers...

Страница 163: ... Selecting Color Black and White When you perform a Print Scan oper ation you can select between Color scanning and Black and White scanning If you do not select this set ting the default setting selected using Color Black and White in 3 Print Scan Settings under the Scanner Features menu applies A A A A While the Print Scan standby screen is displayed press CLR B W B B B B Use the 1 1 1 1 or 0 0 ...

Страница 164: ...Printing Scanned Image Files 156 8 ...

Страница 165: ...Scan Files by E mail See the relevant pages shown to the right of the following overview diagram 1 The settings that are configured using ScanRouter delivery software determine the file type and compression method of the image file to be distributed Place originals on the ADF or on the exposure glass of a scanner See p 118 Before Send ing Scan Data Select a destination on this machine See p 158 Se...

Страница 166: ...gistered to the Delivery Server appears C C C C Use Next or Prev to scroll through the pages and display the destination you wish to select D D D D Use the 1 1 1 1 or 0 0 0 0 key to high light the destination you wish to select and then press Select This selects the check box in front of the destination Note The appears next to a group destination E E E E Repeat the steps C C C C and D D D D for s...

Страница 167: ...s the destination If you wish to select from an other title press the Ti tle key This displays the list of titles again To recall all available destinations A Press the Title key A list of titles appears on the screen B Use the 1 1 1 1 or 0 0 0 0 key to highlight All and then press OK F F F F When you are finished press OK The Delivery Server Ready screen appears The first destination you have sel...

Страница 168: ...Sending Scan Files Using Delivery Server 160 9 ...

Страница 169: ...ifferent depending on the appli cation you use See p 163 Scanning Originals step A Select the TWAIN driver Menuand Procedure may be different depending on the application you use See p 163 Scanning Originals step A Place the originals on a scanner See p 111 Setting Origi nals on a Scanner Start the TWAIN driver Menu and procedure may be different depending on the application you use See p 163 Scan...

Страница 170: ...r Function 162 10 Click Scan on the Scanner Property dialog box See p 163 Scanning Originals step D Save the scanned image Menu and procedure may be different depending on the application you use See p 163 Scanning Originals step E ...

Страница 171: ...e File menu point to Add Document and then click Scan After a short while the dialog box of the TWAIN driver that operates the scanner appears G G G G Place the Originals Note Place the originals either on the Exposure Glass or on the ADF See p 111 Setting Originals on a Scanner for details H H H H Make the scan settings View the TWAIN driver help files for the details of making the scan settings ...

Страница 172: ...Using the Network TWAIN Scanner Function 164 10 ...

Страница 173: ...ed upside down Place the original in the correct orientation See p 112 Original Orientation No image results from scanning The original has been placed with the front and back reversed When the original is placed directly on the exposure glass the side to be scanned must face down When the original is fed via the ADF the side to be scanned must face up The printer that you have specified for print...

Страница 174: ...ror you encounter This section includes all the error messages that are displayed on this machine and also includes some of the error messages displayed on the Web Status Mon itor Note If an error message that is not contained in this section appears turn off the power of this machine and the connected scanner and then back on If the message is still shown note the content of the message and the e...

Страница 175: ...turning on the scanner to al low the condensation to evaporate Restart the scanner and this machine If the error appears again note the contents of the error message and the error number and contact a service centre SC4xxx is the error number The number displayed differs according to the error type Remove the original s in ADF Exit Double Feed more than 2 sheets of originals were fed into the ADF ...

Страница 176: ...hen Scan Type in 4 Scan Settings is set to one of the Color options Make the value of the following settings larger using the Web Status Monitor Configuration E mail Settings E mail Max E mail Size when sending scan data as an e mail attachment Configuration Delivery Settings Delivery Job Delivery Data Max Set ting when you send the scanned data using a Delivery Server Configuration Send File Sett...

Страница 177: ... or it is not being serviced The Delivery Server is temporarily down for reasons such as insufficient memory Cannot communicate with the serv er Check the server status and connection Exit If you have specified to perform a Scan to Folder SMB operation check if the com puter on which the Windows shared folder exists is turned on If you have specified to perform a Send Scan operation using a Delive...

Страница 178: ...printer Exit The printer is not compatible with this machine Select other printer that is supported for use with this ma chine No response from the de vice Check the power and cables Exit The printer is not responding Check if the printer is turned on and the cables are connected correctly Warming up Check the printer Exit The printer is not ready to print because it is still warming up Wait until...

Страница 179: ...t cases it is required to enter the password into Login Password for the user entered in Login User Name However when accessing a shared folder that is password protected under Windows 95 98 98SE Me it is necessary to enter the shared folder s protection password into Login Password Confirm the operating system of the computer that you are trying to access and make necessary settings in accordance...

Страница 180: ...tings un der Scanner Features menu If the IP address of this ma chine is set to 11 22 33 44 it means that you haven t configured this machine yet or all the settings of this machine have returned to their default values for some reasons In this case you have to configure all the nec essary settings including the IP address and Scan Set tings etc When you use this machine on a DHCP environment and ...

Страница 181: ...ther title like A B or Freq is displayed on the screen it means that you have searched destinations using the Title key and only the matched desti nations are currently available for selection In this case press the Title key highlight All and then press OK See p 121 To recall all available destina tions for details The e mail destinations including Cc destinations are cleared when a file name is ...

Страница 182: ...gh 6 contain the information obtained from this machine When you wish to update the address book of this machine using a CSV file use an exported CSV file and edit it while leaving these lines as they are Line 7 and subsequent lines include the e mail address information For de tails see About the e mail address information below The default name of a CSV file that is exported using Entered Progra...

Страница 183: ...nel 0 Frequently Used Title s Determines whether the e mail address information is to be registered to the Freq title 0 Registered 1 Not registered 1 Title 1 The value of this item is fixed to 1 2 Alphabet Title 2 Determines under which the alphabetical title this e mail address record be longs to Title2 Convention ABC 1 DEF 2 GHI 3 JLK 4 MNO 5 PQRS 6 TUV 7 WXYZ 8 For example 2 indicates DEF is se...

Страница 184: ...ration E mail Settings E mail Address on the Web Status Monitor Note The last two items shown as in the example are fixed to blank for this machine Device Tag Information The following table shows an example of the Device Tag Information which contains the title information of this machine You can export the Device Tag In formation to a CSV file using the Web Status Monitor Note You can use the De...

Страница 185: ...LAN You can configure the settings for a wireless LAN card using Configuration Basic Settings TCP IP on the Web Status Monitor Before getting started it is necessary to prepare for logging in the Web Status Monitor Make preparations to log in to the web status monitor Connect this machine and a computer using a network cable temporarily Sample setting for this machine IP Address 192 168 1 2 Subnet...

Страница 186: ...nect a cross network cable to the network interface con nector of this machine B Connect the other end of the cable to the client computer When you use a hub A Connect a straight network ca ble to the network interface connector of this machine B Connect the other end of the cable to an available connector of the hub C Confirm that the computer is connected to the hub B B B B If not connected conn...

Страница 187: ... 255 255 255 0 in the same way you have done in the steps G G G G through J J J J 4 Default Gateway Address ap pears as the setup item currently selected L L L L Press Next three times and then press Settings The setting screen for 7 Network Boot appears M M M M Confirm that 7 Network Boot is set to NONE and press OK Note The mark appears along with the option currently select ed If 7 Network Boot...

Страница 188: ...d and then click OK Note User name is fixed to scanner The initial factory default pass word is password You can change the password using Configuration Basic Settings Password The setup screen appears U U U U Click Basic Settings and then TCP IP on the sub menu V V V V Make settings to each of the setup items on the screen Reference See p 46 System Settings LAN Type Switch between network inter f...

Страница 189: ...t comput ers using the same channel can communicate with each other WEP Setting Select whether to enable or dis able WEP Wired Equivalent Privacy encryption WEP encryption protects wire less data communication To communicate using WEP data from both transmitting and re ceiving computers must be set with the same WEP Key To en able WEP encryption select En able in the list and then enter the WEP ke...

Страница 190: ...ercentage at the Web Status Monitor s Wireless LAN Signal that is included un der Configuration Basic Set tings TCP IP or Wireless LAN Signal in 1 System Settings under the Scanner Features menu on this machine The fol lowing list provides an indica tion of the signal strength of the wireless LAN Note however that the wireless LAN connec tion may fail due to noise or oth er reasons even when Wirel...

Страница 191: ...n 183 11 Option Wireless LAN Card 802 11b Interface Unit Type A Provides a wireless connection to a network This card is enabled by insert ing into one of the PC Card slots on the rear panel of this machine ...

Страница 192: ...eys left right Start Clear Stop Scanner Features Reset Display language English German French Spanish Portuguese Dutch Italian Memory RAM 128MB 64 MB is used for image processing Main features Supports network TWAIN driver Scan to Print Scan to E mail Scan to Folder SMB Scan to FTP Delivery Server Operating environment Temperature 10 32 C 50 89 6 F humidity 15 80 Power 120V 60Hz Power consumption ...

Страница 193: ...T SHALL THE REGENTS OR CONTRIBUTORS BE LIABLE FOR ANY DIRECT INDIRECT INCI DENTAL SPECIAL EXEMPLARY OR CONSEQUENTIAL DAMAGES INCLUDING BUT NOT LIMITED TO PROCUREMENT OF SUBSTI TUTE GOODS OR SERVICES LOSS OF USE DATA OR PROFITS OR BUSINESS INTERRUPTION HOW EVER CAUSED AND ON ANY THE ORY OF LIABILITY WHETHER IN CONTRACT STRICT LIABILITY OR TORT INCLUDING NEGLI GENCE OR OTHERWISE ARISING IN ANY WAY O...

Страница 194: ...PEG Group In plain English 1 Redistributions of source code must re tain the above copyright notice this list of conditions and the following dis claimer 2 Redistributions in binary form must re produce the above copyright notice this list of conditions and the following disclaimer in the documentation and or other materials provided with the distribution 3 The end user documentation included with...

Страница 195: ...de if you redis tribute it See the file ansi2knr c for full details However since ansi2knr c is not needed as part of any program generated from the IJG code this does not limit you more than the foregoing paragraphs do The Unix configuration script con figure was produced with GNU Au toconf It is copyright by the Free Software Foundation but is freely dis tributable The same holds for its sup por...

Страница 196: ... ANY WARRANTY OF MERCHANTABIL ITY OR FITNESS FOR A PARTICU LAR PURPOSE IN NO EVENT SHALL SAM LEF FLER OR SILICON GRAPHICS BE LIABLE FOR ANY SPECIAL INCI DENTAL INDIRECT OR CONSE QUENTIAL DAMAGES OF ANY KIND OR ANY DAMAGES WHAT SOEVER RESULTING FROM LOSS OF USE DATA OR PROFITS WHETHER OR NOT ADVISED OF THE POSSIBILITY OF DAMAGE AND ON ANY THEORY OF LIABIL ITY ARISING OUT OF OR IN CON NECTION WITH T...

Страница 197: ...he distribu tion Neither the name of the NAI Labs nor the names of its contributors may be used to endorse or pro mote products derived from this software without specific prior written permission THIS SOFTWARE IS PROVIDED BY THE COPYRIGHT HOLDERS AND CONTRIBUTORS AS IS AND ANY EXPRESS OR IMPLIED WARRAN TIES INCLUDING BUT NOT LIM ITED TO THE IMPLIED WARRANTIES OF MERCHANT ABILITY AND FITNESS FOR A...

Страница 198: ...HEORY OF LIABIL ITY WHETHER IN CONTRACT STRICT LIABILITY OR TORT IN CLUDING NEGLIGENCE OR OTH ERWISE ARISING IN ANY WAY OUT OF THE USE OF THIS SOFT WARE EVEN IF ADVISED OF THE POSSIBILITY OF SUCH DAMAGE MD5 Software License Agreement Copyright C 1991 2 RSA Data Secu rity Inc Created 1991 All rights re served License to copy and use this software is granted provided that it is identi fied as the RS...

Страница 199: ...d to permit persons to whom the Software is furnished to do so subject to the following conditions The above copyright notice and this permission notice shall be included in all copies or substantial portions of the Software THE SOFTWARE IS PROVIDED AS IS WITHOUT WARRANTY OF ANY KIND EXPRESS OR IMPLIED INCLUDING BUT NOT LIMITED TO THE WARRANTIES OF MER CHANTABILITY FITNESS FOR A PARTICULAR PURPOSE...

Страница 200: ... Margin 80 Creating a Backup File of All the Settings 100 Cursor keys 12 D Date Time Yr Month Day Hr Min Sec 50 Default Gateway Address 47 Default Printer 99 Delivery Server IP Address 49 DeskTopBinder Lite 106 Device Tag Information 176 Display panel 12 DNS Server 1 IP Address WSM 49 DNS Server 2 IP Address WSM 49 DNS Server 3 IP Address WSM 49 Double Feed Detect WSM 63 Duplex 79 E Edge Smoothing...

Страница 201: ... of Copies 67 MD5 Software License Agreement 190 N Name s 96 Network Boot 49 Network interface connector 13 Network Interface Indicators 14 Network Printer 98 Noise Reduction 72 Number keys 12 O Obtain Printer Information 98 Operating Instructions 3 Option 183 Original Location 118 Original Locations 148 Original Orientation 112 Original Orientation and Scanning Sides 118 Original Settings 74 Orig...

Страница 202: ...ng a Subject 122 Selecting Cc Destinations 122 Selecting Color Black and White 155 Selecting Delivery Destinations 158 Selecting Destinations 120 Selecting Destinations and a Subject 120 E mail 120 Select Language 50 Select Method 59 Select Title WSM 63 Sender 116 Send File 92 Send File Path 91 101 102 Send File Path Name 92 Send File TWAIN Priority 57 Send Function Permission 50 Sending a Scanned...

Страница 203: ...ndFile to Send a Scanned File to an Unregistered Shared Folder 135 Using Keys Displayed on the Screen 13 Using the Network TWAIN Scanner Function 161 W Wait Time for Additional Scanning WSM 63 Warning 1 When an Error Message Appears 166 When Scanning is Not Performed as Expected 165 Wireless LAN Signal 50 Y Yellow indicator 14 ...

Страница 204: ...196 EN USA G829 8602 ...

Страница 205: ... outlet on a circuit different from that to which the receiver is connected Consult the dealer or an experienced radio TV technician for help Caution Changes or modifications not expressly approved by the party responsible for compliance could void the user s authority to operate the equipment Declaration of Conformity Product Name External Box Model Number Network Scanning Unit Type A Responsible...

Страница 206: ...Network Scanning Unit Type A Operating Instructions EN USA G829 8602 ...

Отзывы: