42
RIDA qLine® autoBlot | User manual
7.5 Standalone Imaging
The premise of the instrument revolves around obtaining images following the comple-
tion of a work-list, but it’s noted that sometimes users may want to perform a scan that
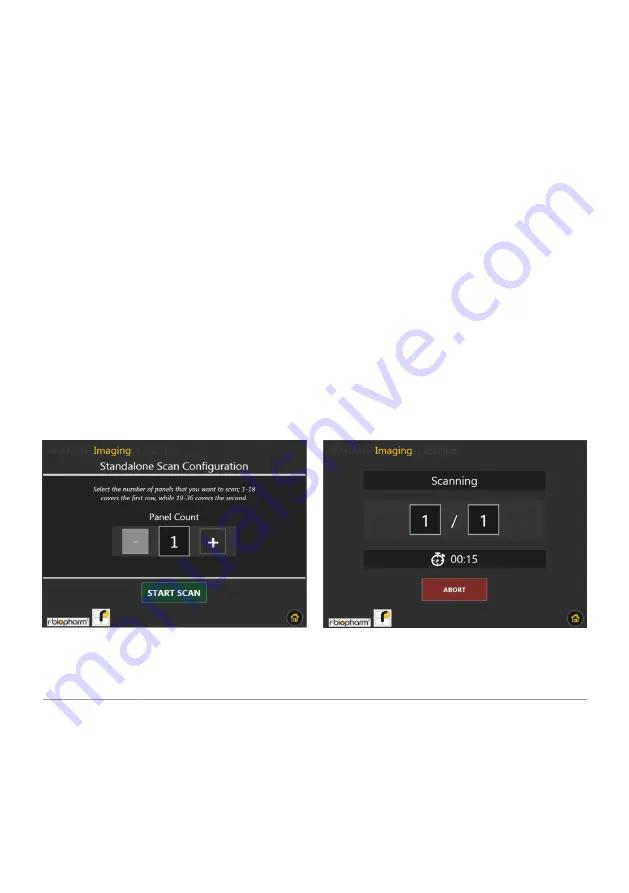
isn’t directly tied to a work-list. This can be achieved by navigating to the ‘Imaging’
category within the main menu and selecting ‘Standalone Scan’. The first screen the user
will encounter within this option is the scan configuration menu, as shown in Figure 37.
The -/+ controls increment and decrement the amount of panels/troughs will be scanned
should the user press ‘START SCAN’.
After pressing ‘START SCAN’, the screen from Figure 38 will become active. This screen
will inform the user of the progress of the scan, along with an estimated time before the
procedure finishes. If the user wishes to cancel the scan and discard all associated data,
pressing the ‘ABORT’ button once will park the instrument and return the user to the
main menu
. If the user doesn’t abort the scan, the images will be saved on the instrument
for retrieval at any time.
7.6 Accessing Stored Images
Images which are captured using the feature described in section 7.5 are stored on the in-
strument, but only up to a maximum of 8 entries. To access these images, the user can navi-
gate to the ‘Imaging’ category of the
main menu
and select the ‘Saved Images’ option.
Figure 37:
The configuration screen
for the standalone scan option
Figure 38:
The screen that is shown
during the standalone scan procedure


