


Chapter 6:
WebPASM
147
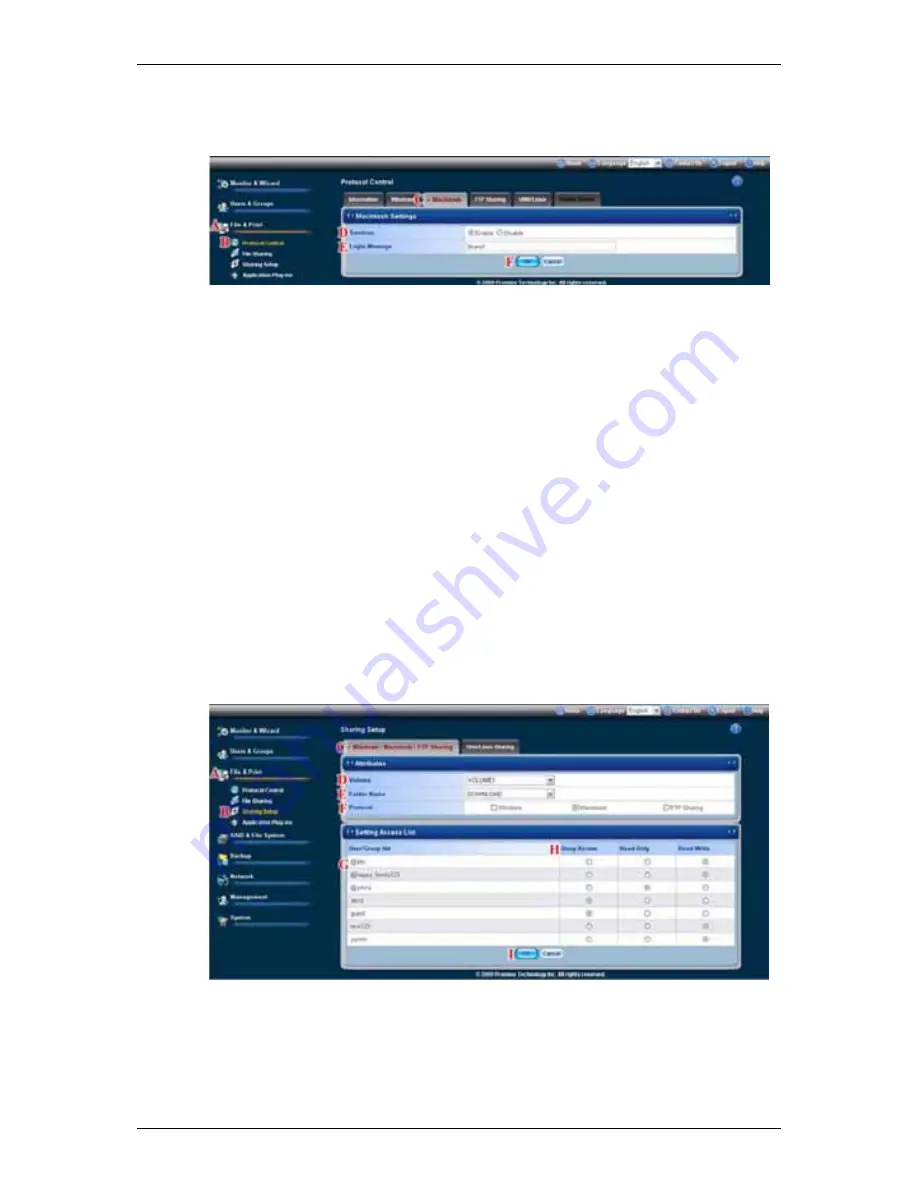
5. Click
the
OK
button to save your settings.
(F)
The optional login message appears on the Welcome screen when you log
into SmartStor from a Mac.
Setting up File Sharing
To set up Mac file sharing:
1. Click
the
Administration
topic and choose the
File & Print
icon to expand
the Tree.
(A)
2. Click
the
Sharing Setup
icon
(B)
, then click the
Windows/Mac/FTP
Sharing
tab.
(C)
3. Choose a volume from the Volume dropdown menu.
(D)
4. Choose a folder from the Folder Name dropdown menu.
(E)
5. Check
the
Mac
protocol box.
(F)
6. In the User/Group list, group names are preceded by the
@
character.
(G)
7. Under Permissions, choose a permission level for this user or group:
(H)
․
Deny Access - Visible only, cannot open
․
Read Only
․
Read and Write - Default
8. Click
the
OK
button to save your settings.
(I)
Содержание SmartStor NAS
Страница 1: ...SMARTSTOR NAS Product Manual Version 1 0 ...
Страница 71: ...Chapter 5 SmartNAVI 67 5 Click the Modify button D 6 Click the folder whose contents you want to backup ...
Страница 127: ...Chapter 5 SmartNAVI 123 Optional To view a photo click the View icon ...
Страница 210: ...SmartStor NAS Product Manual 206 7 The share folder appears on our PC as a mounted or network drive ...


